Early last month, I started #1MinuteMarketingVideos. It’s a daily video about digital marketing where I share everything I know about different topics. The main theme is helping other people be a better marketer in 60 seconds a day. Each video, I talk about a single topic — it could be broad or very specific — and just share my knowledge.
I’ve been putting off video content for so long, but the data is overwhelming. Everything is shifting to video and voice right now. So, I decided to jump on the bandwagon and start creating video content.
You can watch the videos on this page or directly subscribe to the YouTube channel I made.
But what I really want to share is how easy it was to create the videos. If you follow the narrative I share in the description of the videos, I mentioned that it’s getting easier to make them. The last video I made took me less than 30 minutes from planning to creating to distributing.
I’ll be sharing my workflow and the tools I used in this post. But before that, there are two preparatory points I’d like to discuss.
Preparatory Points
1) You Have to Know What You’re Talking About
My topic is a one-minute daily marketing video. It’s important to know what you’re talking about.
I’m sure you already know this. But it’s worth repeating. So, if you’re going to undertake any video content projects like what I did, make sure you have a source material you can use.
Otherwise, you’ll just get stuck and be frustrated that you can’t create these video content.
2) You Can’t Improve Unless You Do Something First
One of the biggest lessons I (re)learned in 2017 is we can’t improve something unless there is something to improve on. Meaning, unless we start and actually do any task or project, we can’t improve on it.
I’m the person who usually plans and plans and plans. I take so long in planning that I always complain there’s no time to execute. Now, I just do it.
Then, I just improve along the way. I’ll share more about my journey below.
Workflow and Tools: How to Create Video Content in Less Than 30 Minutes
1) Plan
Since I decided early on that I’ll be doing daily 1-minute videos on digital marketing, I need some sort of plan to help me do this quickly. So, I relied on two things you’re probably familiar with already.
- Mind Map. I started a mind map with digital marketing at its center. Then, I branched off to the topics and categories about digital marketing. Websites, social media, Blogging, etc. Here’s what that mindmap looks like.
- WWWWWHow. This is every writer’s best friend. Who, what, when, where, why, how. To help me quickly think of specific topics, I combined this with the mind map. So for websites, I can easily come up with these topics
- What is a website
- Who should have a website
- Why should you have a website
- How to start a website
Then, I just repeat this process for the other topics.
For the mind map, I used a free program on the app store called Simple Mind. I’ve been using it since 2012. I’ve never found any reason to use it’s paid version.
2) Create
For the creation of the videos, I use Adobe Spark. Or more specifically, Spark Post and Spark Video. Everything is made on my iPhone. No special program necessary.
I’ve been using Spark Post since last year. But I only started using Spark Video for this project. I also had to subscribe to the service to remove the watermark so I can add my own branding.
Here’s my workflow:
- Write script (Notes App)
- Create the intro image and video (Spark Post)
- Record audio (Spark Video)
- Add images or b-roll (Spark Video)
- Add the outro (Spark Video)
Script Writing
Since the topics are very small (and I’ve talked about it in some of my other blog posts before), writing the scripts is very easy. How easy?
I’m in California right now writing this article in a Starbucks. This is approximately an 8-9 minute walk from the apartment where I’m staying from. By the time I stepped out and ordered a drink, I already have completed either 2 rough drafts or 1 final proof-read one.
At any given time, I can craft a couple of drafts here and there. Then, when it’s time to finally work on it, I pull out the notes and refine the words.
Intro Image and Video
The beginning of #1MinuteMarketingVideos is an animation of a Spark Post. I mainly used that as something to make it look more attractive.
I already had my “brand colors” so it was easy to set that up. In this image, you’ll see that I have yellow and black templates already (the white isn’t shown).
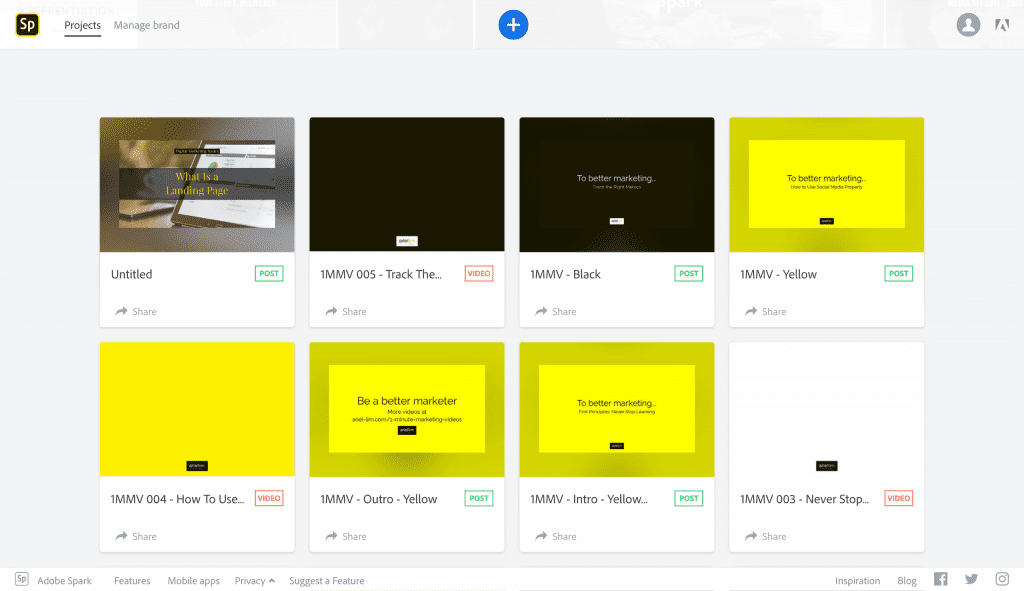
I just edit them, download the video and image, then I’m done. Here’s how that looks on my iPhone:
Recording Audio
I record the audio by holding up my phone to eye level.
This ensures my speaking volume is optimal — meaning, my posture is straight. I articulate my words clearly. This also reduces the chances of me “blowing air” into the microphone, etc.
I sometimes record sitting down, sometimes while standing and even walking around. But I always put my phone in front of my face.
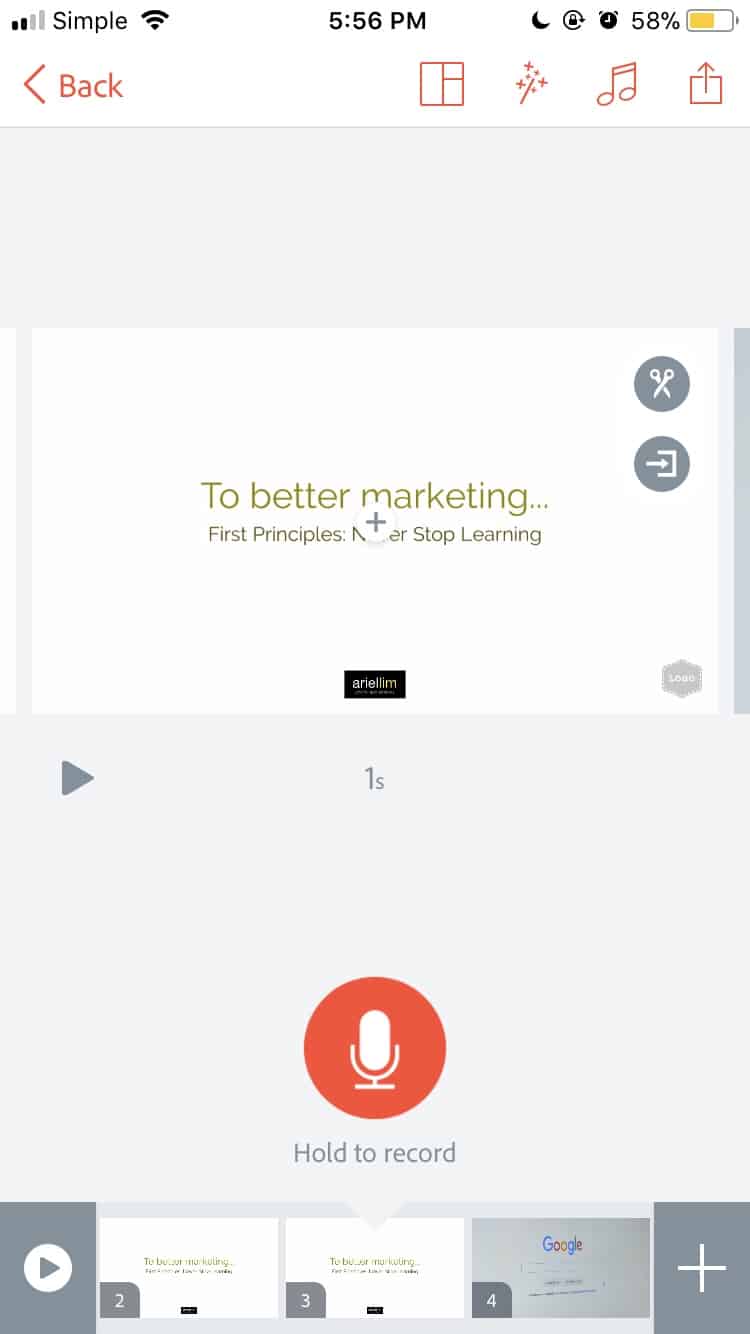
I simply hold the record button and start speaking.
Again, my scripts are short, straight-to-the-point. So there’s no need to read them. Sure, I refer to it. Sometimes I take 2-3 tries. But I don’t worry too much about it.
I just make sure I do it in a quiet place.
It’s also at this stage where I take a look at the length of the entire video.
The sound content determines the length. So if I’m over the 60 seconds, I figure out where to cut my words.
Add Images / B-Roll
This is the exciting part. Adobe has access to royalty-free images. Just type in some keywords and you’ll see them immediately.
But, I find that a video is more exciting than an image. So, I decided to make my own B-roll like this one.
I also searched online and started building my own folder. There’s a ton of websites out there offering free videos.
Outro Image
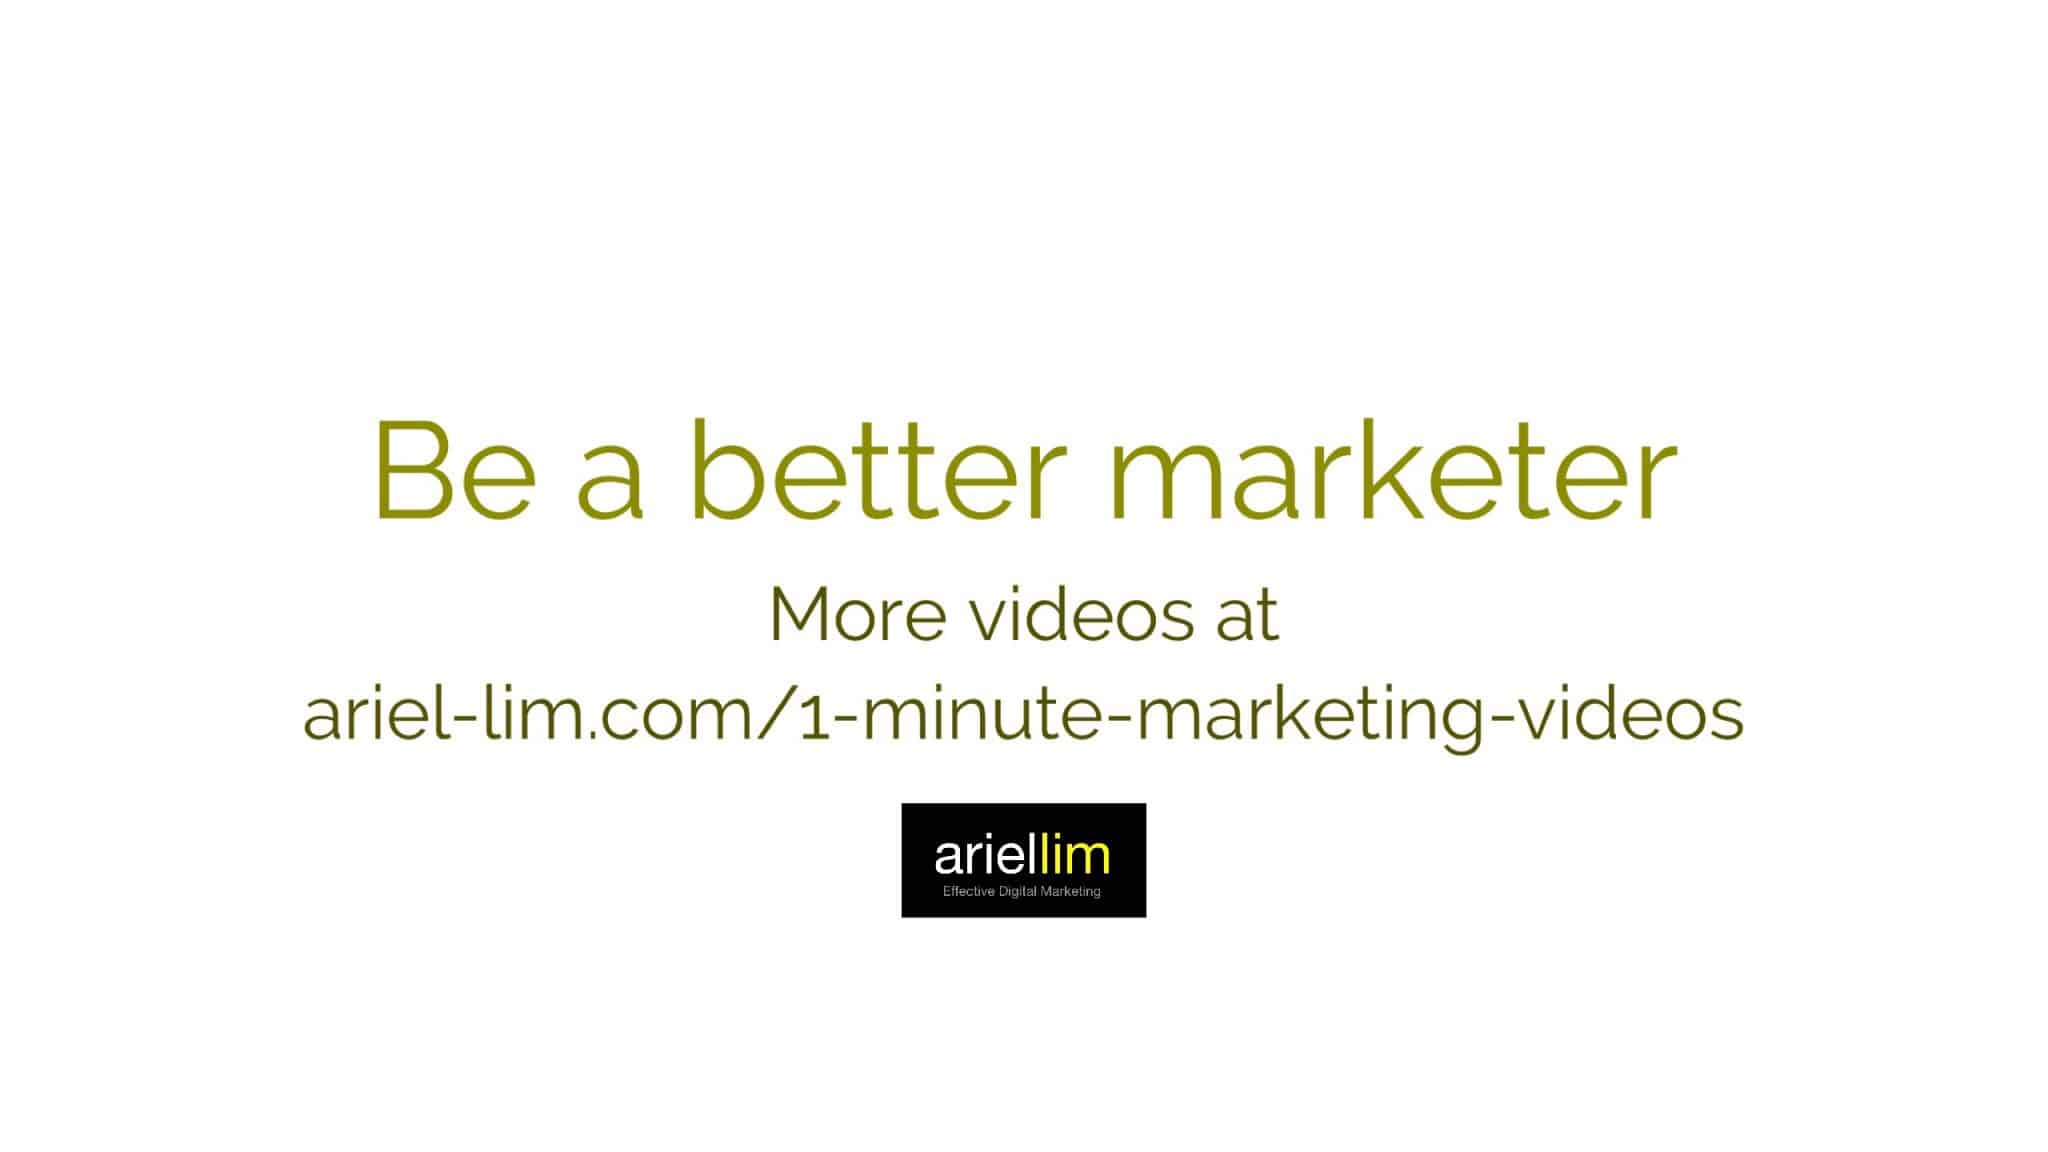
The outro image is the only “salesy” part of the video where I invite them to watch more of my videos on my website. Here’s what it looks like.
Pretty much that’s it.
My goal here is to impart my knowledge and at the same time, build more credibility and authority on the topic. I’m not here to sell. So, even my call-to-action provides more value.
3) Distribute
Once you create content, your role as a marketer doesn’t stop there. It needs to be distributed. Otherwise, did you really create something if no one finds it? (rhetorical question).
I distribute the videos where they’ll get the most engagement:
- YouTube
- Website
Distributing the Videos on Instagram
This one is a no-brainer.
Instagram caps videos at 60 seconds each. Plus, Instagram is a very visual social network. It’s the perfect channel to distribute video content on.
I add captions to my post and share more information about the video. I also add tags to the first comment. Nothing new here. Here’s where the magic happens.
I follow Gary Vaynerchuk’s $1.80 Instagram Strategy. Not to the letter but the main principle behind it. Here’s a video of him explaining that concept.
But if you’re too lazy to watch the video, here’s the rundown:
- You don’t actually spend $1.80 on anything. You only invest your time and opinion — your two cents. Doing the math, $1.80 is equal to 90 bits of two cents.
- Share your comments and opinions (exuding positivity, love, and warmth) on the top 9 posts of the hashtags you used.
- Rinse and repeat. 3x daily – morning, noon, evening.
Like I said, I haven’t followed that routine as what he said, but do so at least daily. So I’m spending like 50c a day. I grew my followers from zero to 70+ in just 30 days.
Distributing the Videos on Facebook
I made a Facebook page for a while now. I haven’t really been active, until now. So please like the page!
Look, if you haven’t noticed already, your newsfeed mostly contains videos. Facebook puts a premium on them.
They also get the most engagement, making this another no-brainer channel to distribute your video content.
I simply publish and/or schedule the video on my page and that’s it.
Once I have enough, I’ll start promoting them via ads. But that’s another story for another time.
Distributing the Videos on YouTube
Unless you’re from another planet, YouTube has dominated online videos for more than a decade now. So there’s absolutely no reason not to put your videos there.
Simply create a channel, like I did. Then, start uploading videos.
I’m not a YouTube master because this is the first time I’m also doing this.
But, one thing I’m doing is I am creating playlists as I go along. The playlists are the categories/topics. For example, I group all videos related to websites in one playlist. Or put all videos on social media in another.
Distributing the Videos on my Website
Lastly, I also place the videos on my website. After all, it’s the only place where I can do what I want. I’m also doing it for SEO purposes.
I added a new page on my site. Then, to make things simple, I simply embed the videos in a reverse chronological order. I use Facebook instead of YouTube here.
That can be up to you entirely. I simply chose Facebook because of my plans to advertise/promote my videos there later on. So everything just ties in together.
4) Analyze
The last part of this project is analyzing everything I did. From planning to creating to distributing.
There are a lot of data points you can analyze here. Some of them are as follows:
- Process
- Design / aesthetics
- Quality
- Engagement
For example, I have revised my process at least 4x already. I document them in an Asana project. Here’s a screenshot of what it looks like.
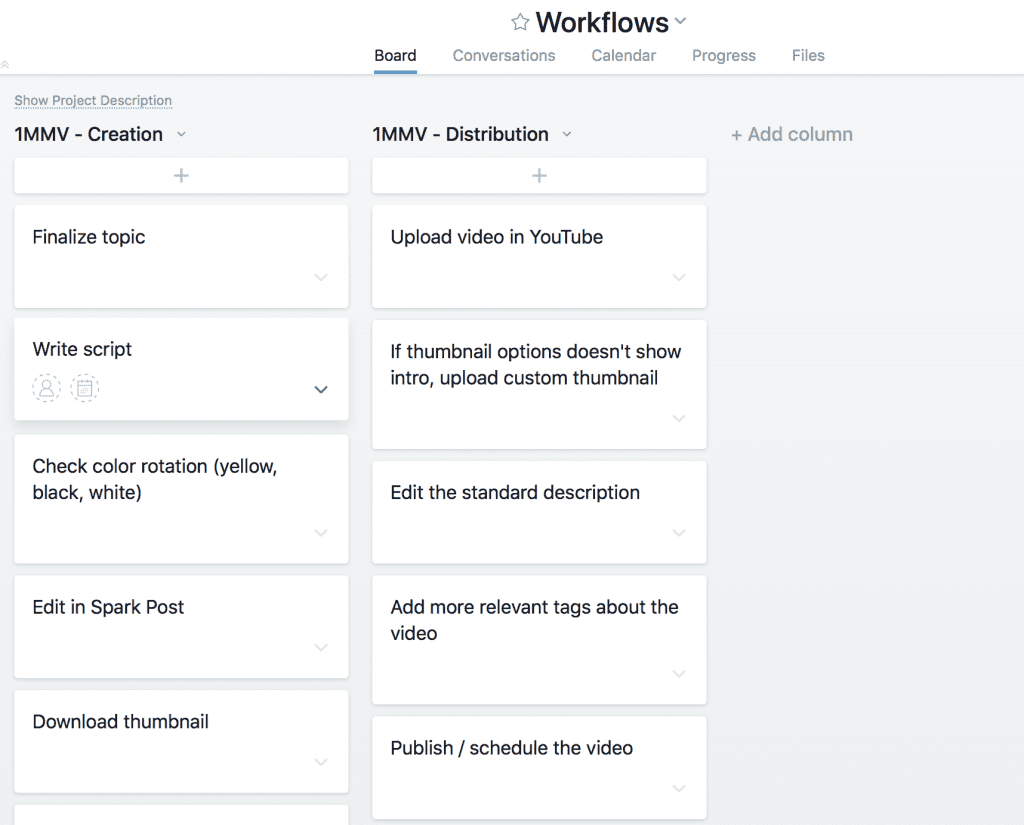
This way, when I get stuck or if I decide to hire another person to continue this in the future, he/she can simply follow along without me having to hand-hold him/her.
This is one of the most important activities you should do when you start out any project — document the process.
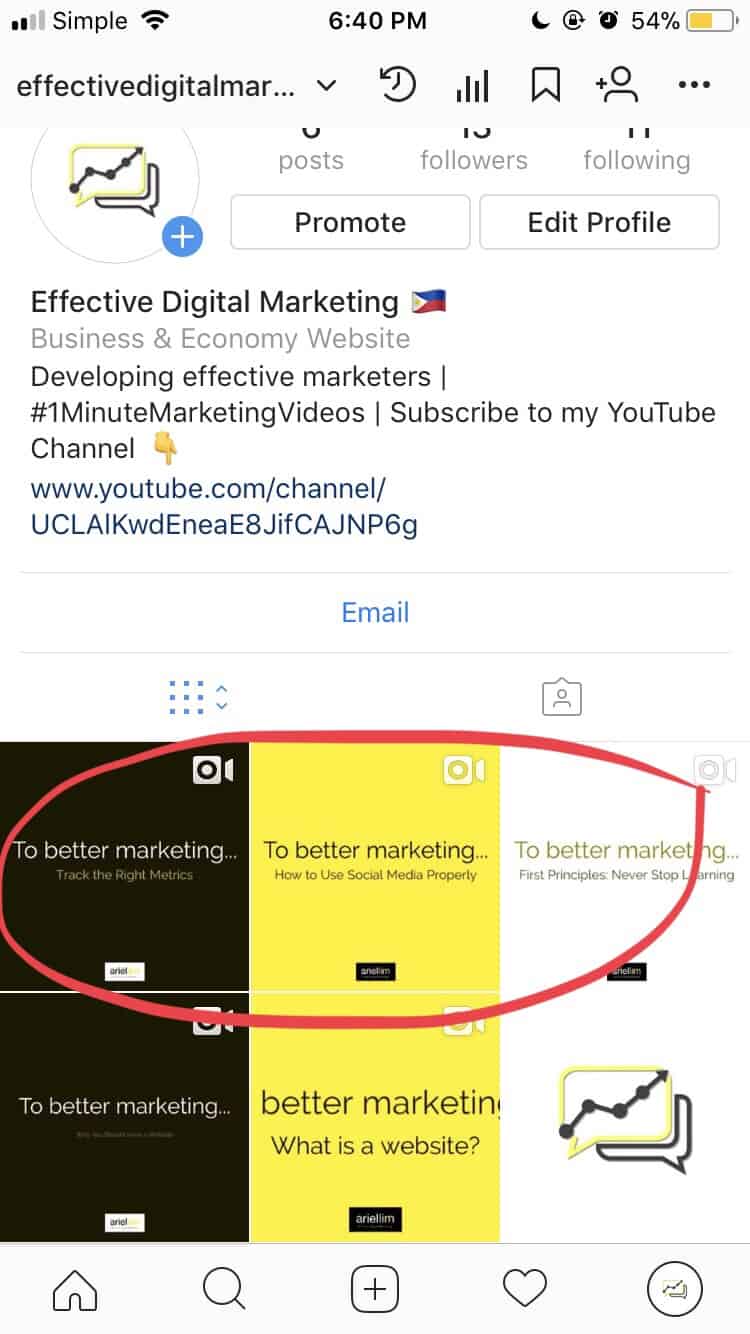
Another improvement I made is on the design. If you look at this screenshot of my Instagram profile, you’d notice that some of the thumbnails don’t look good when viewed on a grid.
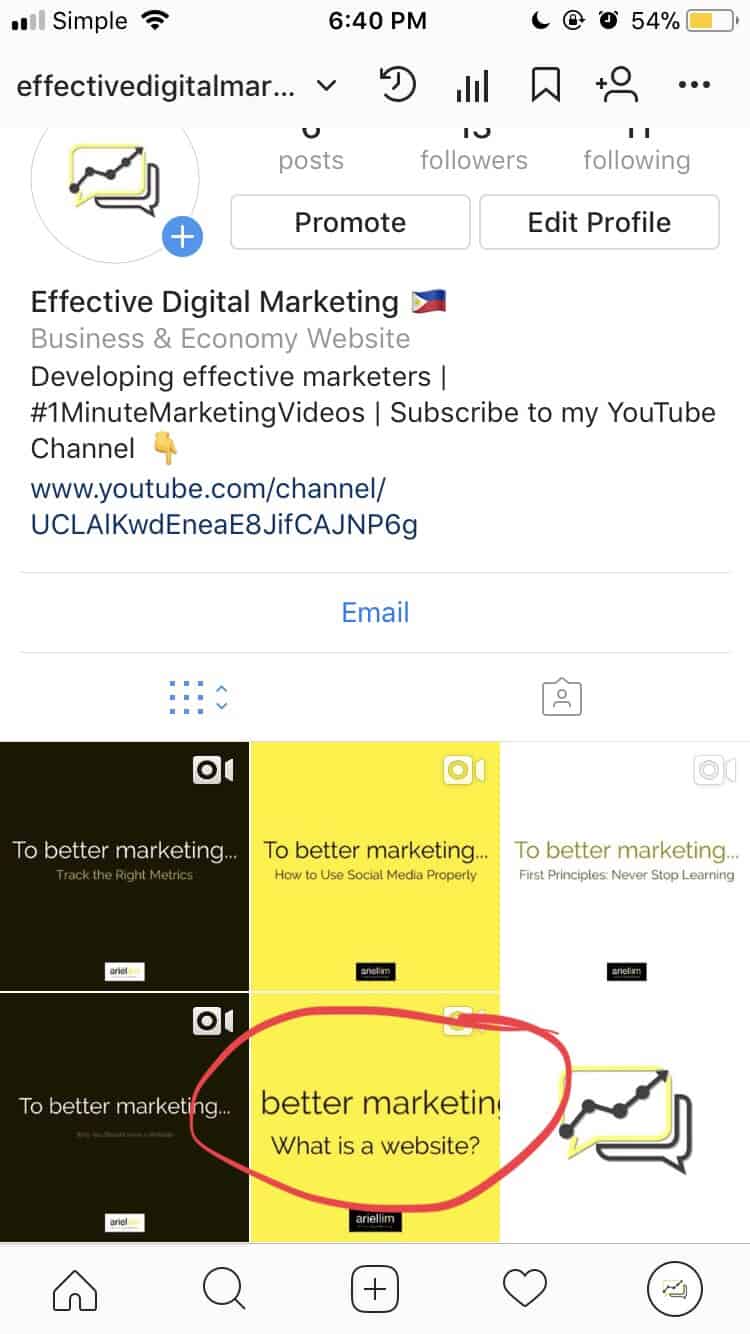
So, after I adjusted it, it became too small to read.
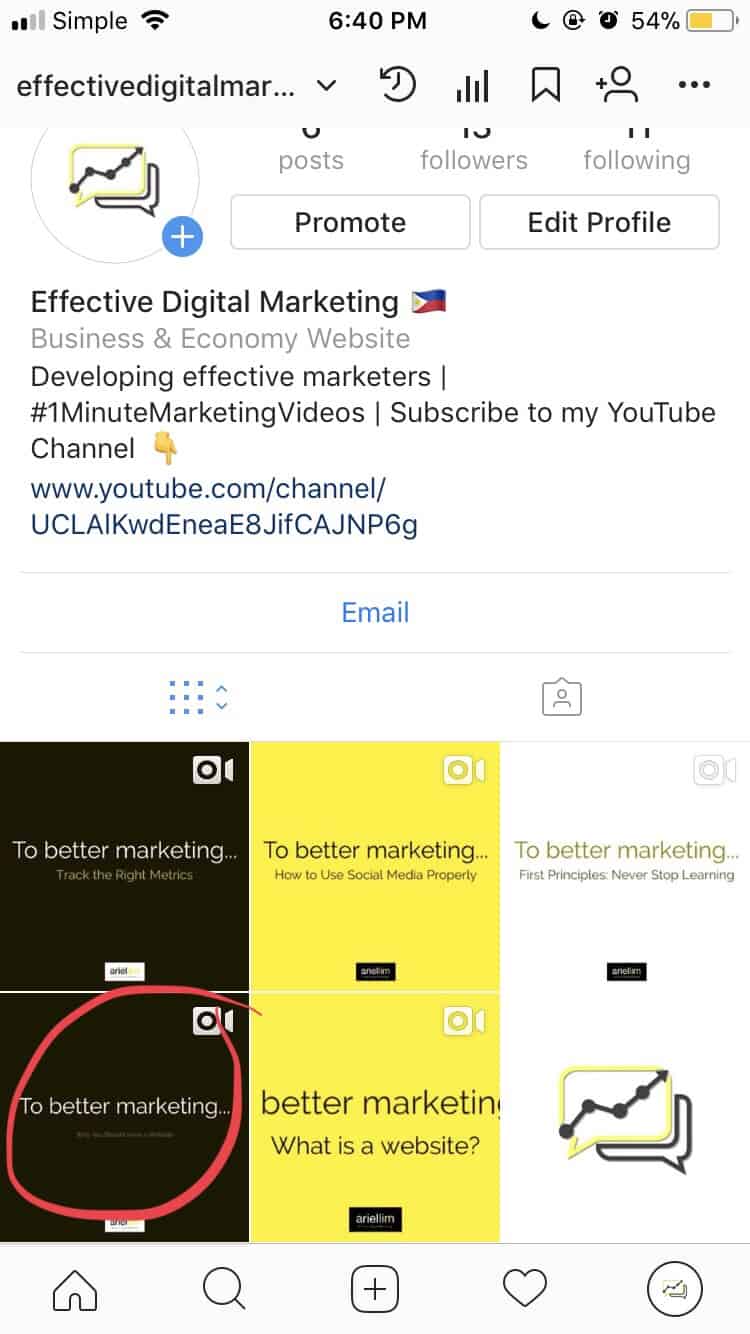
Finally, I found the perfect size. This is what I then used as the templates for the rest of the videos I made.
Again, there is a lot of analysis you can do here. I’m simply using these as examples.
But the bottom line is this: don’t fuss about the perfect shot, video, design, whatever. You can’t improve on something unless you do it first. If I got stuck in looking for the perfect color, font, size, and shape, I’d probably be still working on my first video.
And that’s my workflow for creating and distributing video content in less than 30 minutes.
What about you? Do you have your own process to create videos? Or are you just starting out? Either way, let me know in the comments and I’d be glad to answer your questions.
