Outsourcing your digital marketing, or parts of it, to someone is the norm today. As a business owner, you can’t possibly know everything about digital marketing, nor have time to learn them to the level that takes years of practice. You have limited time. And that time is best spent on managing and growing your business.
So, what’s your option? Outsource your digital marketing.
Why You Should Quantify Your Outsourced Digital Marketing Projects
If this is the first time you’re outsourcing your digital marketing, I strongly recommended that you start small but project that’s easily quantifiable. That way, you’d know if they did a great job or not.
A website redesign might seem like a subjective project. But in the eyes of any digital marketing expert, this can be quantified easily. A website can’t just be pretty and nice to look at. It has to help you in any of the following:
- Increase your traffic
- Get your more leads
- Have more paying customers
- More revenues
A website redesign project should not be measured by how fast it was completed, nor if it was according to your specifications. It has to contribute to something tangible.
I discussed more about this in a white paper I put together— 9 Things Business Owners Need to Know Before Hiring a Digital Marketing Agency or Consultant. Feel free to check it out!
Biggest Mistake Business Owners Make When Outsourcing Their Digital Marketing
Once you have chosen the agency or individual who will handle your digital marketing, the first thing they will need to get started with their work is access to your online marketing assets.
These are accounts to whatever tools you are currently using, or plan to use in order to accomplish your business objectives.
From my experience working with dozens of businesses across the globe, this is the biggest mistake I often see owners do— they give their usernames and passwords to the people working on their accounts.
While it’s a great idea to trust them, it doesn’t mean that you have to give them full control of your online assets.
Just imagine the repercussions of this:
- They can steal your data and use that for themselves
- This is different depending on what data you have, but if you handle customer information like emails, credit card numbers, etc. This is a huge risk. How do you think your customer would feel if the received an email or a call pitching for services from your agency?
- Or even use the tools for themselves that you paid for yourself
- An even bigger risk, they can easily change the passwords and you will immediately lose access to them yourself.
- Or someone from the agency’s staff will do that
- This is especially true if you ended the relationship on negative terms
The solution? Give them (limited) access to your accounts.
How to Give Someone Access to Your Digital Marketing Tools
I’ll go over the most basic digital marketing tools here first and how you can give an outsourced agency or individual the proper access to your accounts.
Click on any of these to jump straight to that topic
I’ll be adding more to this list in the future.
The goal of granting access to your accounts is to allow other people to view the data, configure it properly, and create reports. Obviously, you don’t want them to have the ability to run away with the entire account where you end up losing access to everything. So, that’s what this article is all about—teaching you the step-by-step process on how you can give someone access to your online marketing tools and reducing the risk that you lose access to them yourself.
How to Give Access to Google Analytics to an Outsourced Agency or Consultant
The first tool that you need to to give your chosen outsourced digital marketing firm is Google Analytics. If you haven’t already created one, do so now. Here’s a step-by-step instruction on how you can create an account and install Google Analytics.
Step 1: Log in to Google Analytics
First, head on over to analytics.google.com and log in. Once you’re there, you will see your default account.
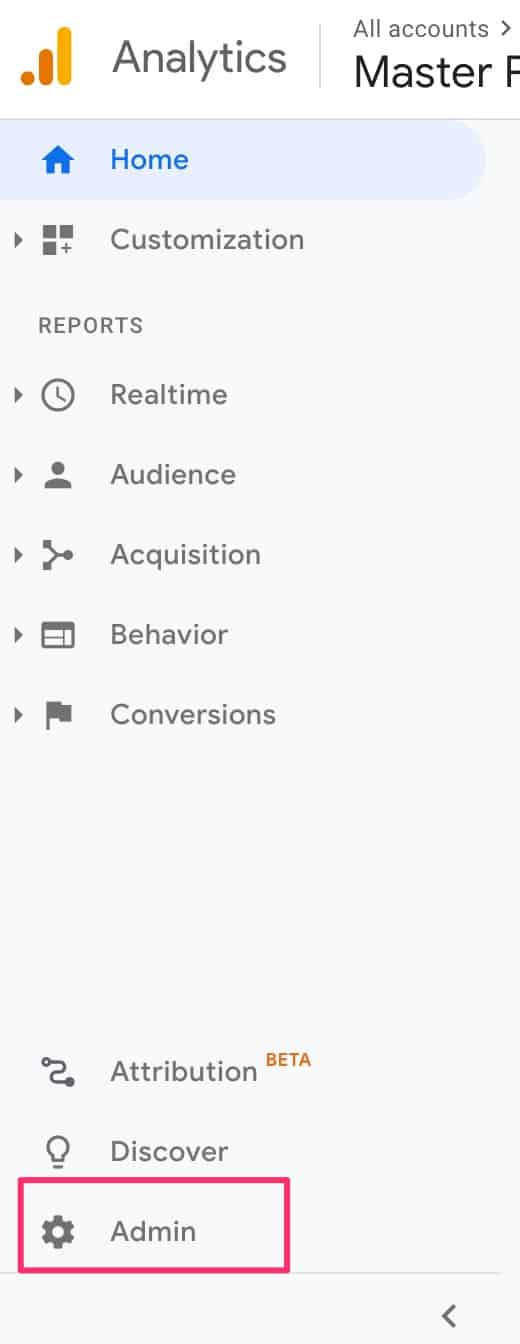
Step 2: Go to the Admin Section
Next, click on the admin section on the left-hand menu.
Step 3: Determine the Level of User Access Needed
Google Analytics provides 3 levels of access:
- Account
- Property
- View
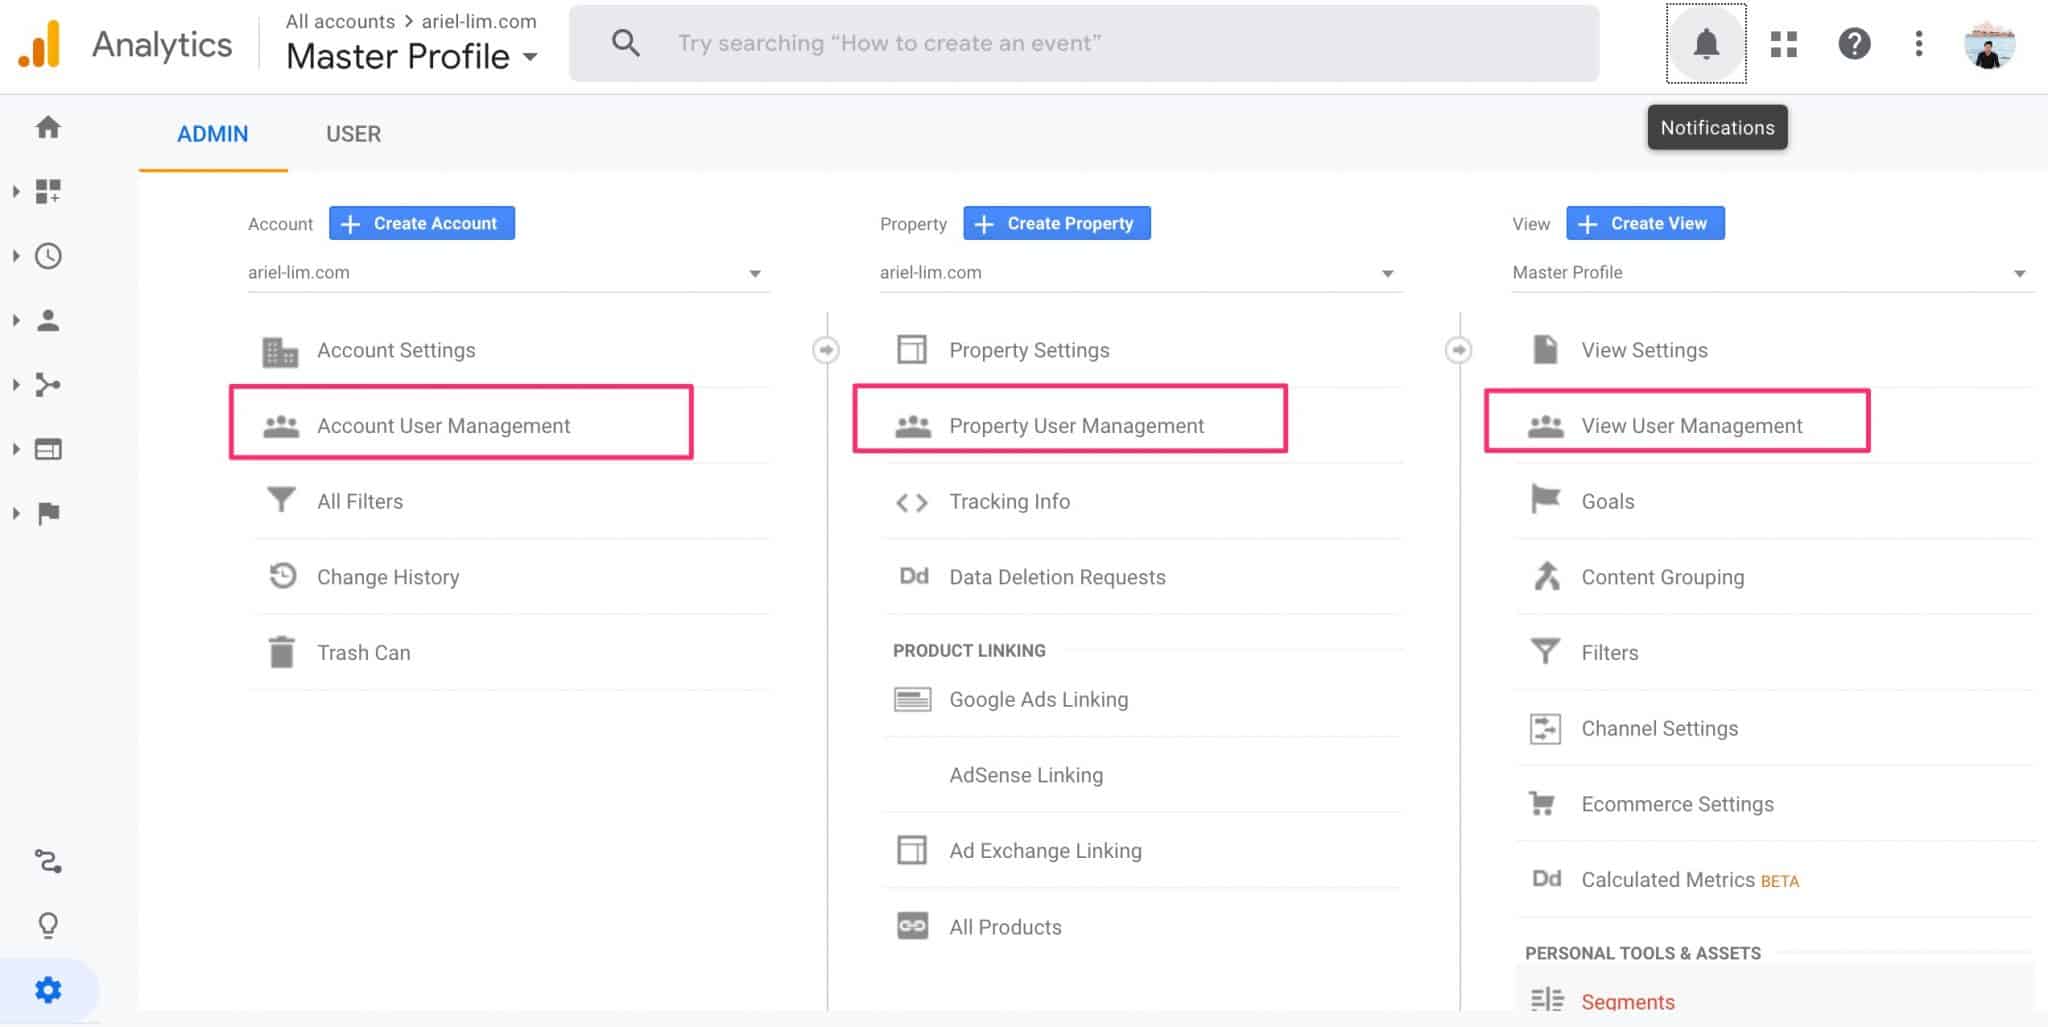
I’m not going to dive in and discuss each of those three. But oftentimes, you would not want to give someone else access to your Google Analytics in the account level. In most cases, you would choose the property or view level and give access to those.
I typically request access at the property level because (1) most Google Analytics accounts aren’t setup properly, so I would need to gain access to info that’s only available at that level; and (2) you can create multiple views in one property. And it’s a best practice to have at least three different views for different purposes. I’ll discuss this more in some other post.
Step 4: Give the Appropriate User Permission
Once you’ve selected which level to grant your outsourced help the credentials, you would need to enter an email and determine which permissions they actually have.
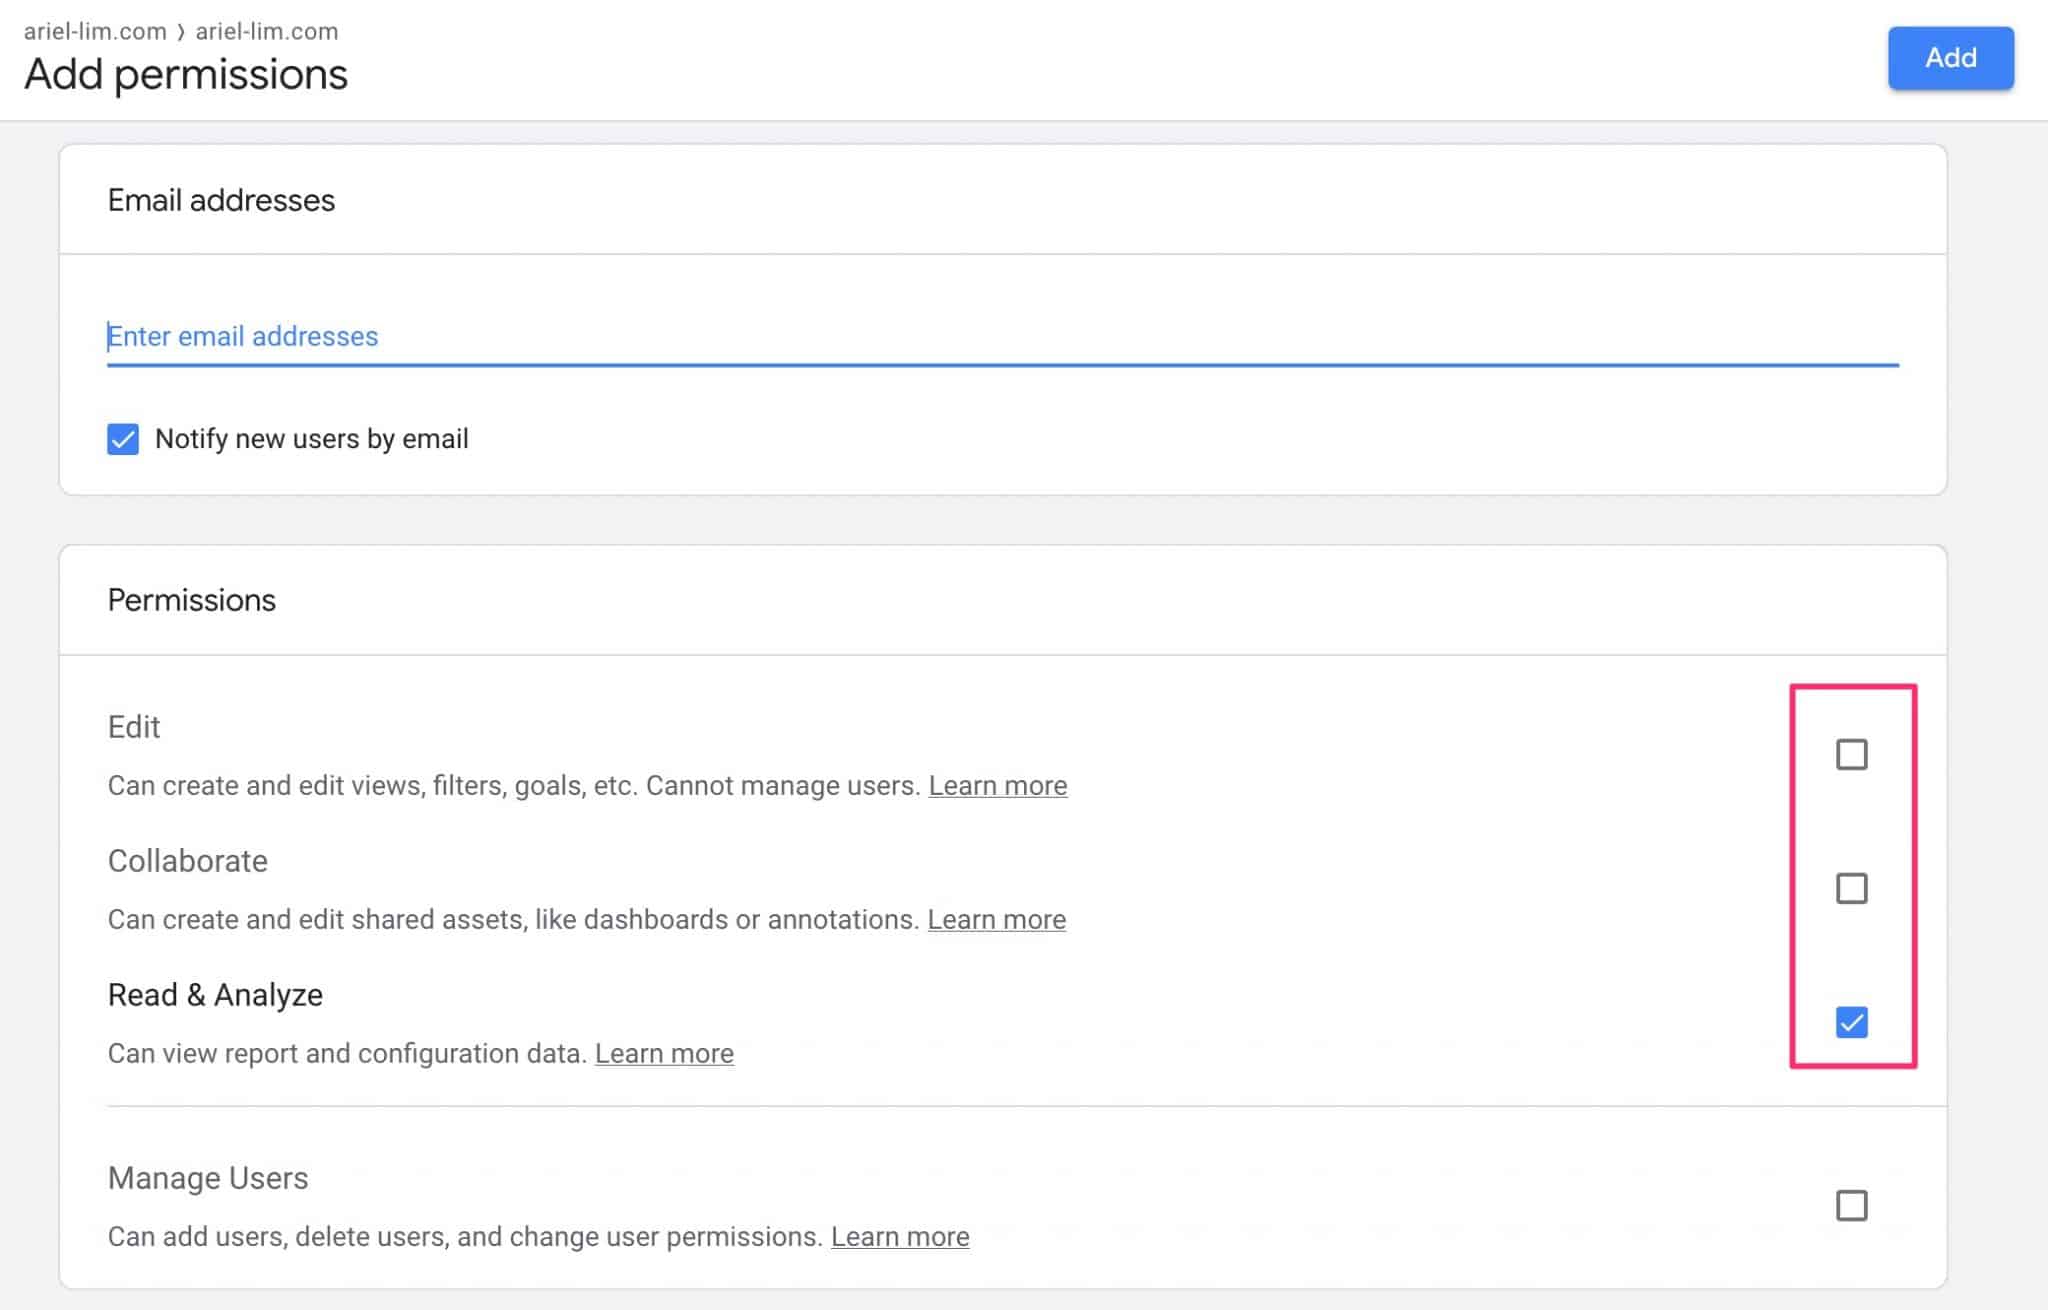
In most cases, you would check the three boxes I highlighted:
- Edit
- Collaborate
- Read & Analyze
This will give them the ability to create separate views, add filters, and goals. They will also be able to create custom reports and be able to help link Google Ads or Google Search Console.
If you only give them the Read & Analyze permission, most of the time, they will ask you to do a couple of things for them because their account is so limited that they can’t do anything.
If they have multiple people working, you can also allow them to manage other users. Going back to lowering your risks, this will only allow them to modify stuff related to your property and views, but not your account.
You can learn more about user permission in Google Analytics here.
How to Give Access to Google Search Console to an Outsourced Agency or Consultant
The next tool you should be using is Google Search Console. If you are not using this, you’re missing out on a lot of analytics and data. To add a new user to your account, follow these steps.
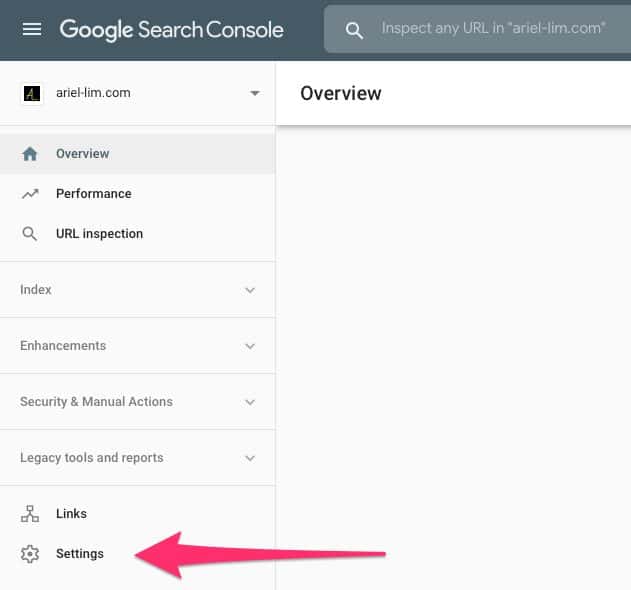
Step 1: Go to Settings
Of course, you have to make sure you are in the right account. Then, once you’re in, head to the lower-left section an click on settings.
Step 2: Click on User Permissions
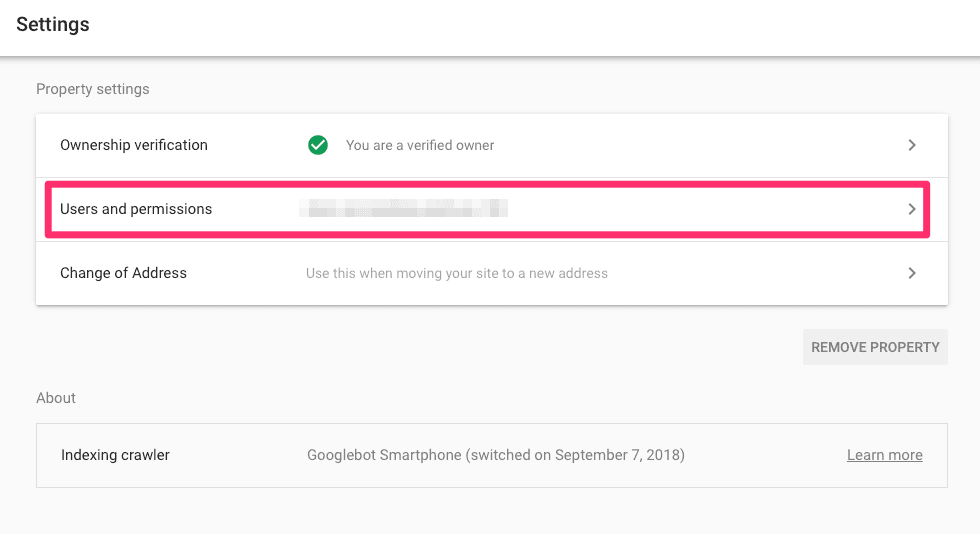
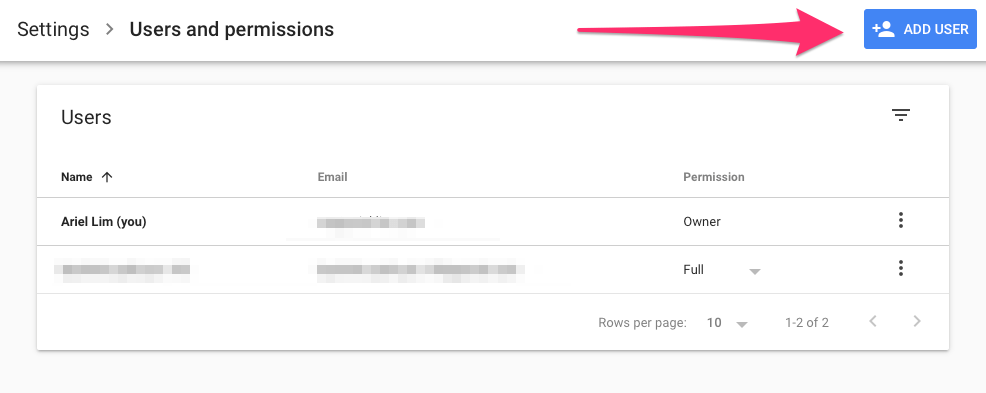
Step 3: Click on Add User
Here, you should see all accounts who have access to your Google Search Console. I couldn’t stress this enough, but you should never share your email credentials. Instead, add new users like the examples in this article.
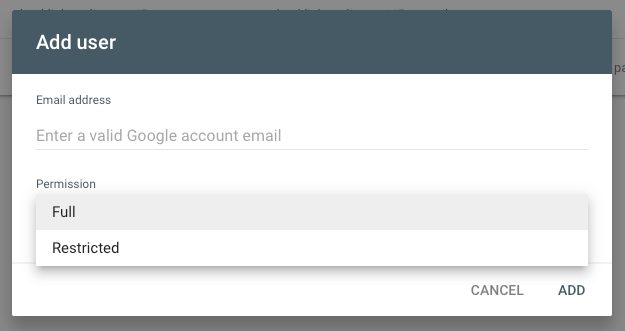
Step 4: Complete the Form
Simply enter the email address and the permission type.
Here’s a quick and dirty difference between the two:
- Full user: Has view rights to all data and can take some actions.
- Restricted user: Has simple view rights on most data.
How to Give Access to Google Tag Manager to an Outsourced Agency or Consultant
This process is similar to Google Analytics. Of course, the only way this works is if you already have a Google Tag Manager account and installed properly on your website.
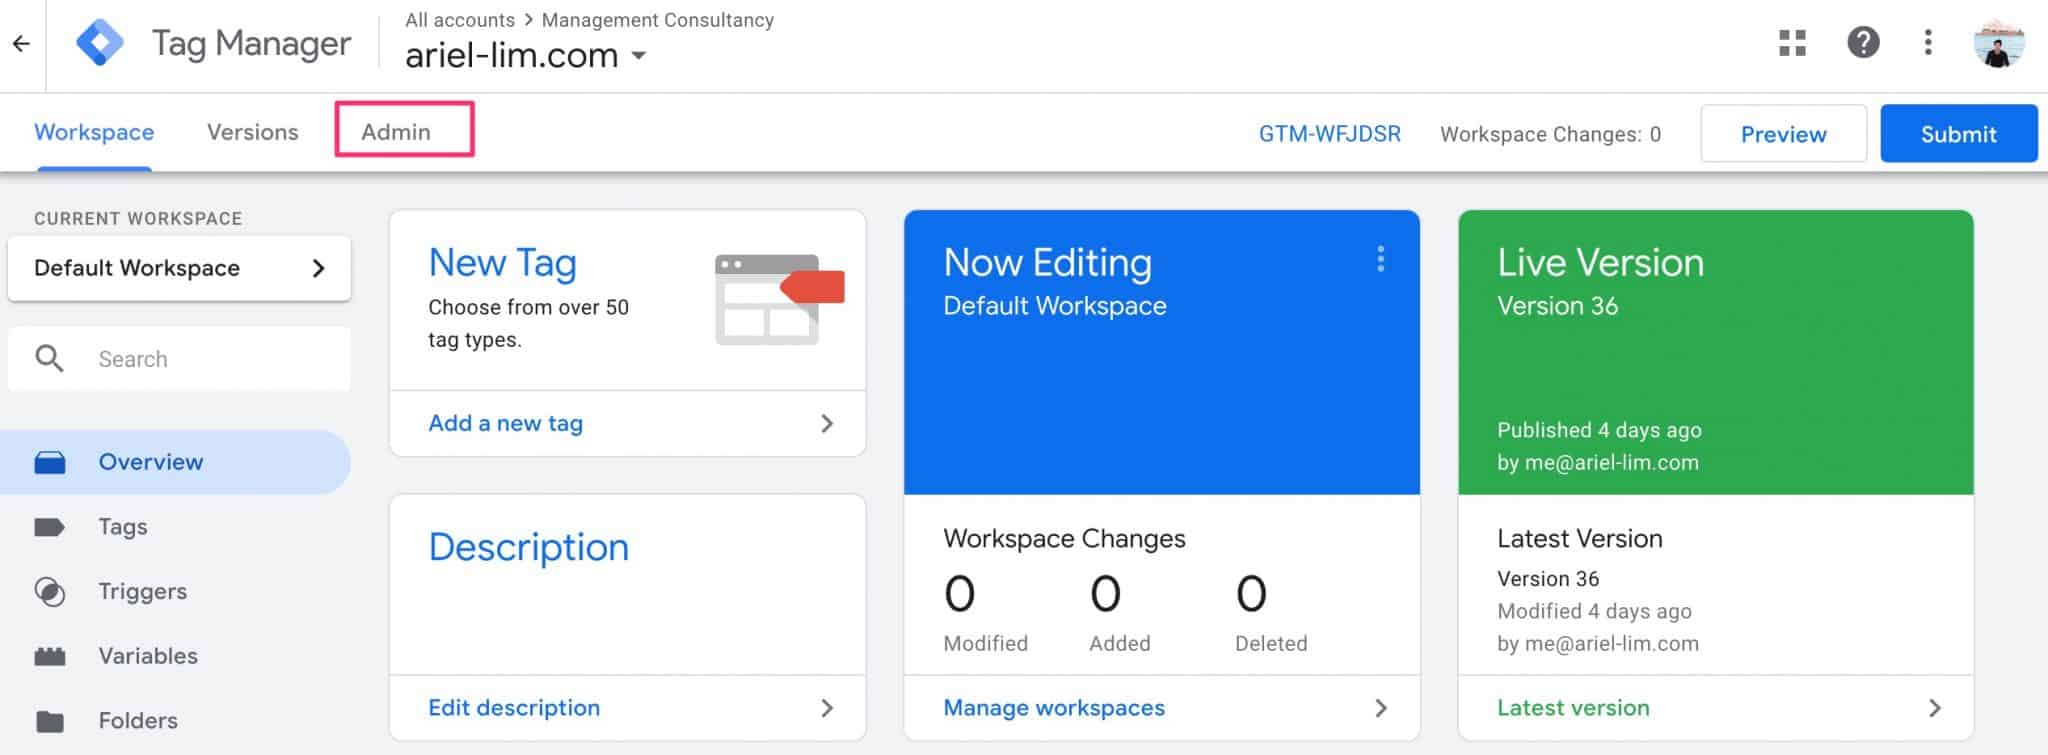
Step 1: Log in to Google Tag Manager
Head on over to tagmanager.google.com and log in to your account. You should see something like this (if you have multiple accounts in your account).
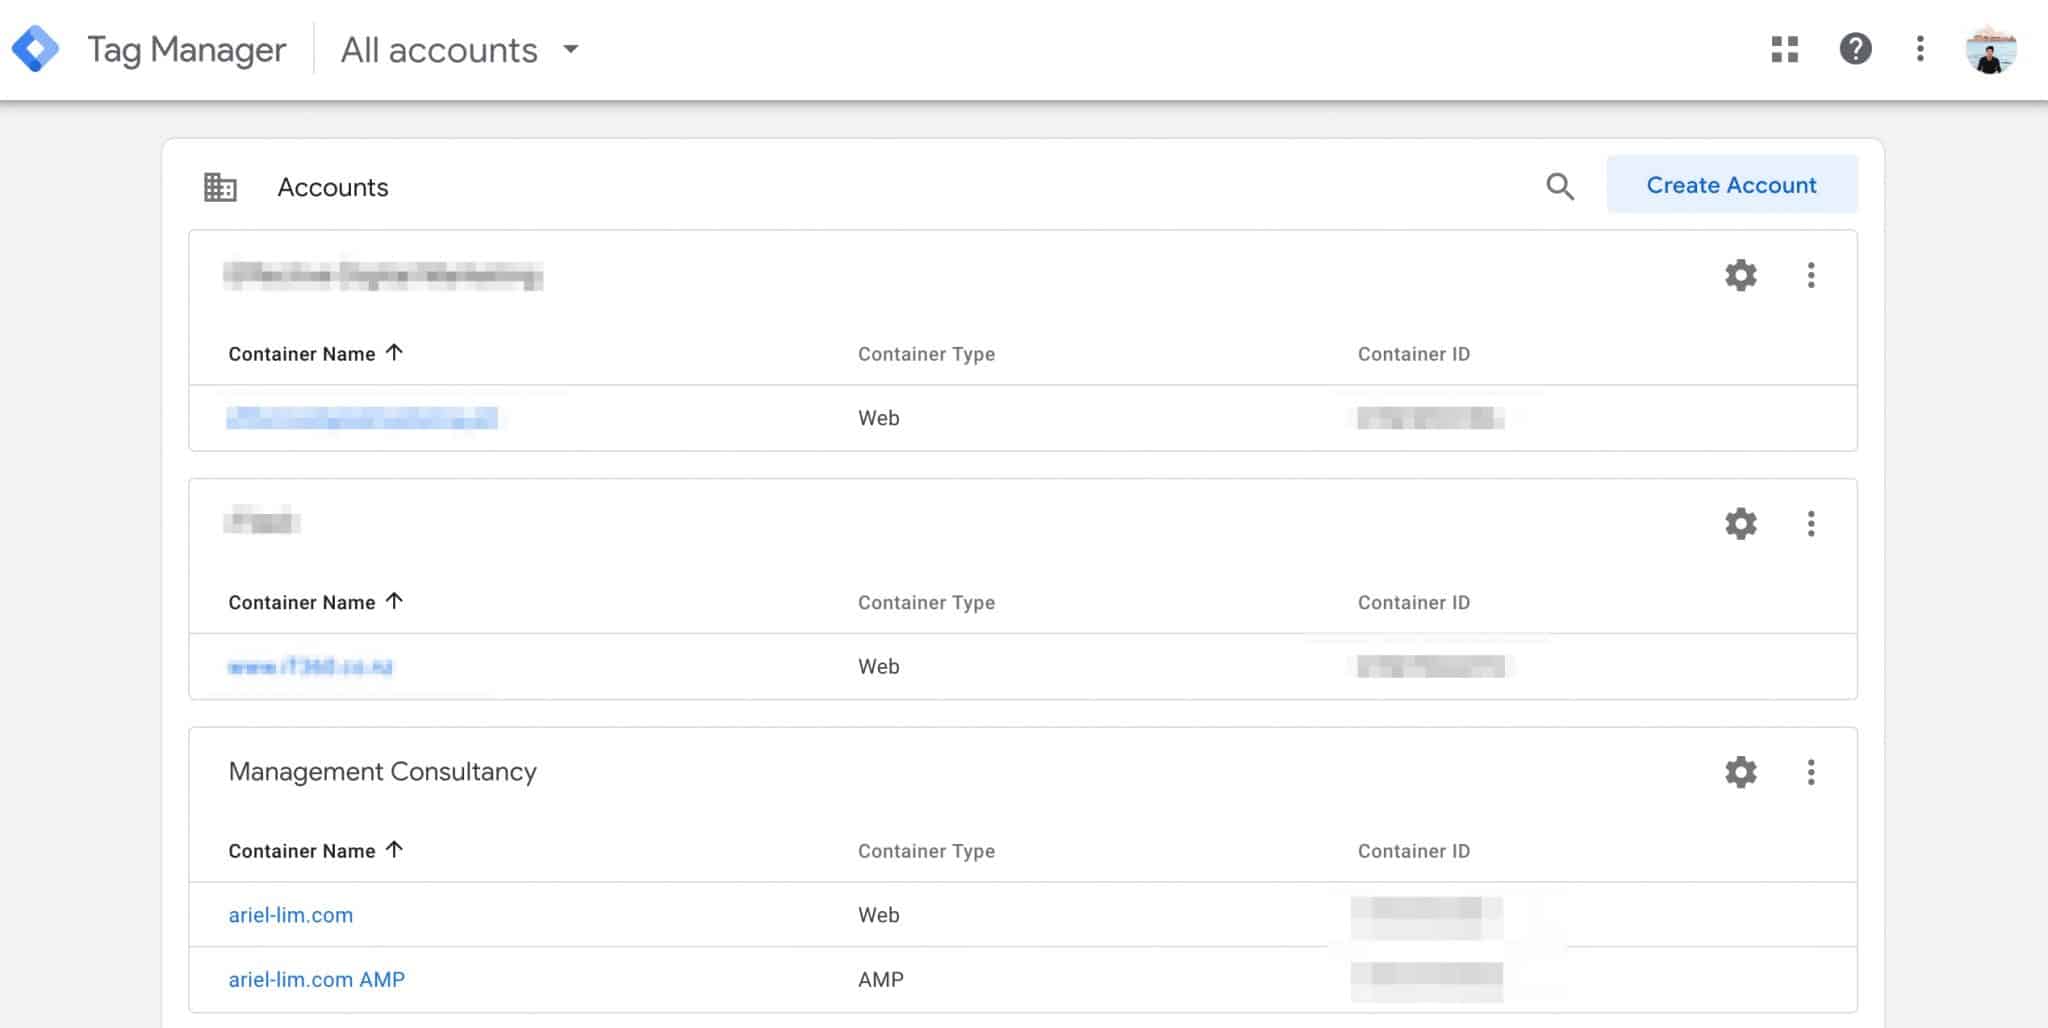
Choose the one you want to give permissions to.
Step 2: Go to the Admin Section
Next, click on the admin tab at the top.
Step 3: Determine the Level of User Access Needed
This part is similar to Google Analytics, but GTM only has two levels:
- Account
- Container
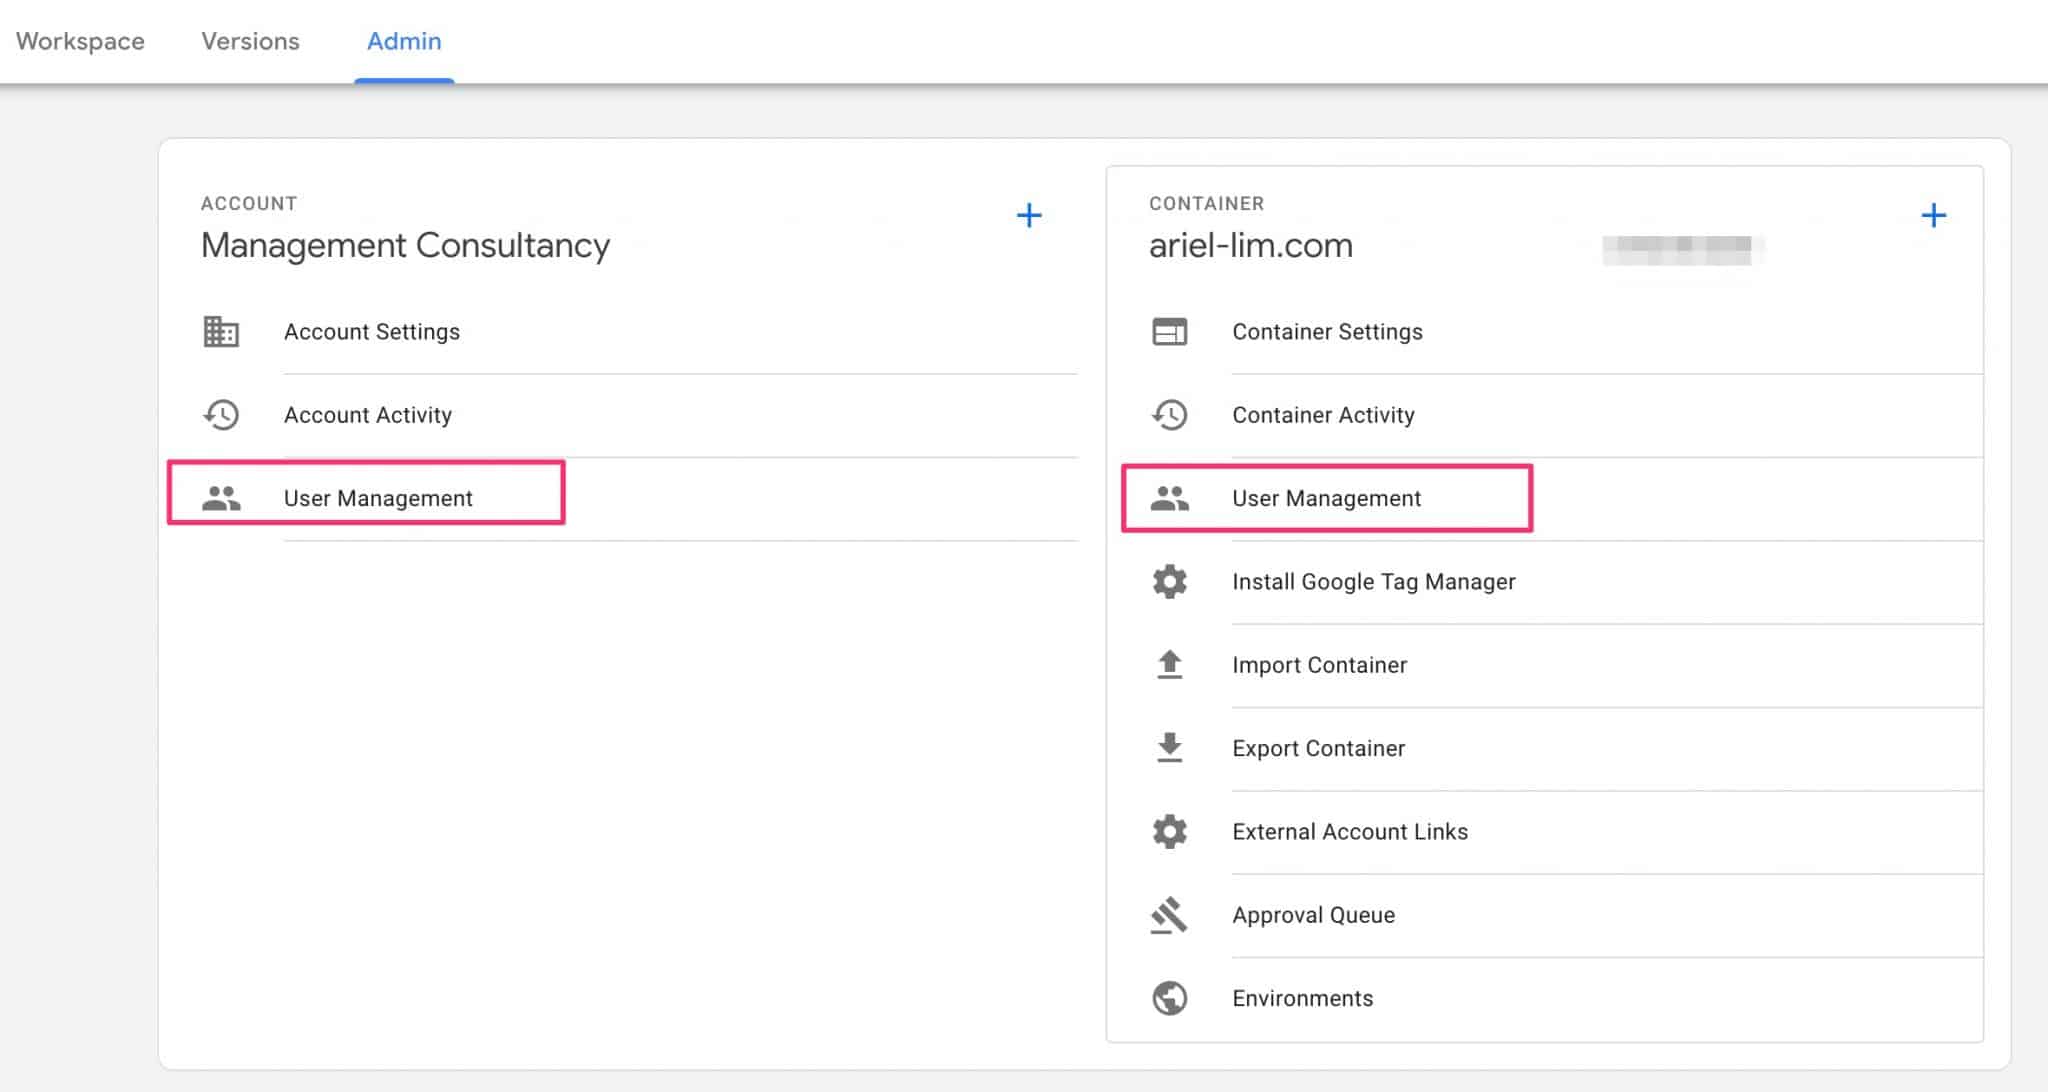
Just like in GA, you’d most likely not give access to someone else at the account level. So, in this case, click on the User Management under the container section.
Step 4: Give the Appropriate User Permission
Next, you’ll see the current users with access to your container.
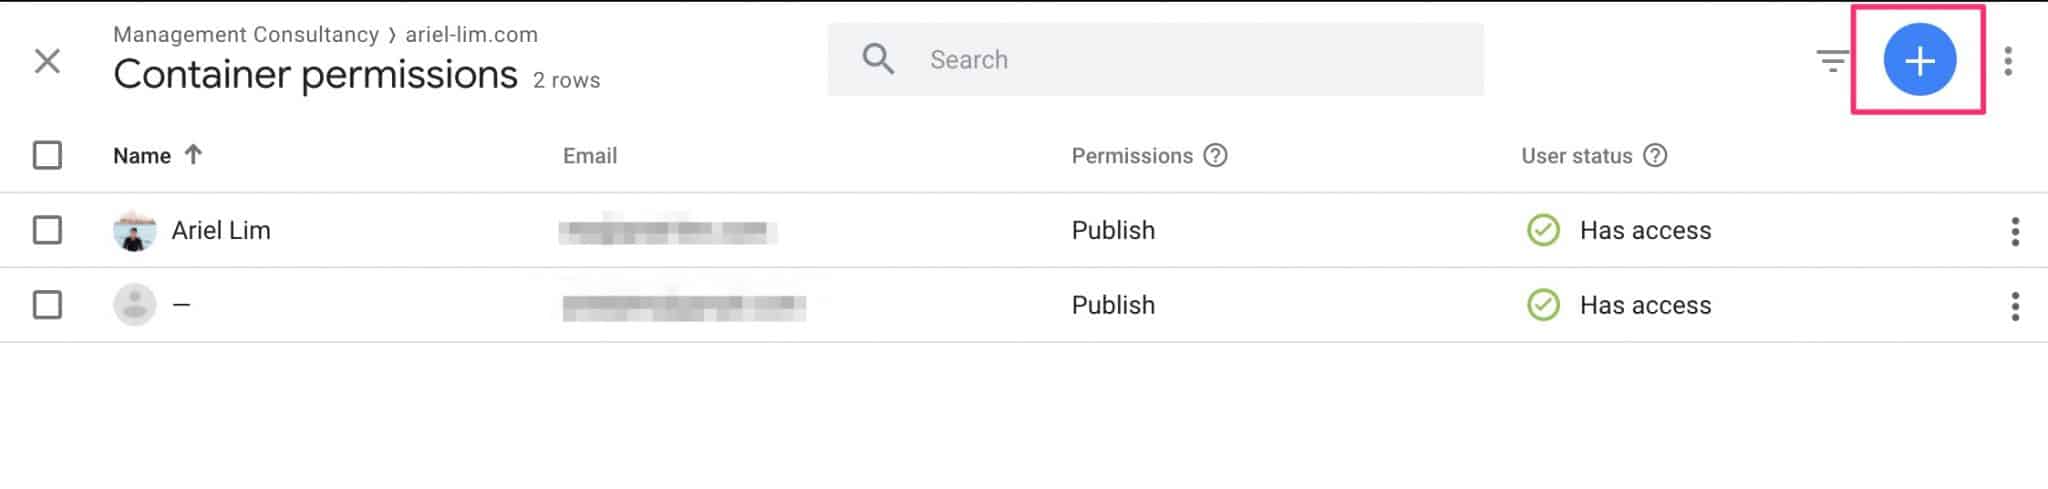
Click on the plus (+) sign to add a new user.
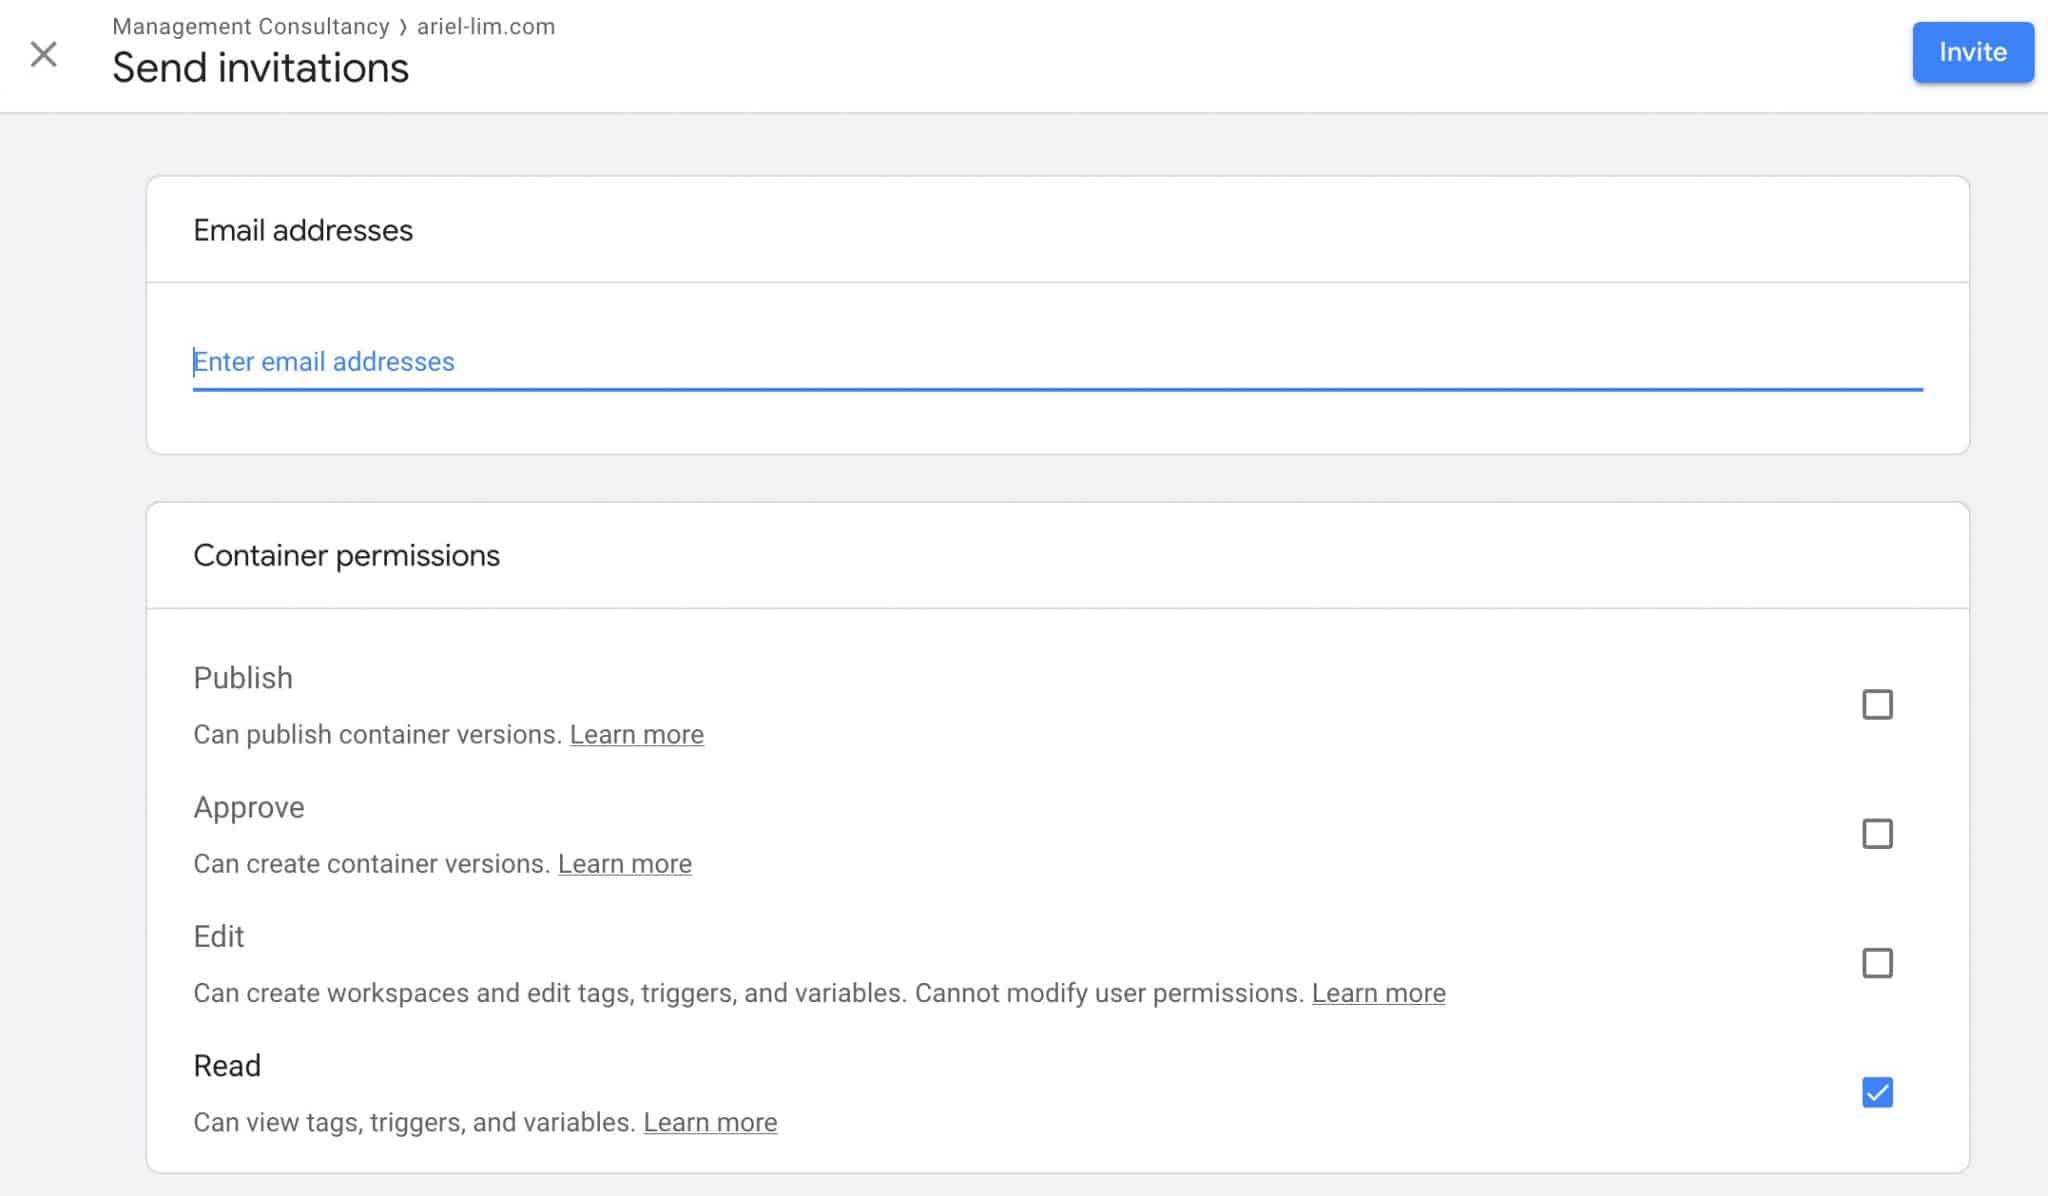
Now, selecting the permissions here will differ depending on a lot of factors and how you want to be involved.
Remember, Google Tag Manager allows you to deploy and install code directly to your website. For example, you want to try a messenger bot, you install the code via GTM by adding a tag, then publish the container. That messenger bot is now live on your website.
Take those factors into consideration when giving user access.
For me, I always request publish permission at the container level. The reason for this is I often implement new tech for my clients. For example, I configured Facebook Pixel, Google Ads, LinkedIn Ads for this one client. I also installed some heat mapping and A/B testing software. So, imagine how much time this would take if I can only set it up but can’t get them live (approve or edit).
If you want to be hands-on and only give them edit access, you would have to be the one to review and approve the changes yourself. This means you need to spend time and understand what the changes are all about. Otherwise, you will just end up causing more delays in getting your projects implemented.
Consider what your needs are and make sure you also stay on top of this because everything that you publish is automatically live on your website.
How to Give Access to Your WordPress Website to an Outsourced Agency or Consultant
The next thing you should learn is to give someone access to your website. Here are the steps you need to take.
Step 1: Login to WordPress and Click on Users
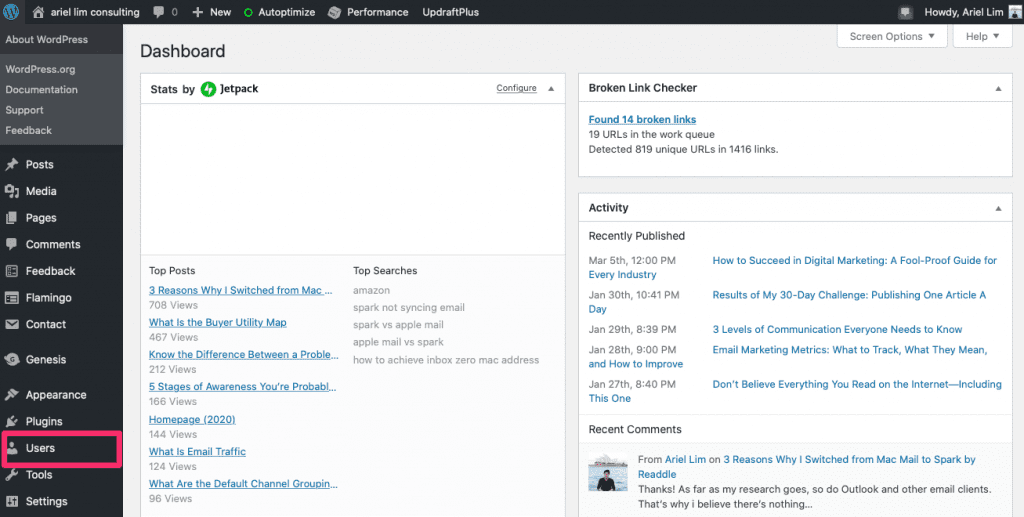
Step 2: Click on Add New

Step 3: Enter the Details
At this stage, all you need to do is enter the required information and you’re all set.
The most important detail I’d like to highlight here is the role settings.
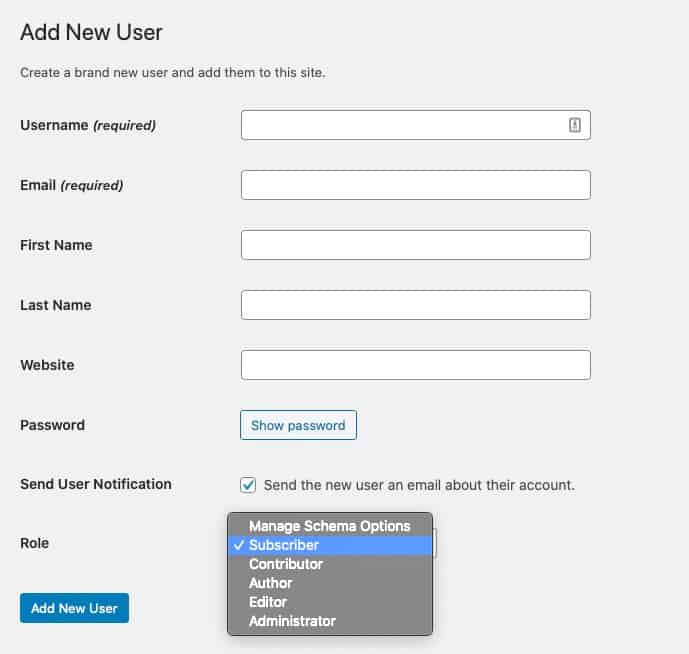
I always request for an administrator role. That way, I can make modifications and edits easily. But that is not always the best practice.
Before you give someone admin access, make sure you trust the person because with that type of access, they can steal data or shut down your website. They can even remove you from the list of admins in some cases.
So, limit the number of administrators on your WordPress website. The other roles here are for different uses. For example, you have several writers. You can give them author or contributor access. You won’t have to worry about them messing up with your site. In most cases, they can only access the posts section. To learn more about the different roles, feel free to read WordPress’ documentation.
Over to You
Giving access to a 3rd party doesn’t have to be difficult. You just need to know what you are giving them access to.
Giving them your username and password is a terrible idea and can be used against you. If you give them your email address and password, which you use on all your accounts, people with malicious intent can easily change that password and extort you for money.
The same thing can happen when you grant outsourced digital marketing agencies and consultants with access to your account. The best way to prevent this is to give them limited access but doesn’t hinder them in their work. Just like what I discussed above.
I’ll be adding more to this list as time goes by. Do you have any tools that you want me to cover here? Let me know in the comments below.
