This is the beginning of a case study I’m doing in my own website. There aren’t any results yet; rather, I finished implementing the details and that’s what I’m writing about here.
The goal is to get a 10-20% lead conversion rate. As you might already know, conversion rates typically fall under 1%. An improvement to 5% is already big. Getting 10-20% is a game-changer.
Click on any of these to jump straight to that topic
Tools Needed
I used a variety of tools to accomplish this. Most of them are free. If you don’t have one, you can follow the links and create an account.
1. ConvertKit
ConvertKit is one of the many email marketing software you can choose from. It’s the one I’m using on my website so feel free to use whatever you have.
One of the features the ConvertKit offers that I really like is the ability to use the same form and have it display upon exit intent and triggered by a click. You’ll see this more below.
2. Attract
This is one of my go-to tools for creating lead magnets. It’s free. All you need is create an account, choose from the preset templates, then add your content.
All design and formatting is handle by the software. If you’re like me and you want to get results and not worry about design, or wouldn’t want to wait for several days before you can launch a lead magnet, attract is definitely for you.
3. GoViral
The last tool in this entire process is GoViral. It’s also from the same company as Attract.
The purpose of this tool is to get more traffic to your landing pages using a variety of techniques such as getting others to share a pre-written tweet or Facebook post.
Again, you’ll see this in action below.
How It All Works Together
The process goes like this:
- A person visits any page on my site
- That page will either have a form or a button (from ConvertKit)
- If a person clicks the button, a form appears
- After filling out a form, they get redirected to a GoViral page to get an extra bonus item
- An email will be sent to them with a link (from ConvertKit) to download the lead magnet (Attract)
- If they share (or follow) the GoViral page, they get access to the bonus item
- Other people will find the shared post/tweet with the link to your original landing page where they can repeat the same process above
It’s a virtuous cycle that allows you to generate leads automatically and employ other people to share your content. And even if they didn’t convert, you’d still get some brand awareness in the process.
Step-by-Step Guide to Create a Lead Generating Machine
Part 1: Decide on Your Lead Magnets
I shared what I did in this post. But I’d like to explain the thought process behind one here.
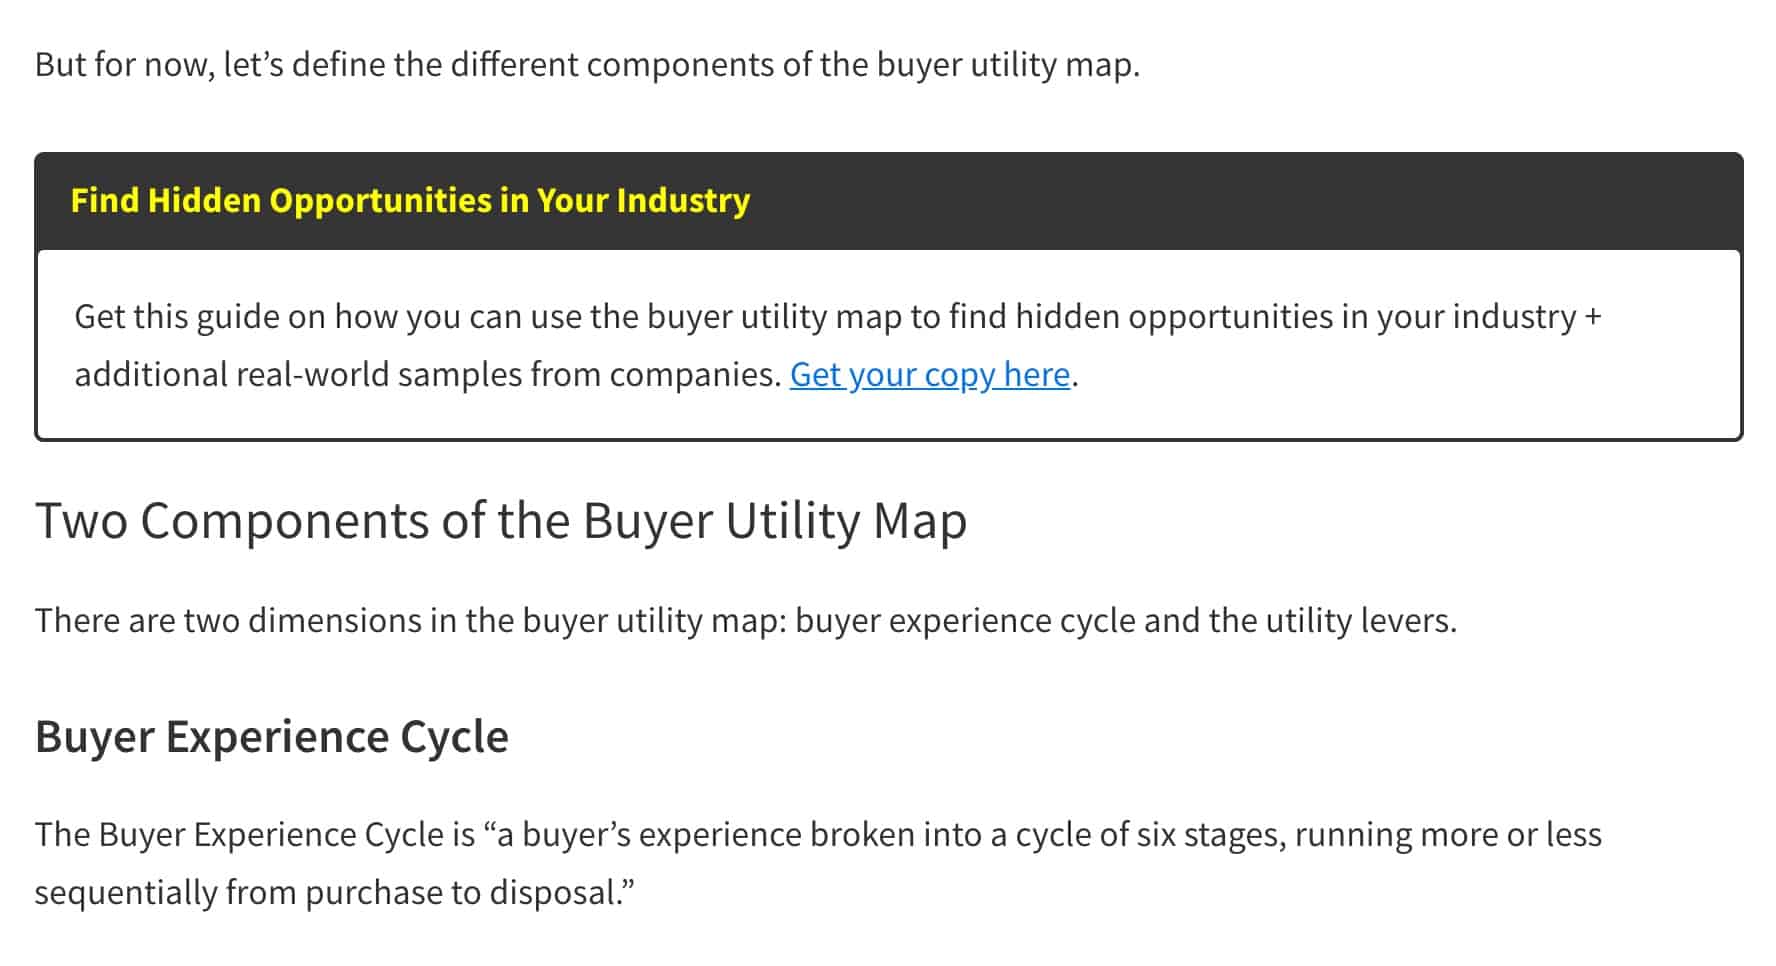
I’ll take this example of the buyer utility map as it’s one of my top pages and a lot of people are searching for it.
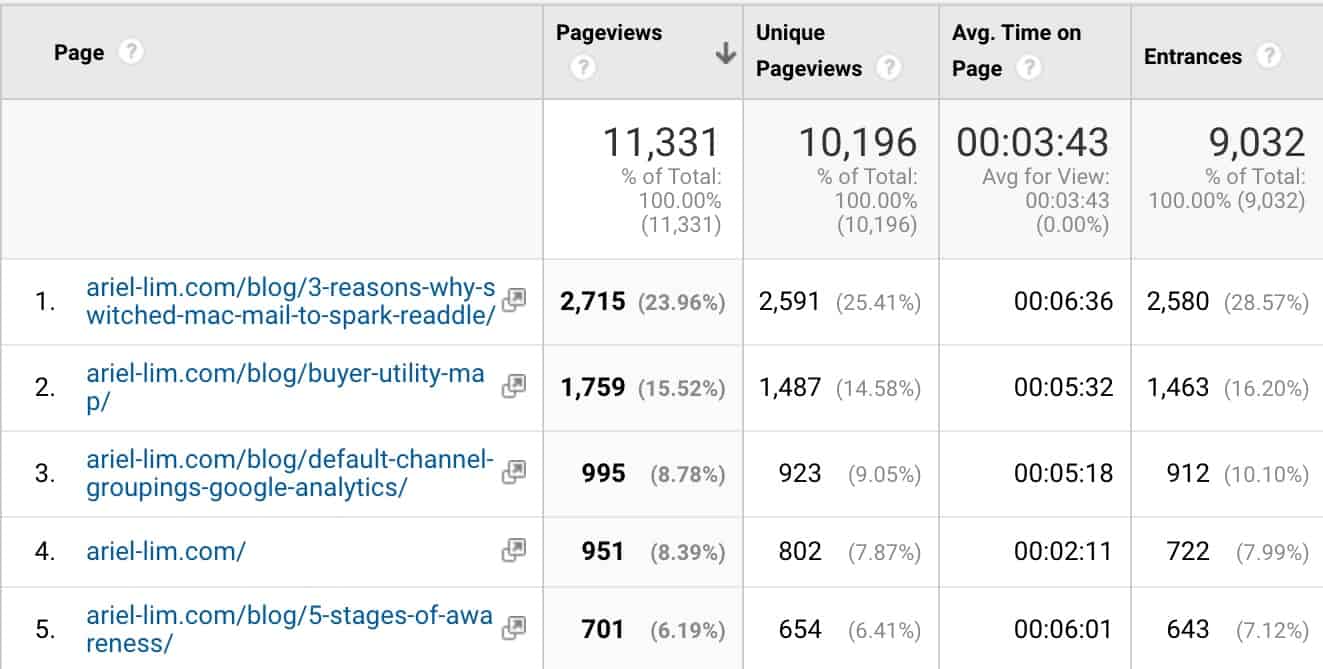
It’s doesn’t have a big search volume because it’s high-level strategy that a lot of people probably haven’t heard about. Nonetheless, it’s a topic I can add more value. That’s why I chose this article as my starting point.
All I have to do next is create a content upgrade—what’s the next step that people would want to get or learn more about this topic? After some basic searches of my competition in the top 10, most of them are using the same example and describing the same thing.
So, what I did was add something new that people are searching for—buyer utility map examples from other companies so they can see it in action. Currently all articles in the top 10 of Google have one example. I made additional two. I tease this out in the post by having an image that shows you all the pages of the PDF.

This is my main lead magnet. Normally, I’d redirect them to a thank you page where they can download the PDF. Yes, that’s a separate page, not a message that appears saying that their PDF has been sent.
The reason is you can add so much more customizations in the thank you page. For example, you can add a video to the thank you page that tells people about the service related to the PDF they just downloaded. Or maybe it’s a webinar about the topic that covers it more in-depth. You get the idea. It’s another way of keeping them on your website and providing more value.
But, I wanted to test out the virtuous cycle I described above. I want to get consistent traffic and leads without me doing anything. So, I setup the next step in the process where they see another lead magnet—a bonus. But this time, there’s no more form.
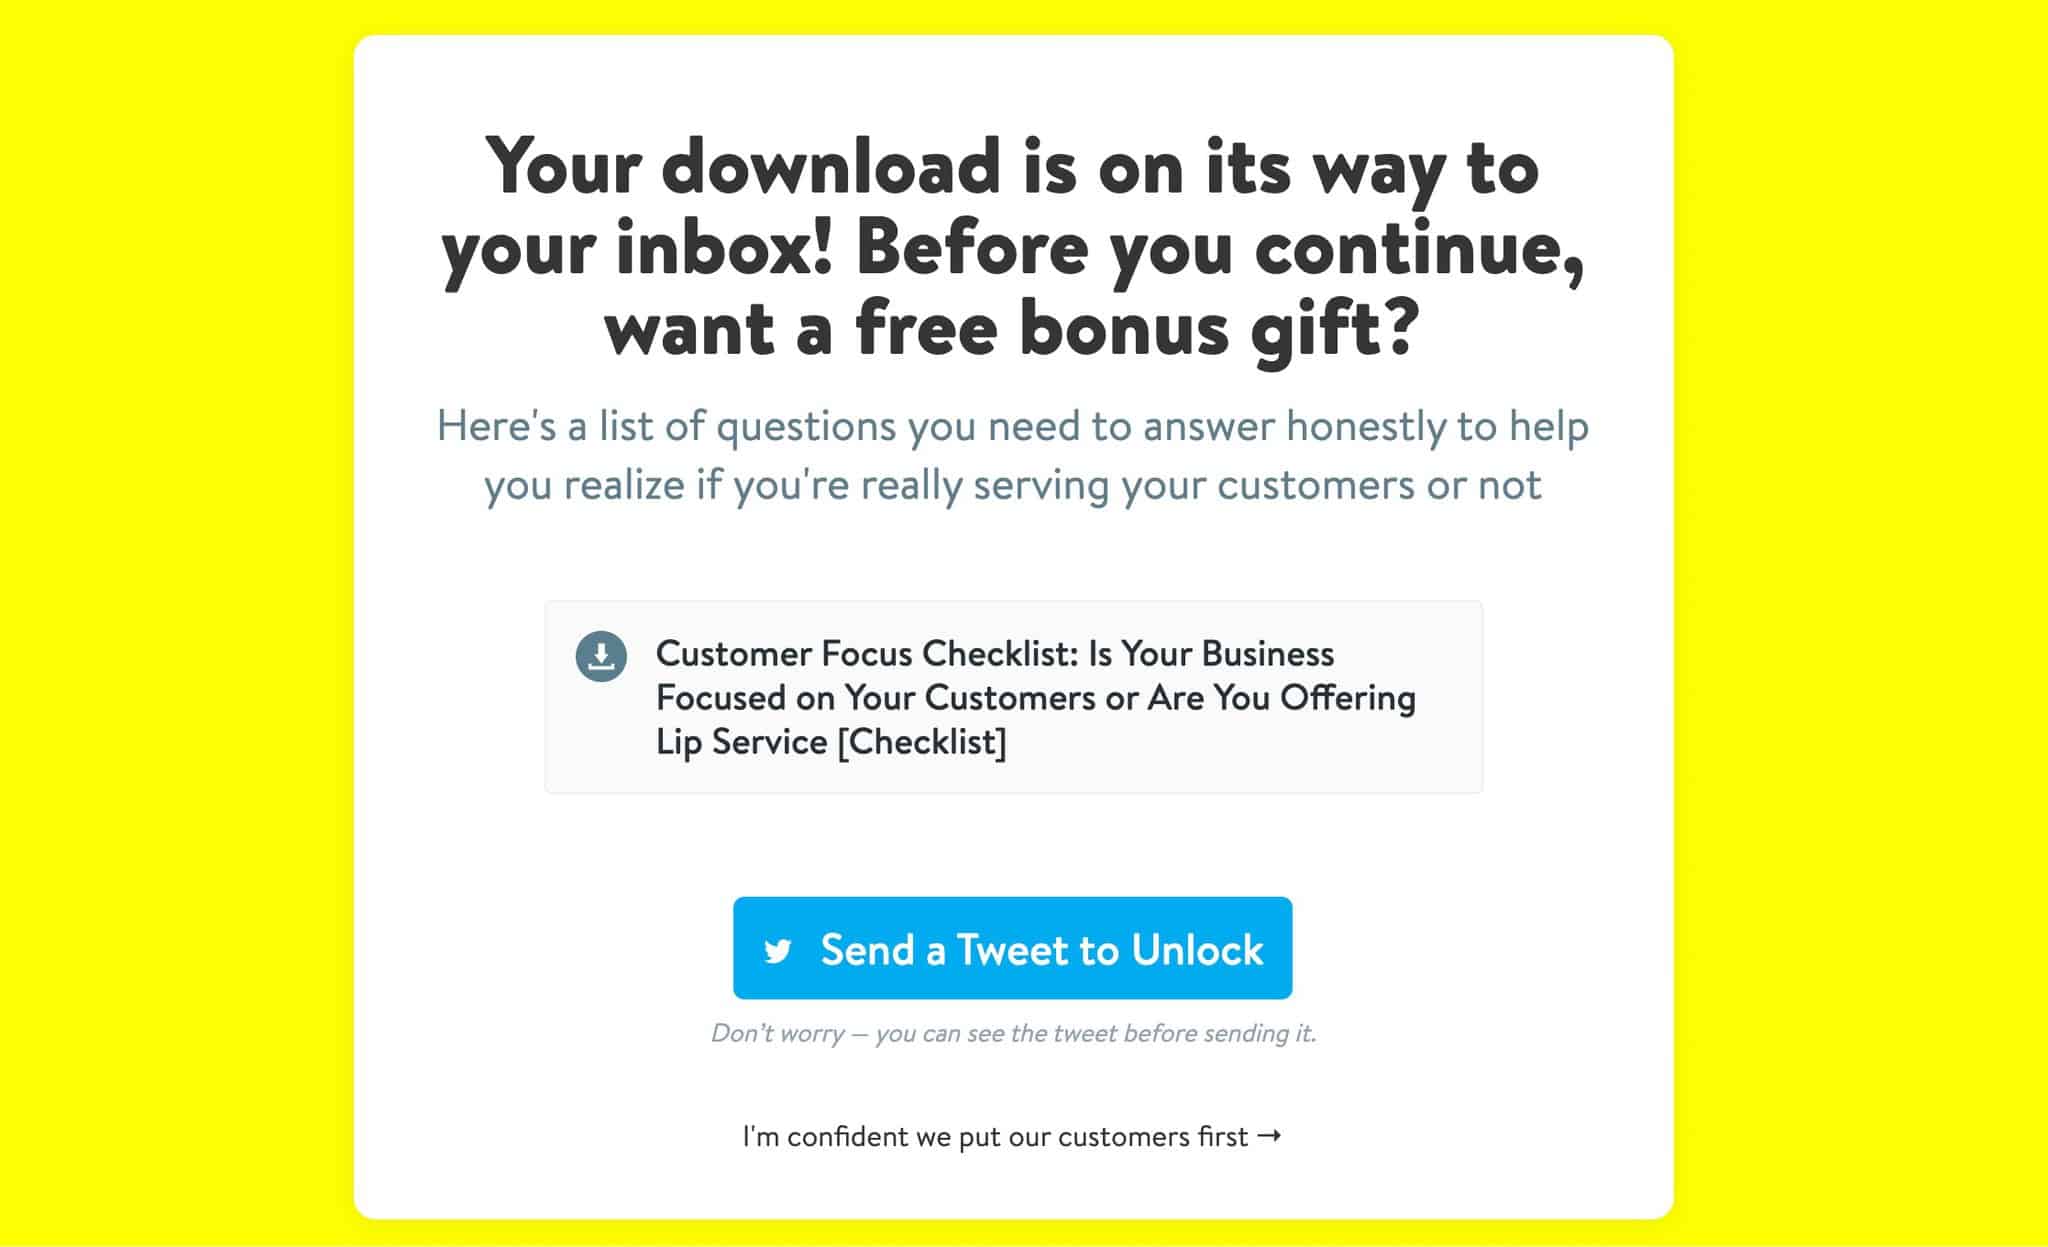
If they want the bonus checklist I made, they’ll have to click on the Tweet button (or any other type of share like on Facebook, Product Hunt, email, etc.) I made this as the next step because one of my other growing blog post is about customer focus.
Since the buyer utility map is all about finding hidden opportunities in the industry to better serve your customers, it falls right in. If they click the tweet button, that’s the time they can access the checklist.
In my How to Setup Google Analytics lead magnet, my bonus upgrade after the guide is a list of basic Google Analytics filters you should add.
You see the connection? They have to be connected. That means, you need to focus on creating those lead magnets and content upgrades if you want to generate more leads. If you’ve been getting a lot of leads from your simple newsletter signup, imagine how much more you can convert if you made them more relevant and valuable?
Part 2: Set It Up
Now that you’ve seen how everything flows, I’ll show you how to set it up. In order to do that, you’ll have to do everything in reverse so you don’t go back-and-forth. Here’s how it would look like:
- Create the free bonus content (i.e. checklist)
- Create a GoViral page for that bonus content
- Publish a page where that GoViral content will be hosted (optional)
- Create your main content upgrade (i.e. Buyer Utility Map Guide)
- Create a form in ConvertKit and setup email delivery
- Add the form to your website
- Test the entire setup
1. Create the free bonus content (i.e. checklist)
Head on over to Attract and create an account. Click on the Create lead magnet button and you’ll be taken to the template selection. Pick from one of the preset templates:
- Resource guide
- Checklist
- Case Study
- How to Guide
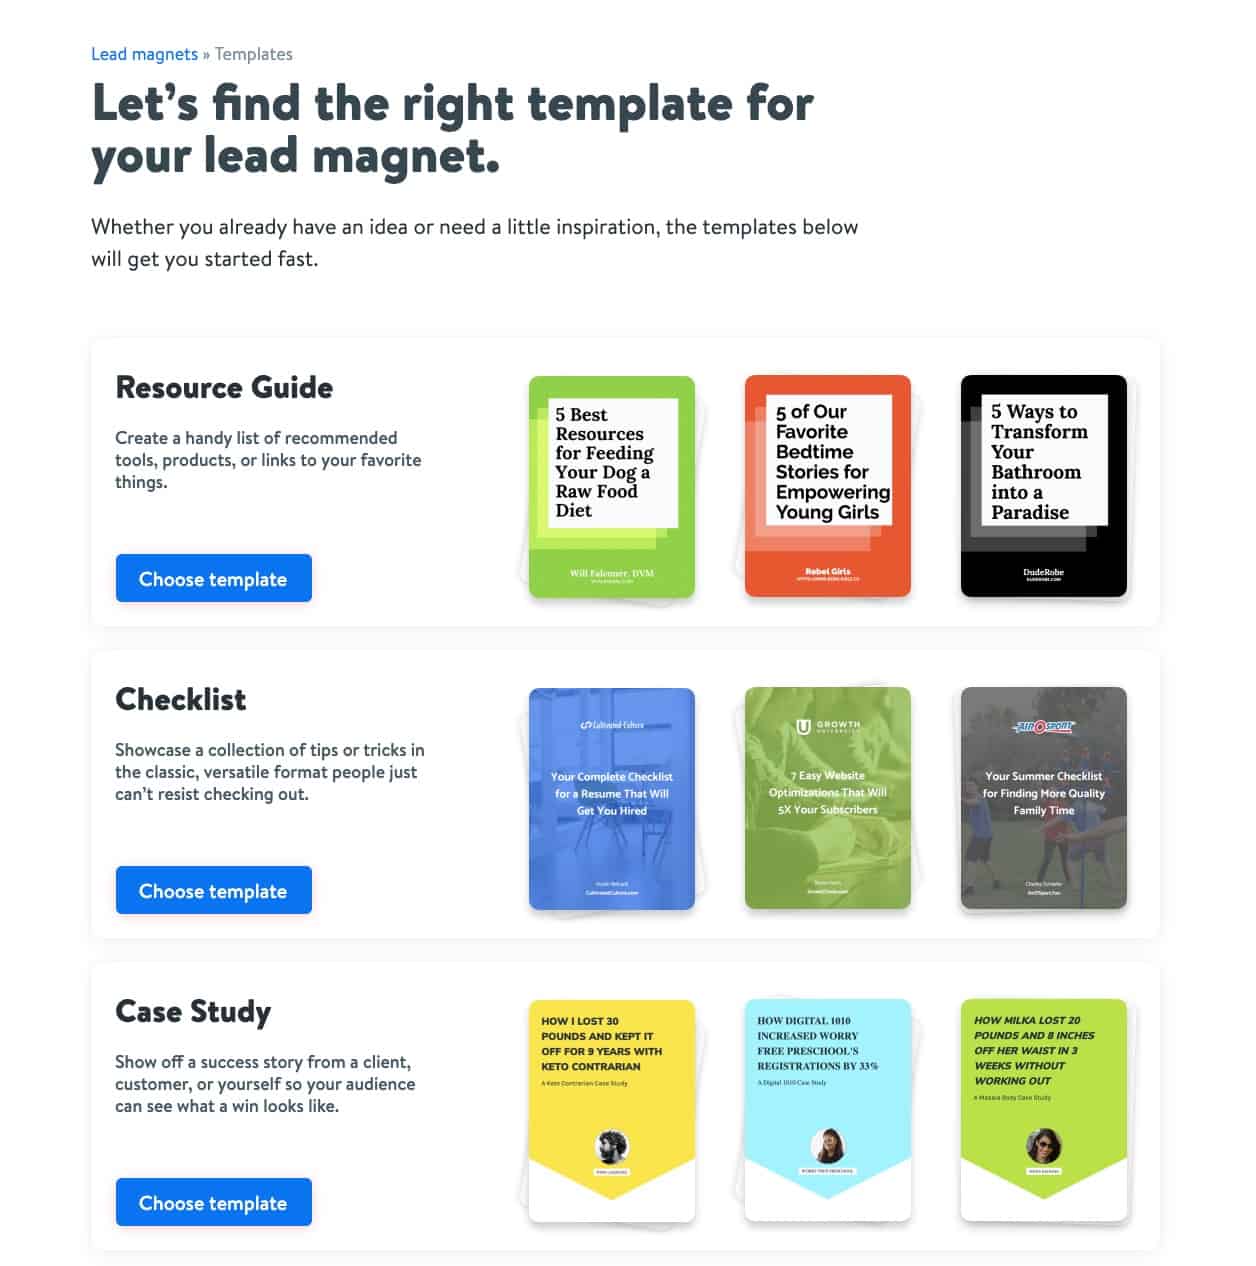
Since this step is for the bonus content, this will most likely be a checklist. For your main content upgrade, it will most likely fall under the resource guide, case study, or how to guide.
Once you have decided, click on choose template.
These are just templates. It’s still up to you to use them. The limitations you’ll see are mainly in the design. This, I believe, is for the reason that most tools (like Canva) offer you unlimited design options that you don’t know where to get started. It might be great for designers, but for people like me who want to get things done as quickly as possible, the limited options is perfect.
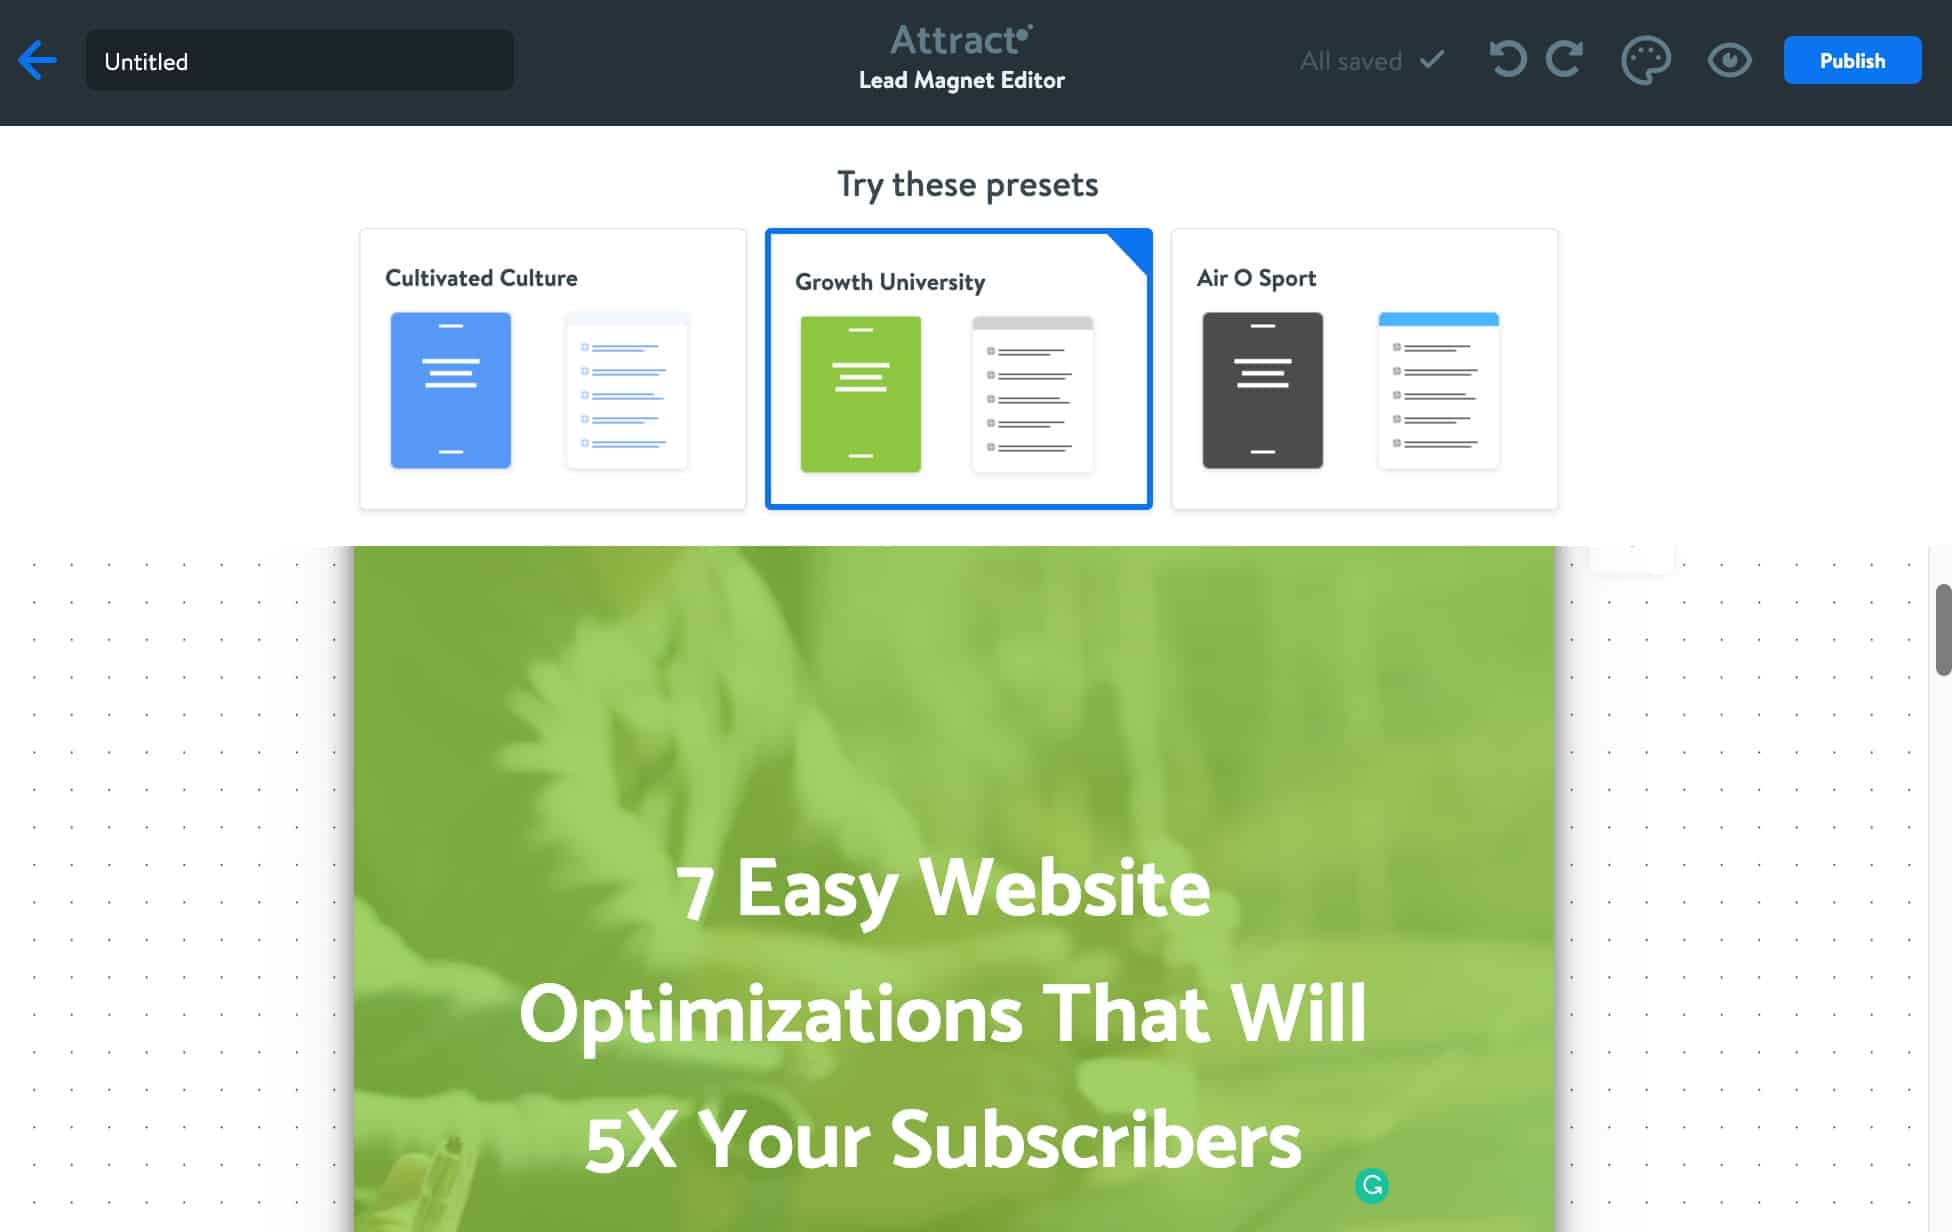
You’ll be greeted with a preset selection after choosing the template. They are all similar within each template. Feel free to choose any of these since you’ll be modifying the templates anyway to match your brand.
Every template will have four pages:
- Cover
- Introduction
- Content itself
- Call-to-action page
After picking one, click the settings icon on the cover page to get started. You’ll also do this for every page I mentioned above. Expect to do this process 4x—once for each page type.
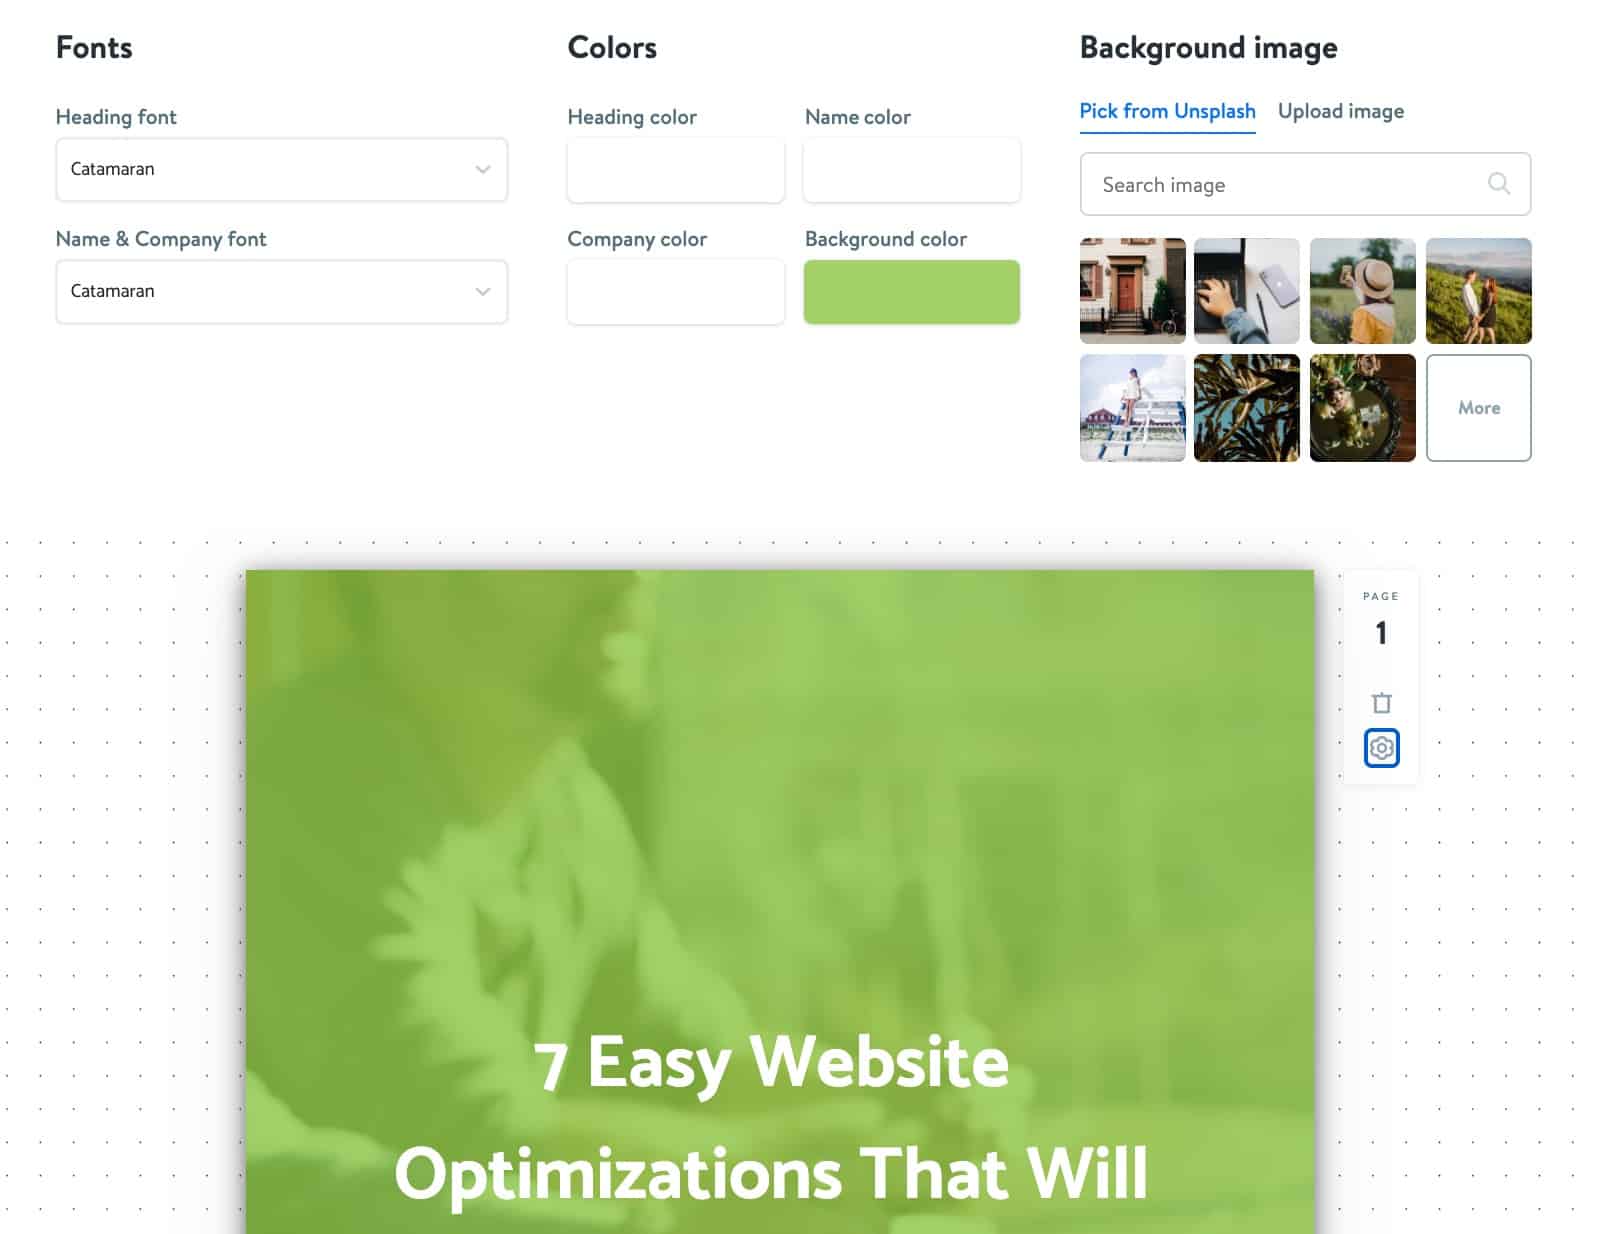
Two things I’d like to highlight here.
- Every page might have more or less options than the image above. But you can see them applied immediately on the page.
- In the main contents (after the intro page), you only have to delete the other pages, then click on add page to PDF to make that succeeding page follow the settings. Otherwise, you’ll have to add it to every single page which is a waste of time
Go through the entire page setup. Once you get to the CTA page, my recommendation is to add a pitch to your products/services.
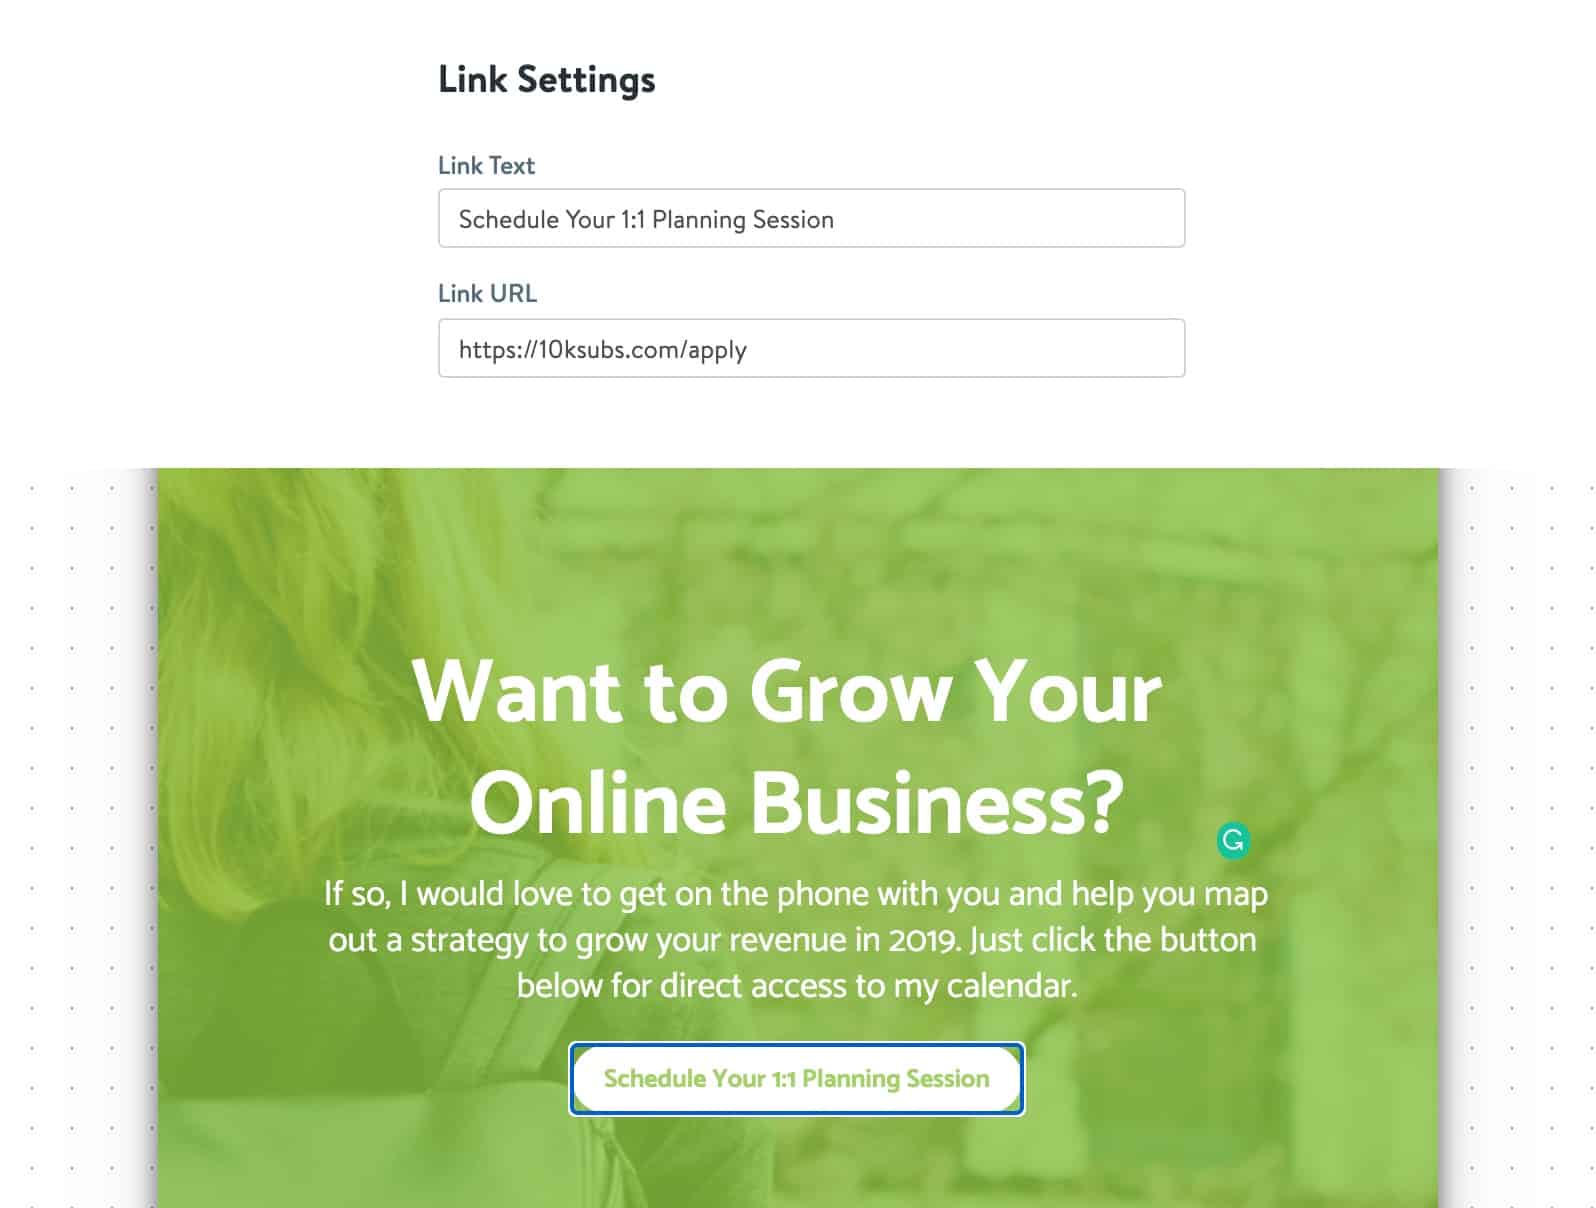
If you’re a coaching business, add a booking session. If you’re a SaaS company, add a link to a trial or demo page. For eCommerce, maybe a category page will work here.
You get the idea. This step is just a way for them to reach you directly.
Now, don’t get lazy here. After doing the work, don’t just link this to your homepage. Make it specific to the contents of this lead magnet.
Once you’re done, hit preview. It’ll open up the PDF in another tab.
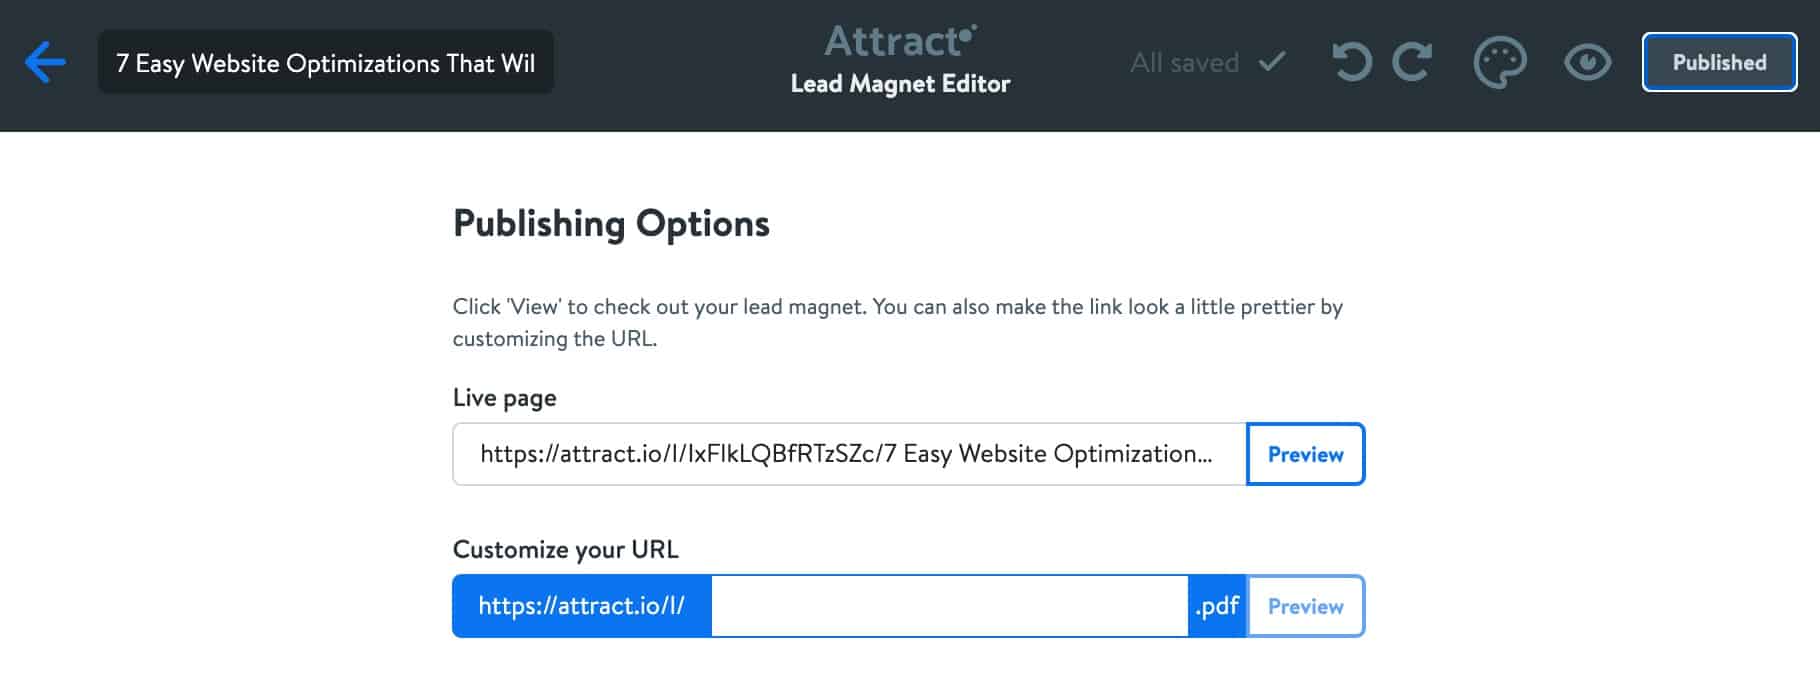
Check how it looks like. If you need to make changes, do so now. Once everything looks great, hit publish. Keep this tab open then proceed to the next step. You’ll need this link later on.
Optionally, you can download and host the PDF on your own website, but I don’t recommend this because it’s unnecessary and additional work. Plus, if you update the content again, you’ll have to repeat it again.
2. Create a GoViral page for that bonus content
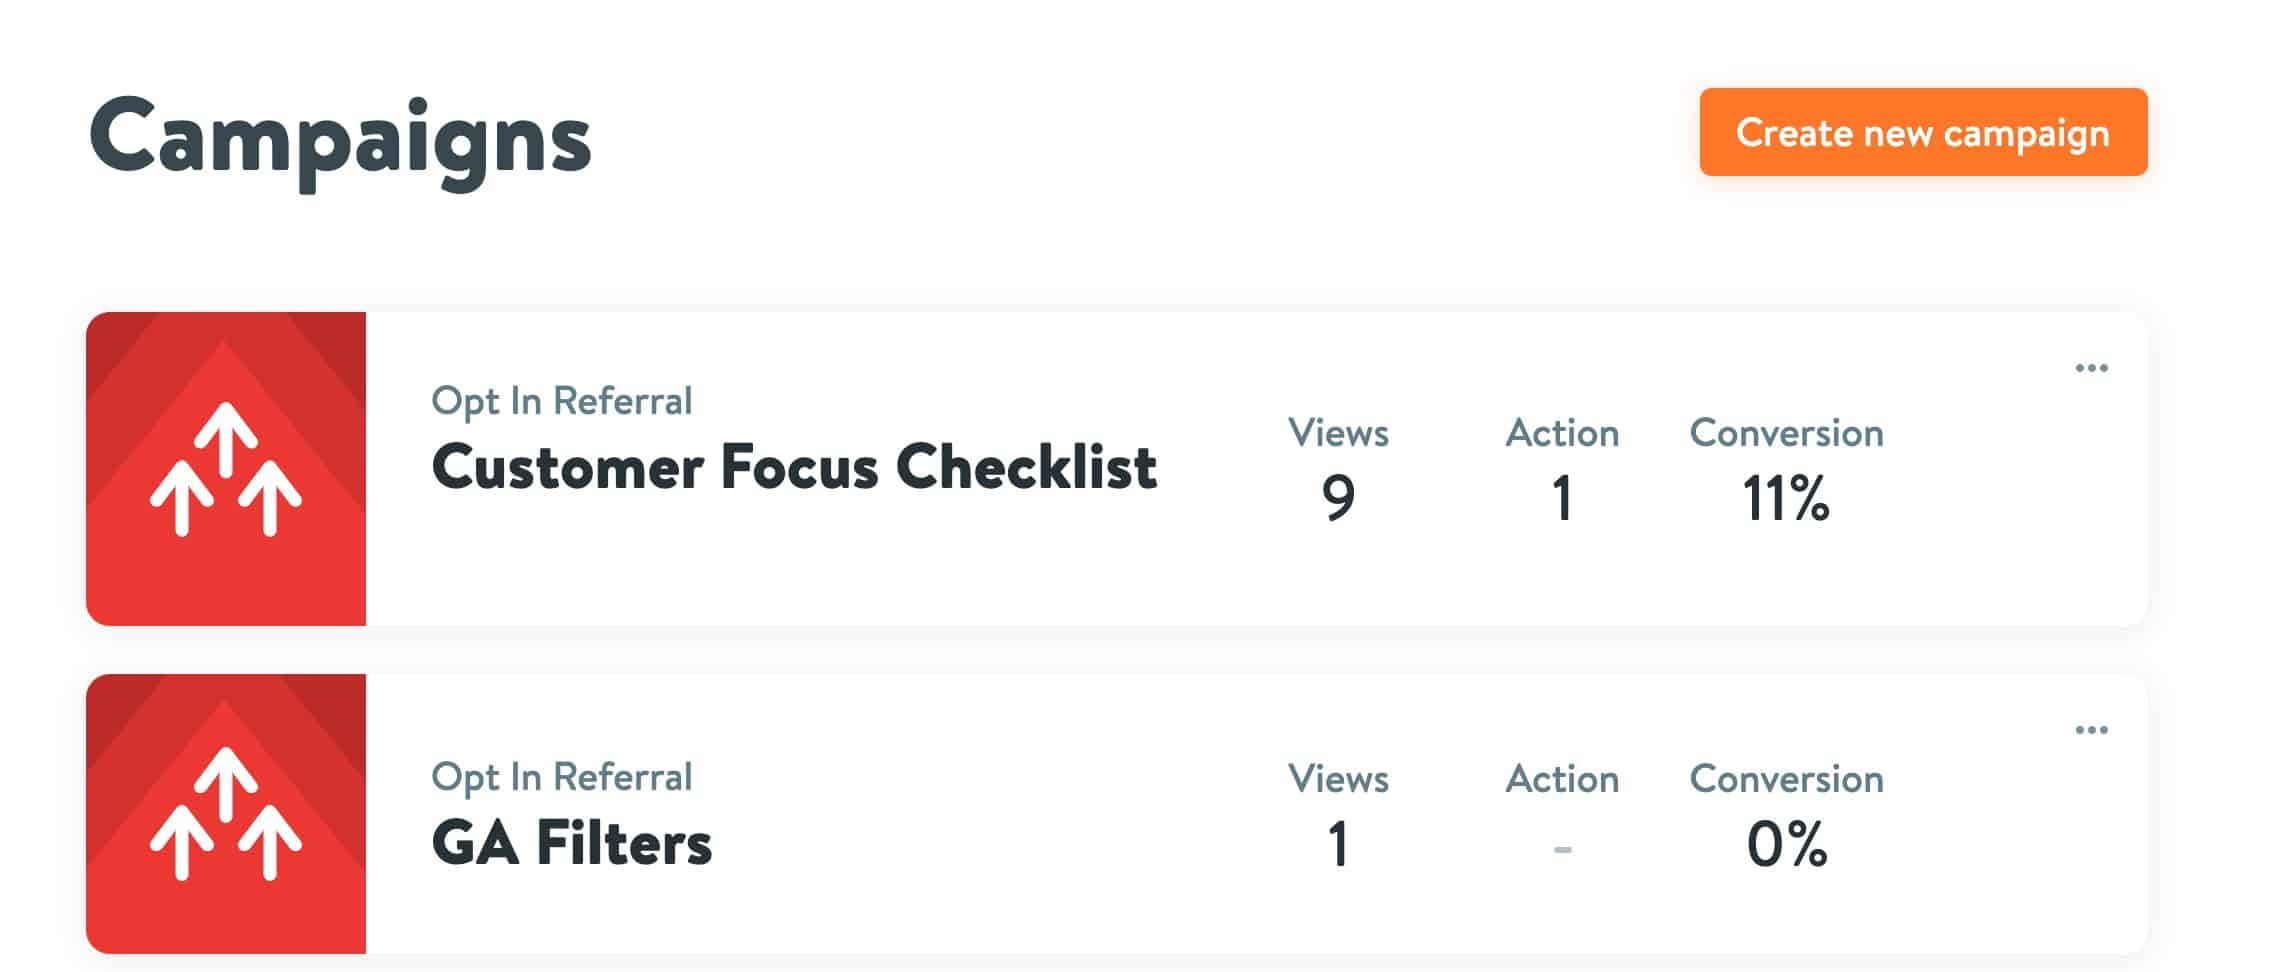
If you haven’t already, create an account and head over to GoViral. Once you’re in, click Create new campaign at the top.
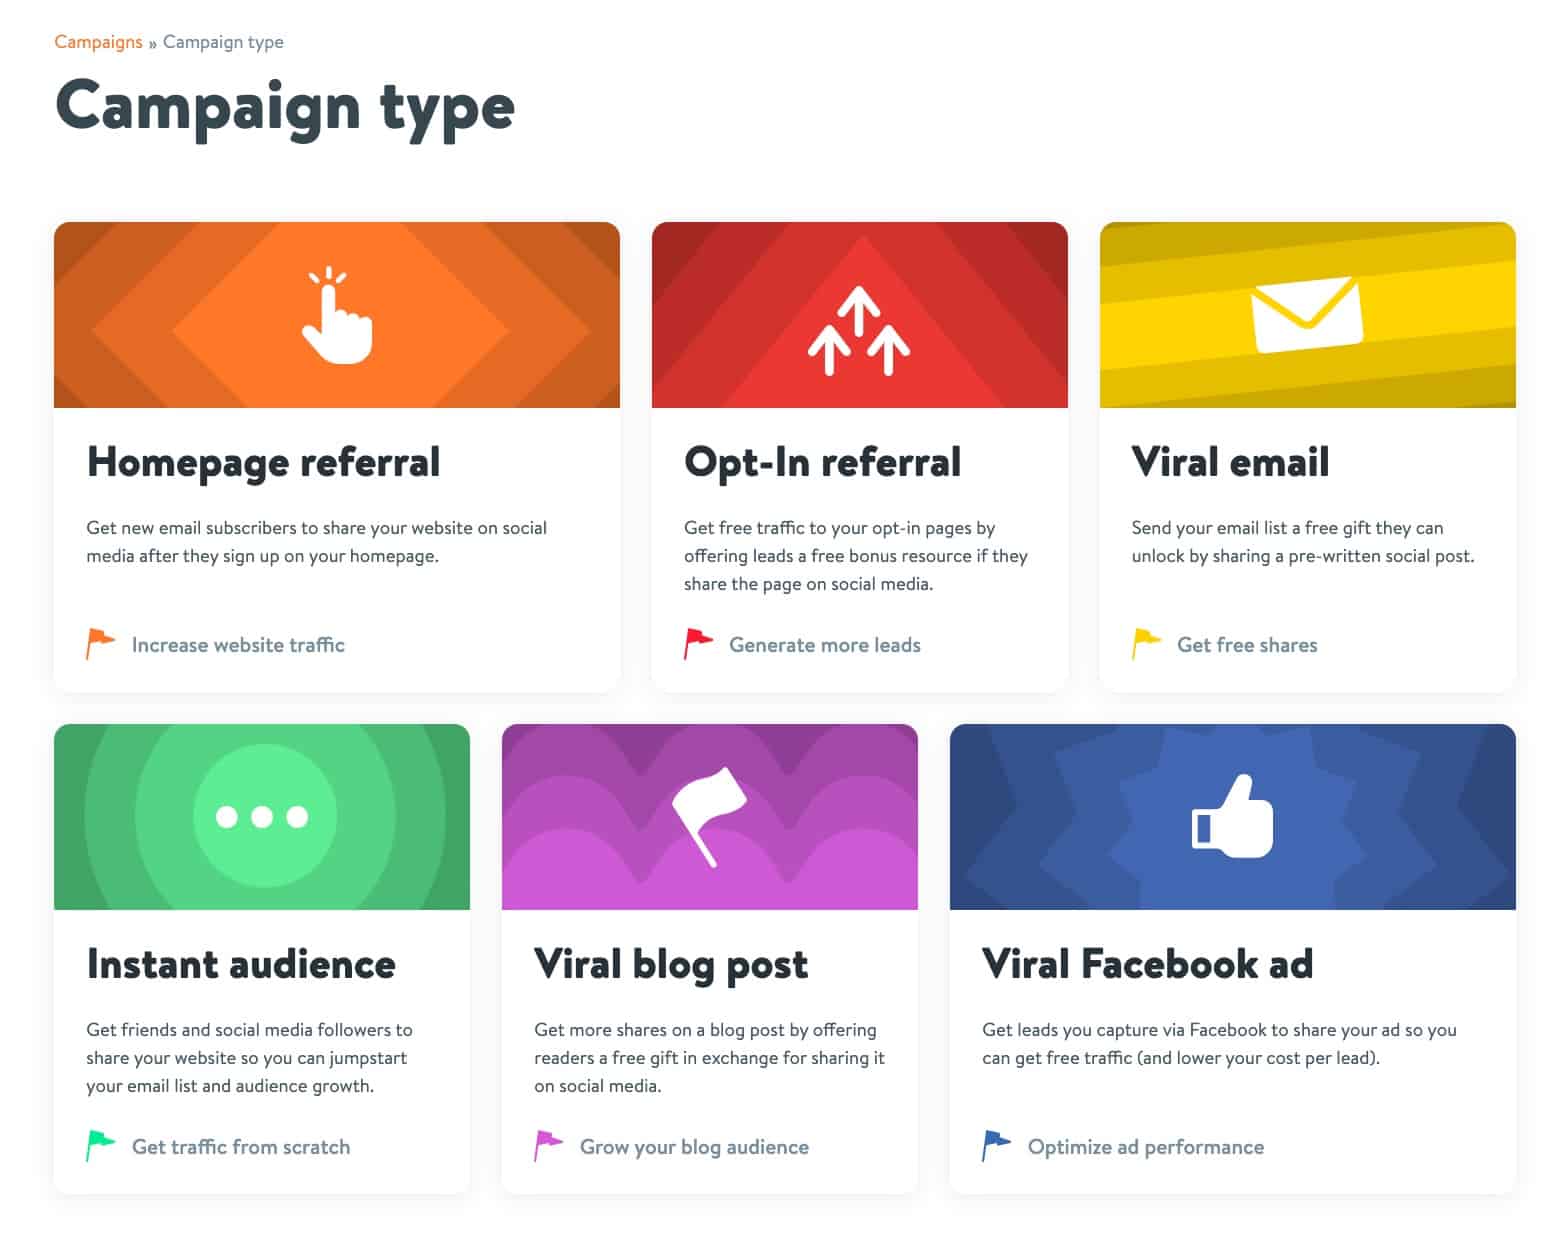
From there, you’ll see a list of different campaign types. Feel free to explore them. But in my case, I chose the opt-in referral because I wanted to generate more leads.
You’ll now see an overview page with a video and detailed explanation of the steps. If you think this is the right type of campaign for you, then click on Create campaign.
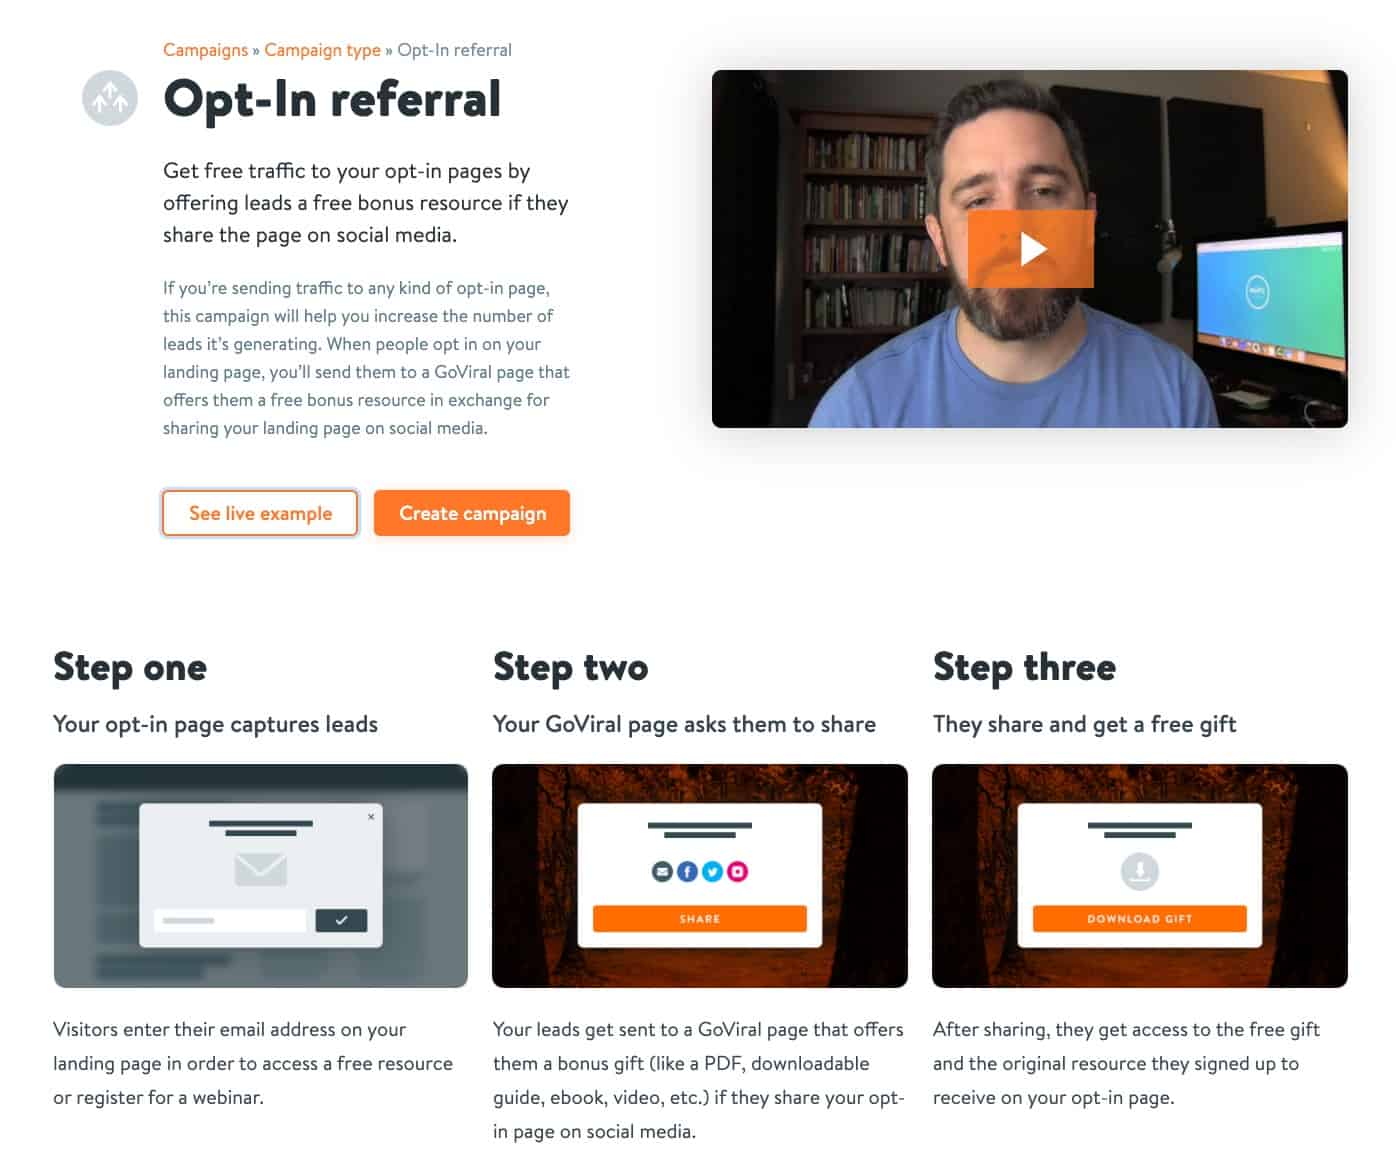
In the next page, you’ll go through three steps:
- Decide on the call-to-action
- Setup your bonus gift including the design
- Publish your page
The editor page is split into two parts: the left is where you make all changes while the right-side is the preview.
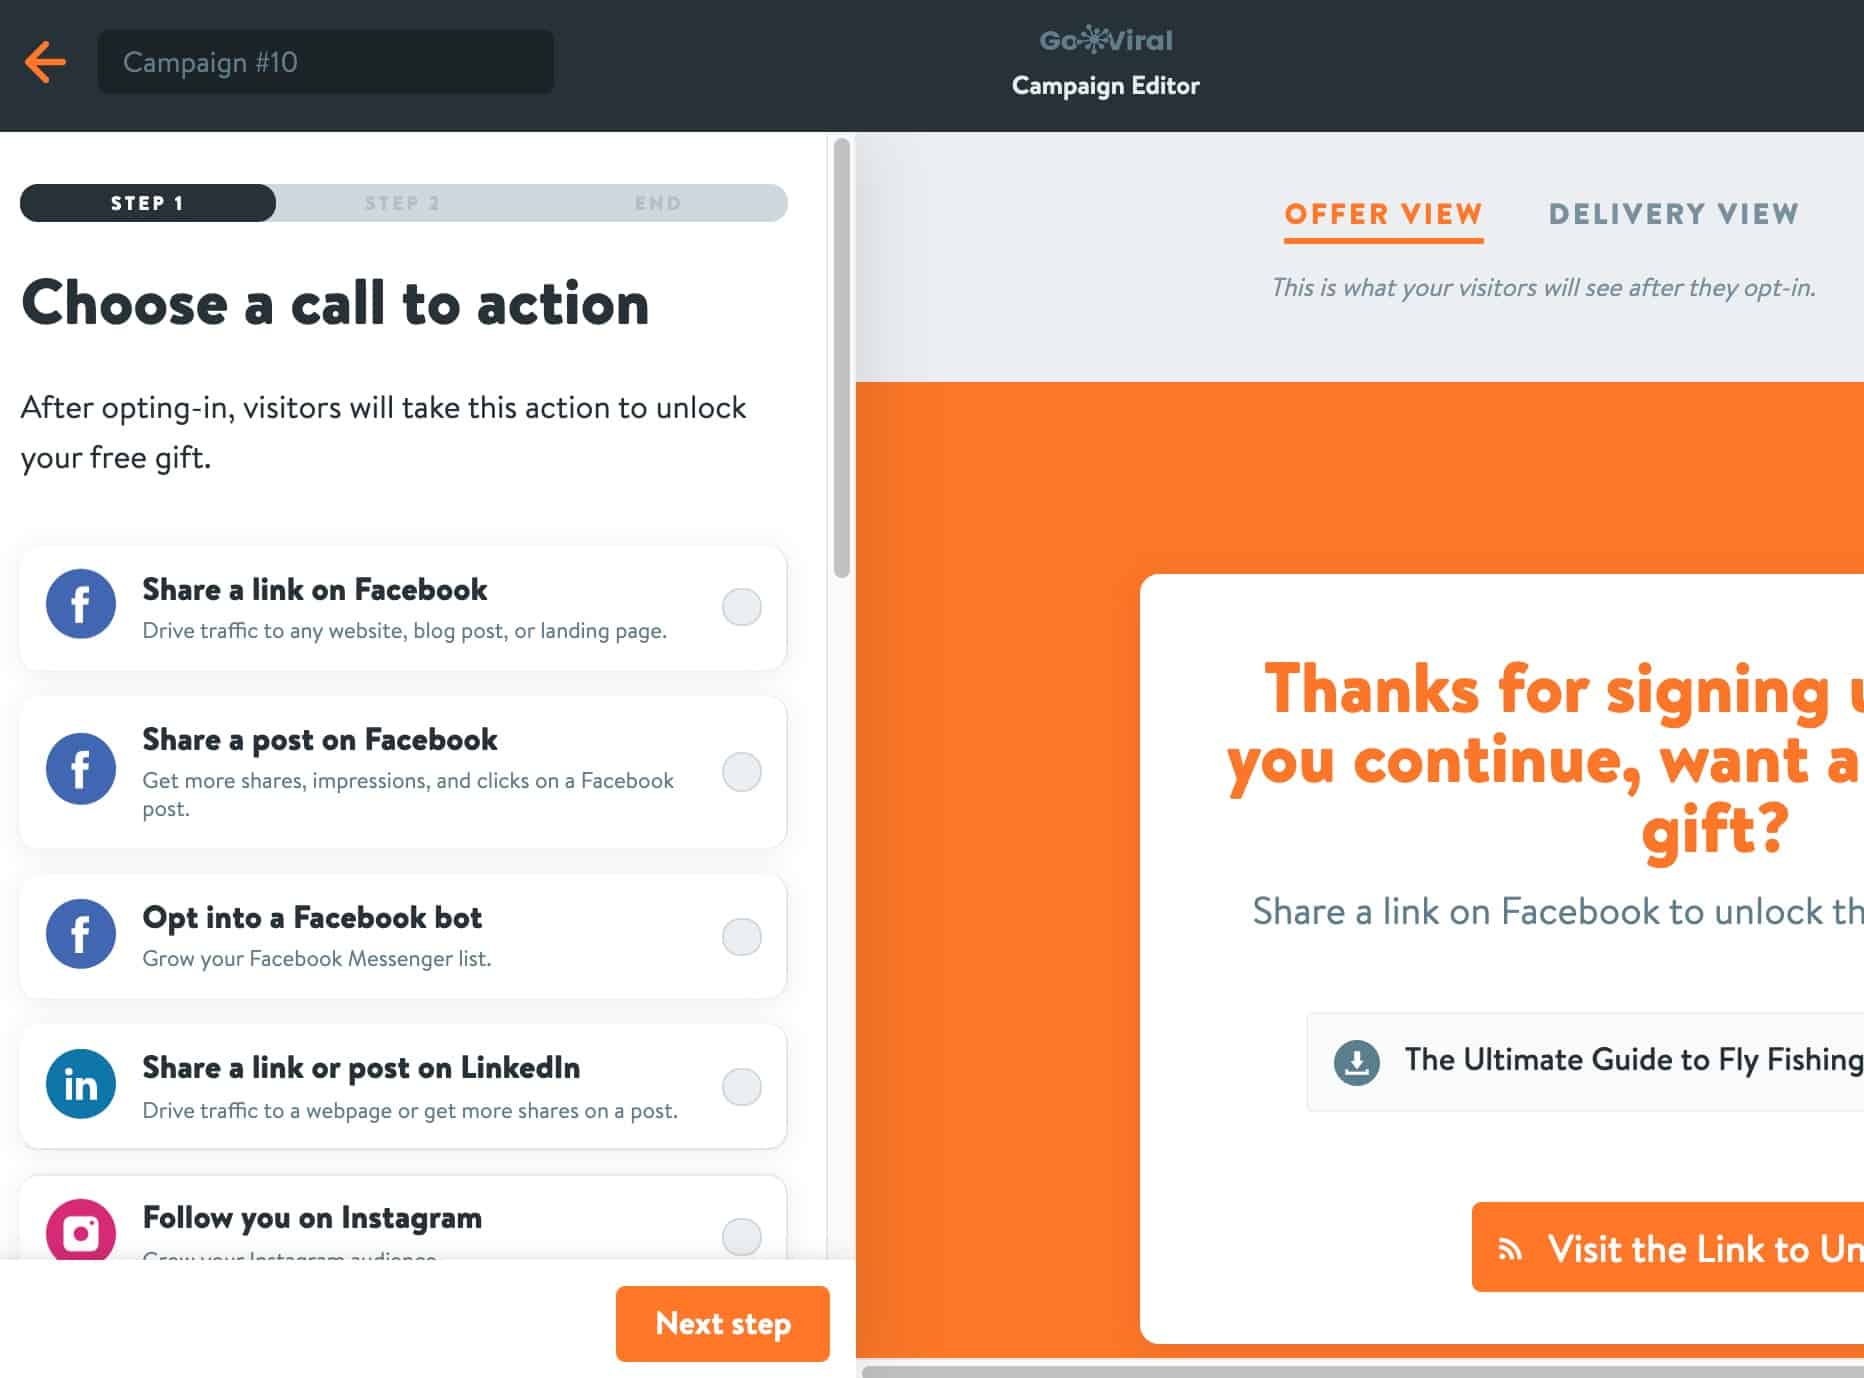
To get started, choose from the preset templates. Some options are:
- Share a link on Facebook
- Share a specific post on Facebook
- Opt into a Messenger Bot
- Send a pre-written tweet
- Upvote a specific post on Reddit or ProductHunt
There’s a lot of options to choose from and it really just depends on what your goal is. Pick one then click on Next Step.
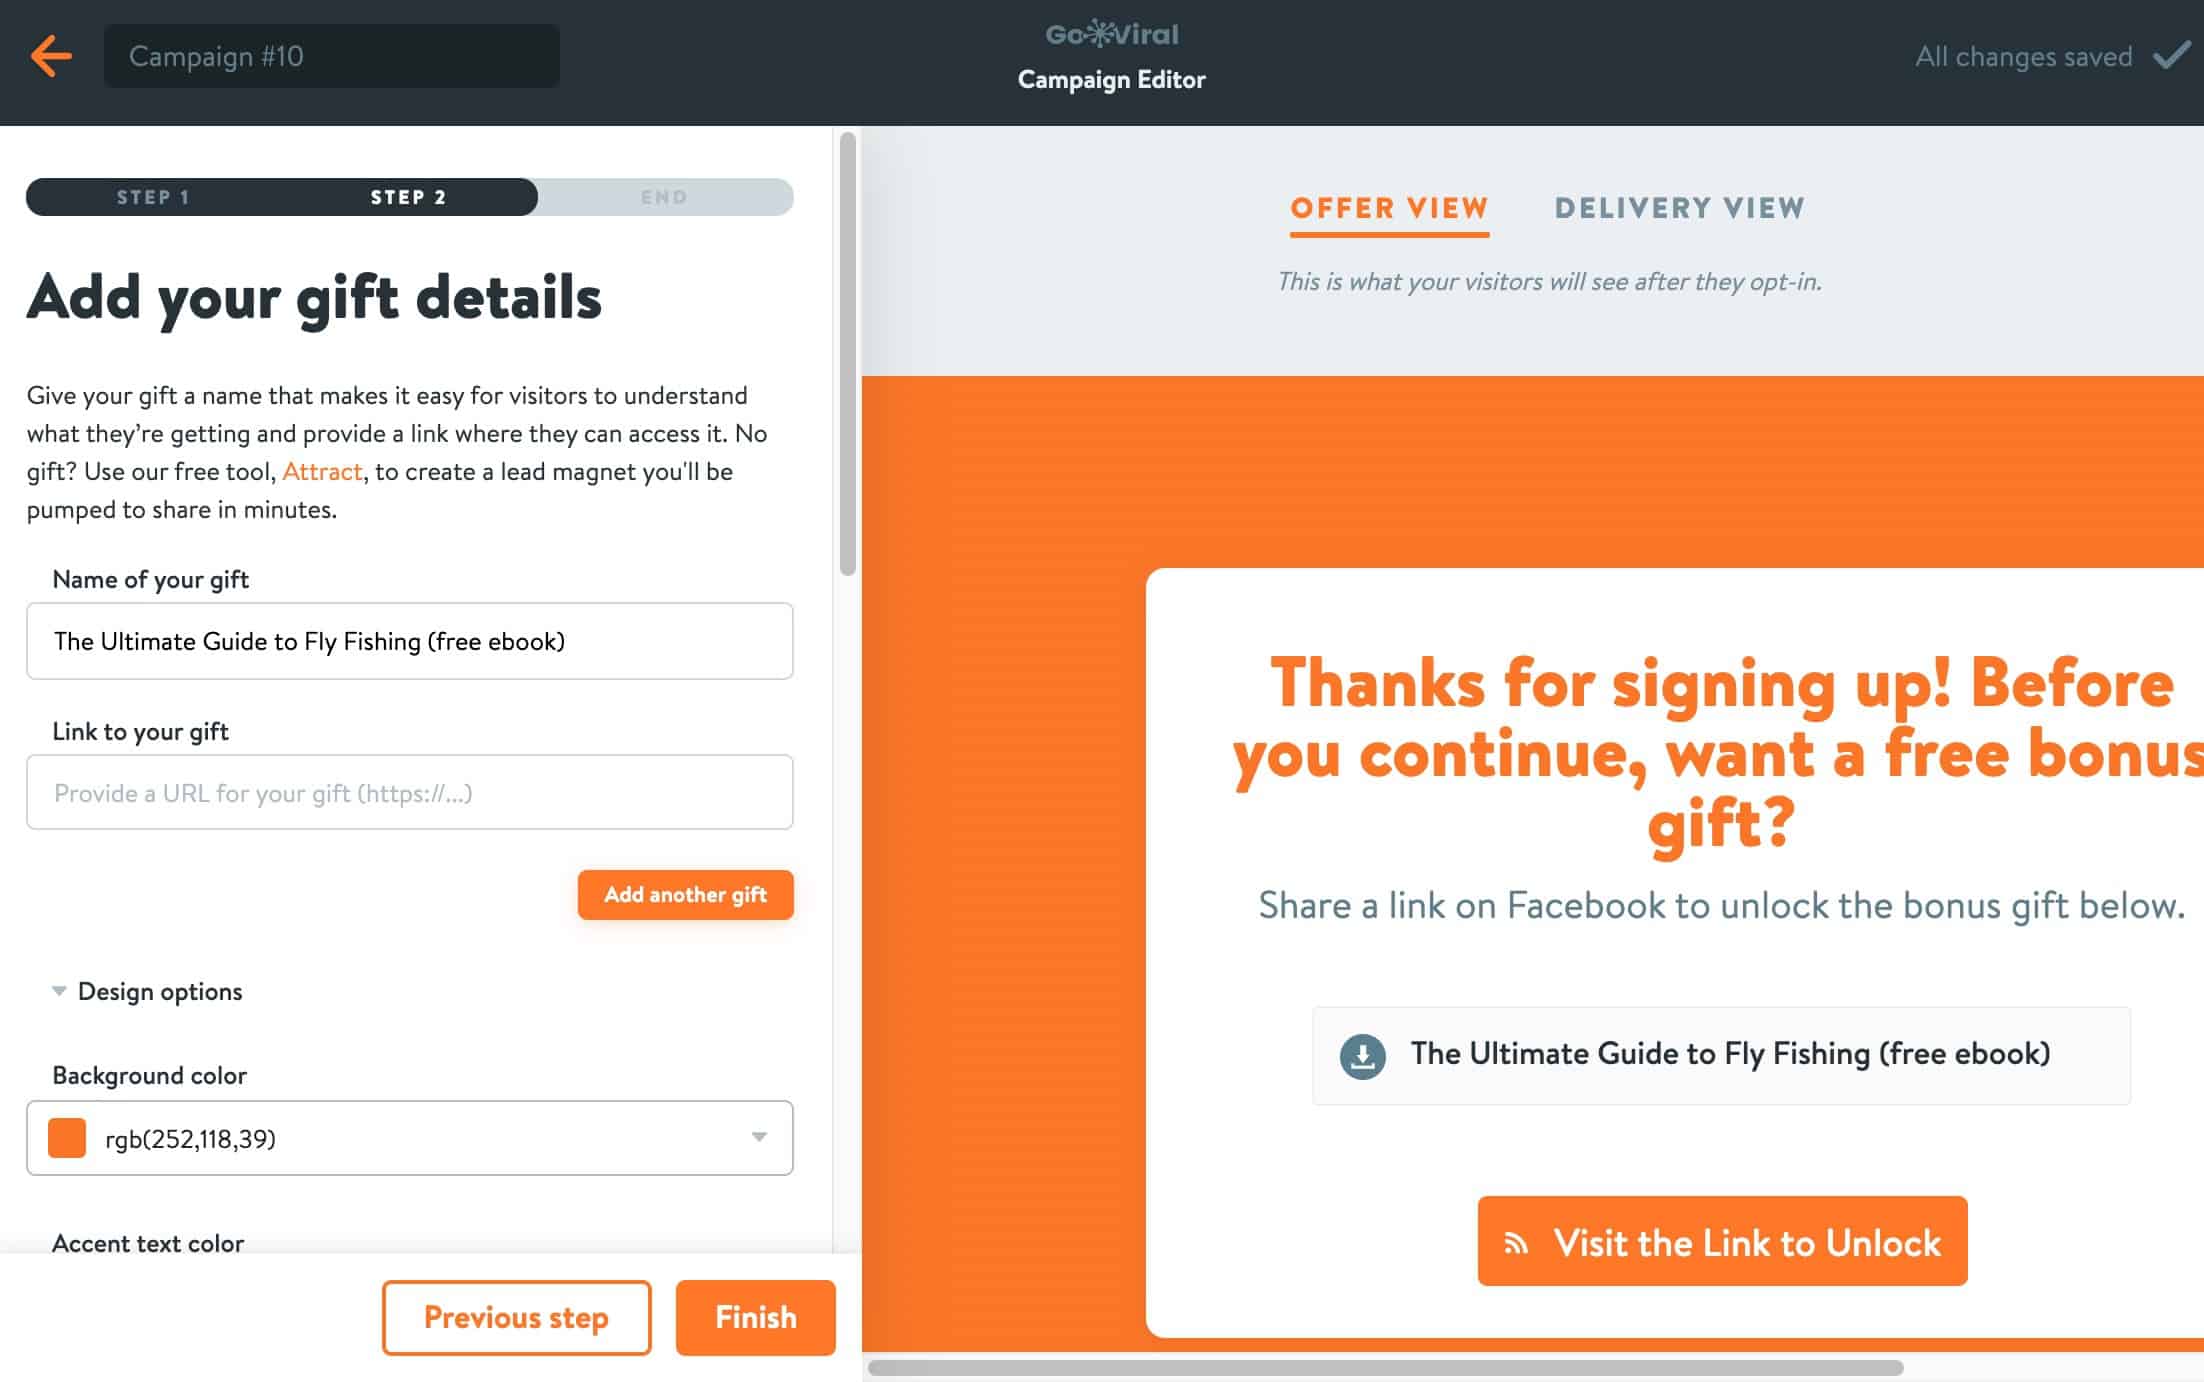
Step 2 is about setting up your gift. Get the link from Attract in the previous step and add it here. It’s also here where you can customize the copy and design elements.
As mentioned earlier, you can choose to download the PDF from Attract, upload it on your site, then have people download it there. But that’s adding more to the process and, in case you suddenly saw an error or want to update the PDF in the future, you’ll have to repeat that download/upload process over again. If you let it stay inside Attract, all changes you made will be automatically updated. Of course, you can’t do anything with those who downloaded the files already. But starting that point, everyone will start seeing the updated version.
Pro tip: check the offer view and the delivery view preview so you see what people are seeing. Personally, I sometimes fail to look at the delivery view and noticed it’s still displaying the default placeholders.
Once you’re done, click Finish and you’ll see the publishing options.
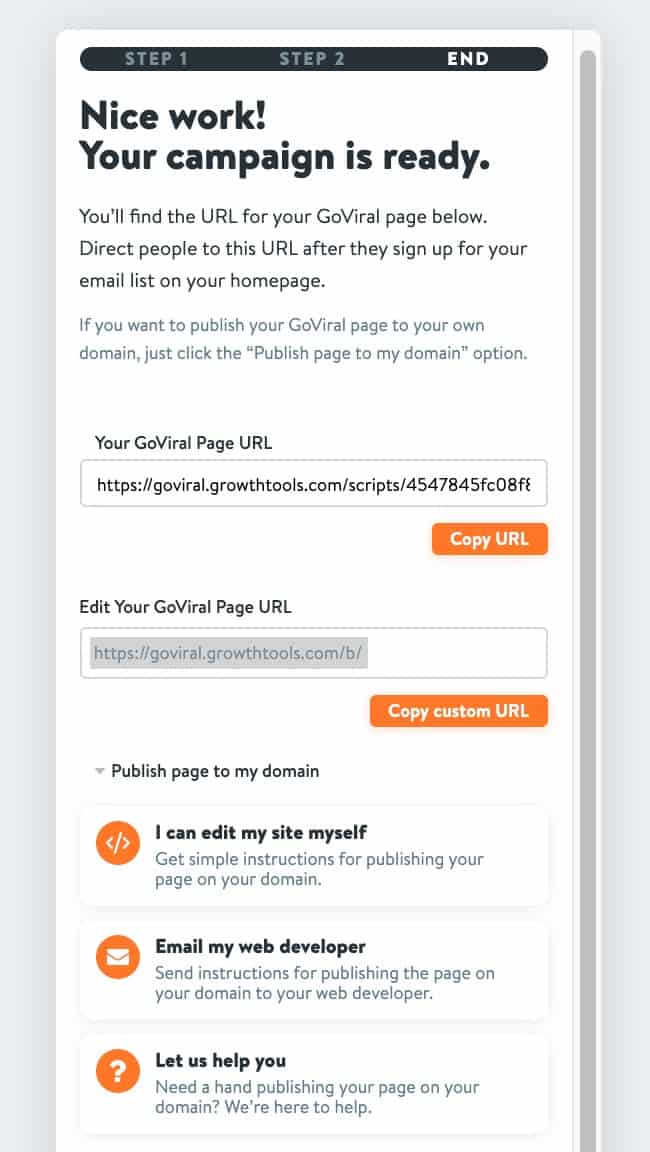
3. Publish a page where that GoViral content will be hosted (optional)
You can just take the URL link above, or perhaps add a custom URL. But both will still be hosted on GoViral’s (Growth Tools) domain, not yours. If you want to host it on your own, you click the publish page to my domain and choose the I can edit my site myself.
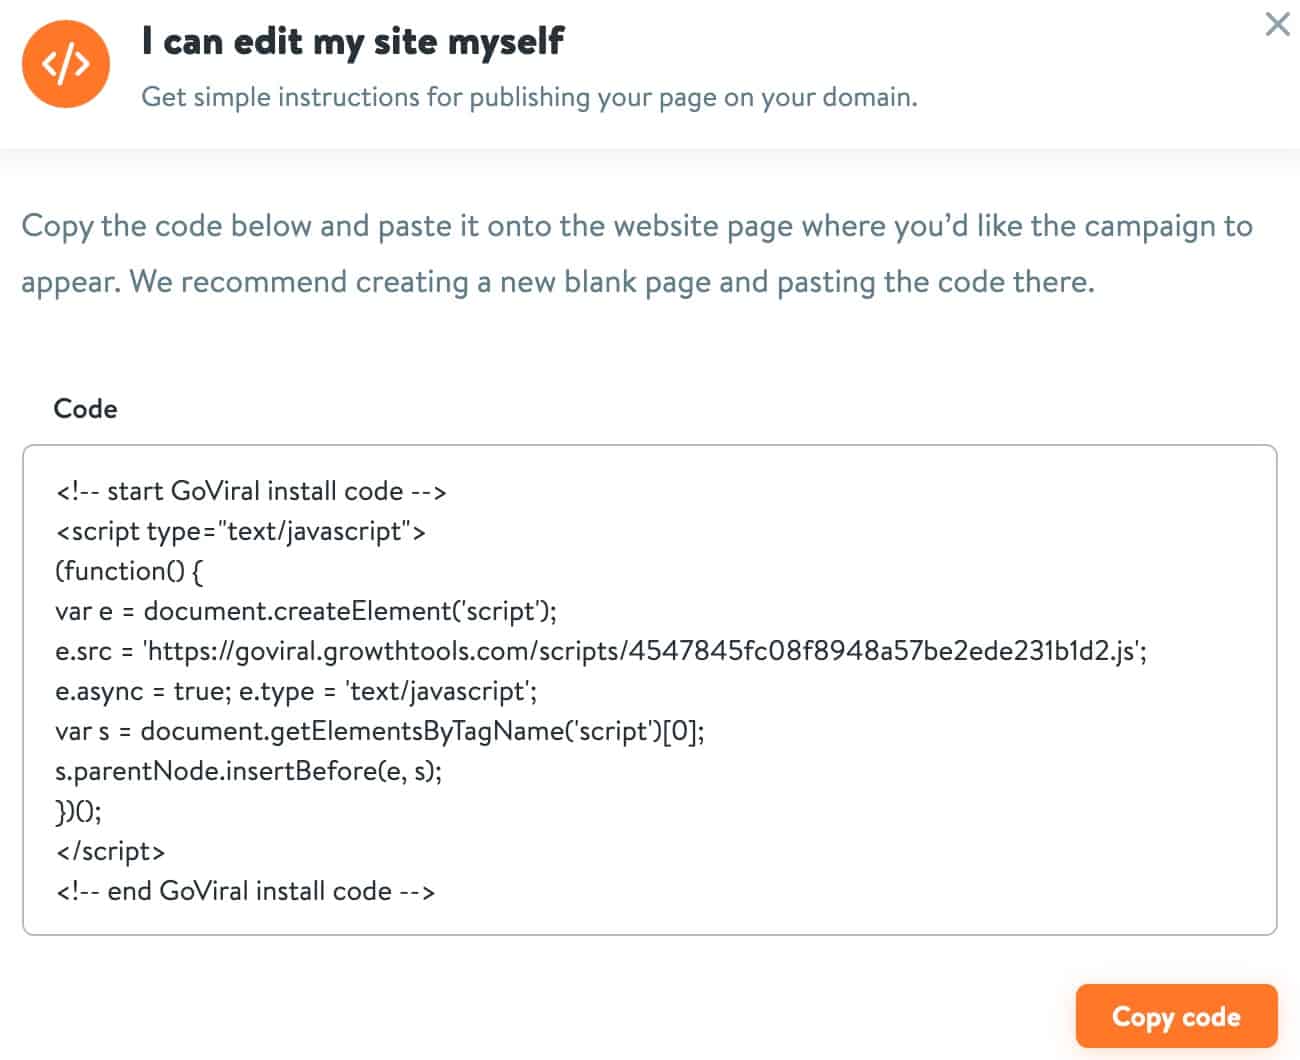
Copy this code, then head on over your website, and create a new page (or post). If you’re using the Genesis Framework, this shouldn’t be any problem. Scroll down to the Header scripts section then paste the code there.
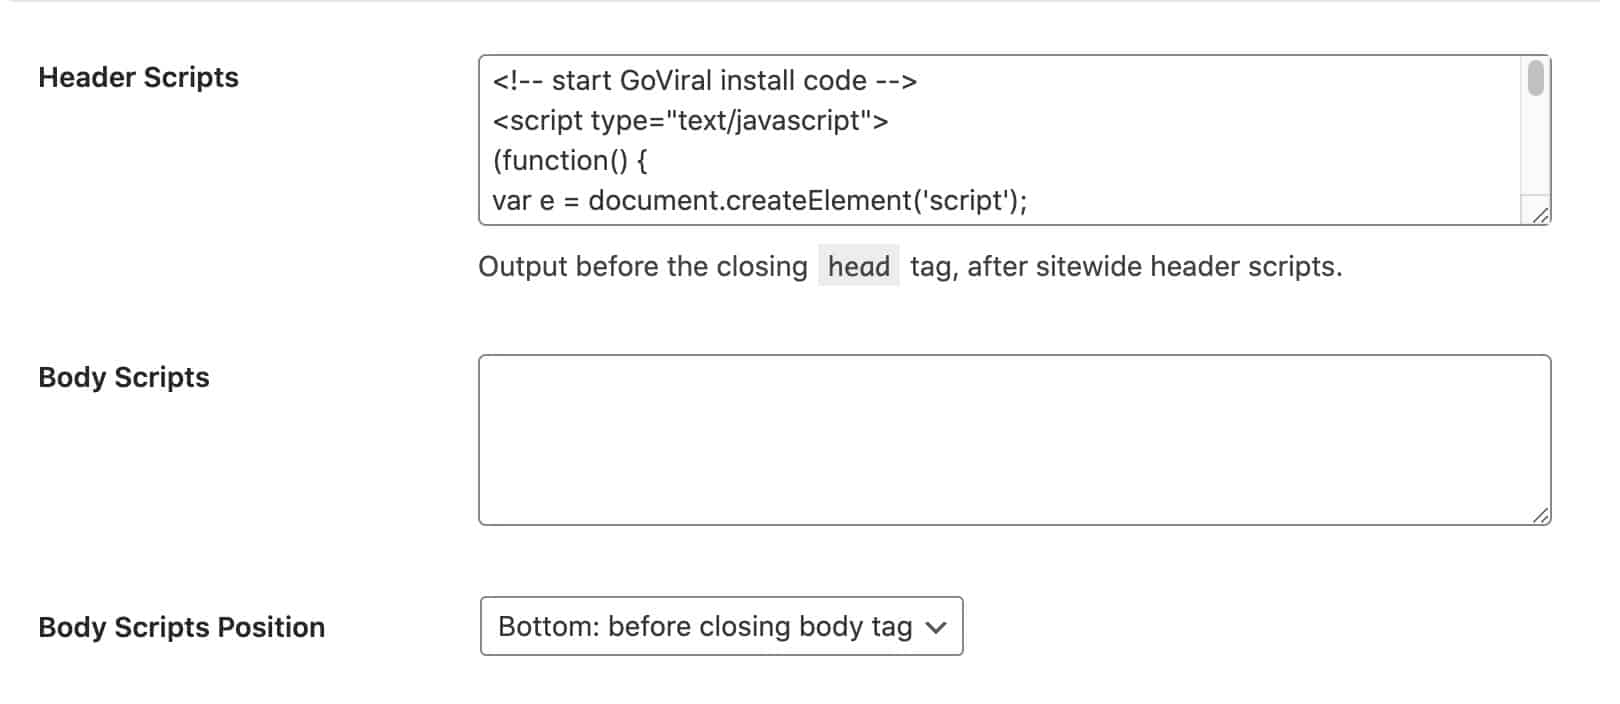
Don’t add anything to the body. It won’t be shown anyway. In my case, I did three things here:
- Updated the title of the page
- Made the page noindex in Rank Math (I wouldn’t want people to just see this page on search engines)
- Updated the URL slug and made it into a child of another page (this is just for my own organization)
Again, this entire step is optional. I’m experimenting a few campaigns hosted on my own and a few ones in Go Viral’s domain. If you want to make it simple and easy, choose to go with GoViral’s URL.
Hit Publish then you’re done. You’ve created the social share component. Now, head on over to Attract to create your main content upgrade.
4. Create your main content upgrade (i.e. Buyer Utility Map Guide)
This is going to be similar to the step above. Choose from one of the options, then start making your lead magnet.
Probably the only thing that would be different is this would most likely fall into a resource guide to how-to guide, as opposed to a checklist. Again, this would depend on a lot of factors and how your site is setup.
In my case, the bonus upgrade is a checklist. Simple one. Just a list of items. But this main one is the meat. So, I chose the template for how-to guide.
Once you’re done, hit publish and you’re done. Get the link then proceed to the next step.
Alternatively, just like in step 3, you can choose to download/upload to your own website, but that’s up to you.
5. Create a form in ConvertKit and setup email delivery
This one involves creating a modal form in ConvertKit. If you haven’t already, you can create a free account here that will allow you to follow along.
I’m not going to go through the entire setup of ConvertKit here, but if it’s the first time you’re signing in, you’ll be prompted with some getting started/onboarding tutorial.
One you’re done, head on over to the Landing pages and forms tab at the top. Then, click on Create New.
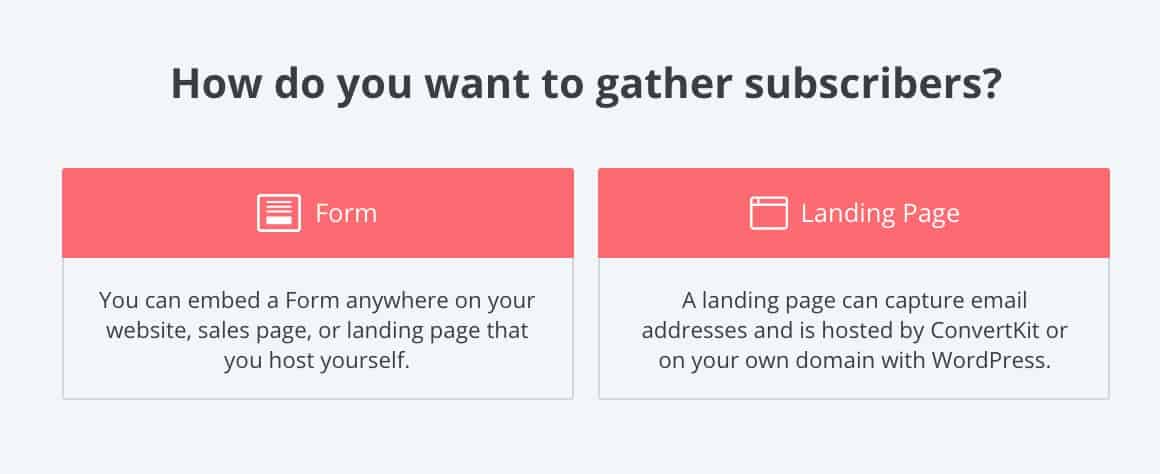
You’ll be asked to create a form or a landing page. For this purpose, choose form. Then, in the next page, choose modal.
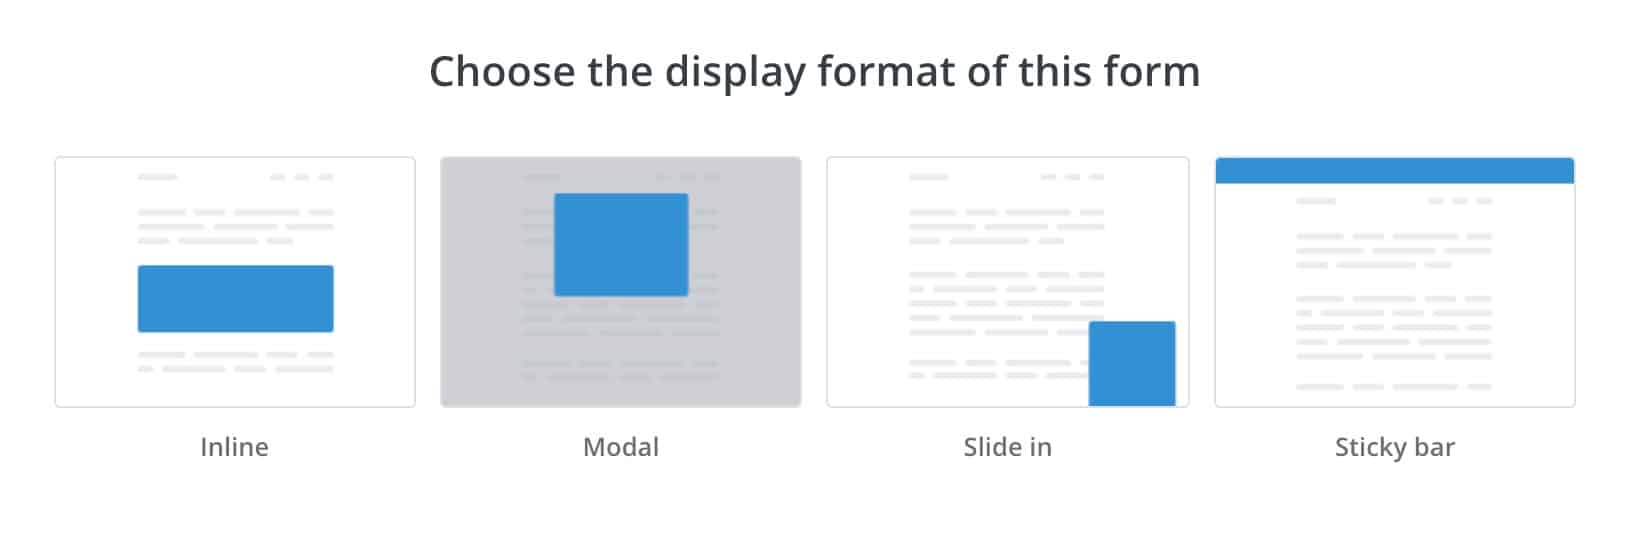
To distinguish them, here’s a high-level overview:
- Inline is where the form is directly with your content
- Modal is similar to a popup
- Slide in forms show up at the bottom and doesn’t block your screen
- Sticky bar stays at either the top or bottom of the page
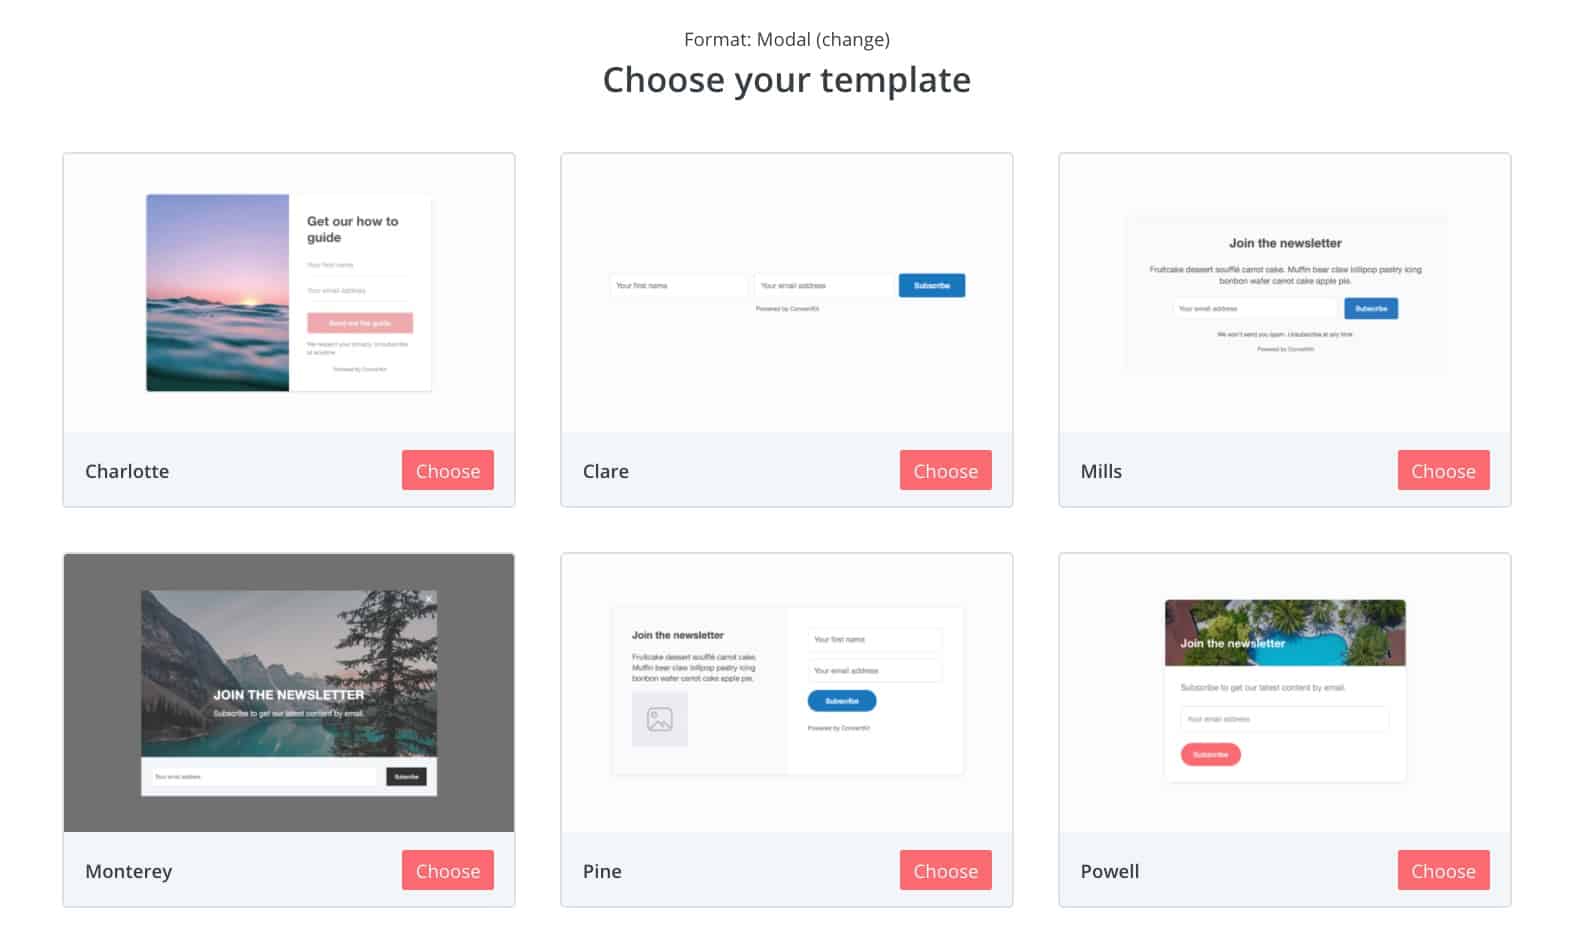
Feel free to experiment here, but in my case, I chose modal. Next, you’ll see a selection of pre-built templates. Take a look at the closest one you like, then click on choose.
You can upload images, customize the copy, and add more fields. That’s really up to you. But there are two things I want to highlight here.
First, go to the settings tab. Toggle the redirect to an external page then paste the GoViral URL there. If you chose to publish it on your own site (step 3) or decided to go with the GoViral URL (step 2), that’s what you paste here.
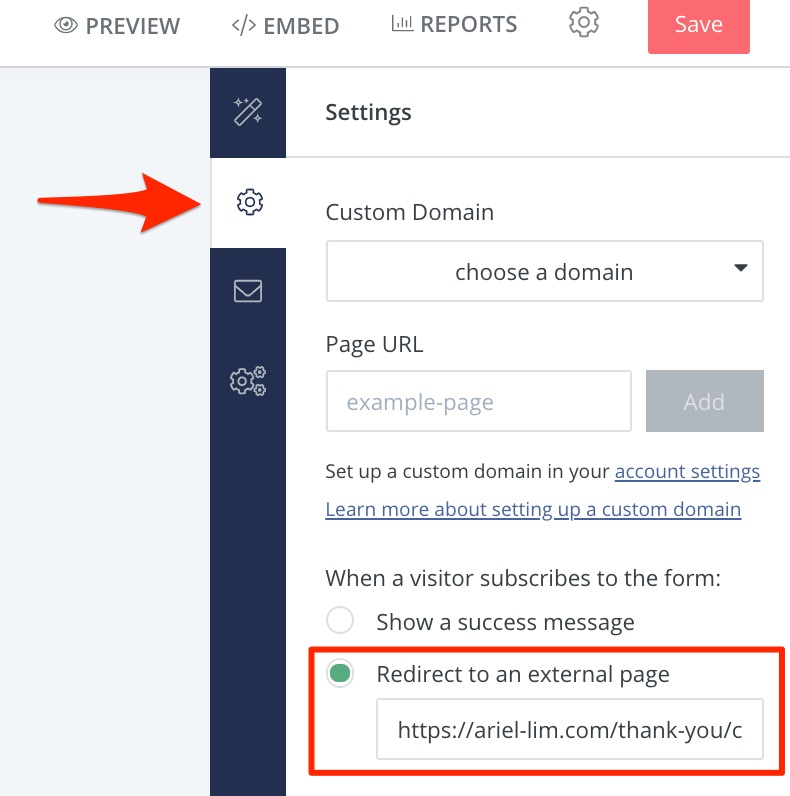
Don’t skip this part. If you don’t do this, then new form submissions will just show the generic success message. But since we want that virtuous cycle, you need to add the GoViral URL here.
Next, go to the Incentive Email tab. In the section for “after confirming redirect to:” click the URL then paste the URL of the content upgrade in Attract you made in step 4.
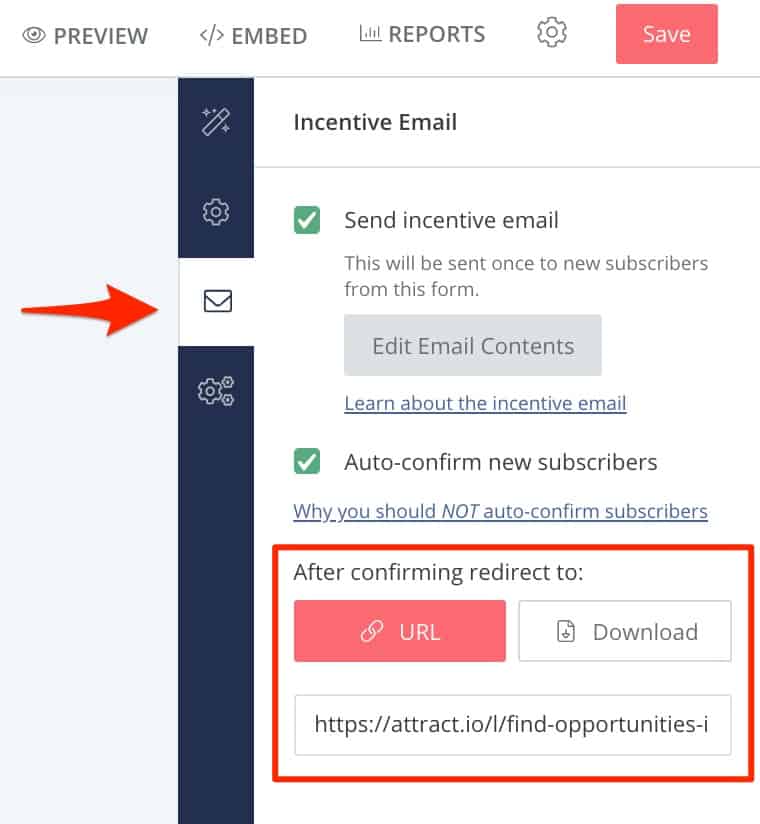
Remember, this is the main lead magnet, your content upgrade—not the bonus material.
Lastly, click on the edit email contents then personalize it. This email is normally for confirming email subscribers. So, the default text is written like that. But since we’re using it to deliver the PDF download, you have to edit it to make it look that way.
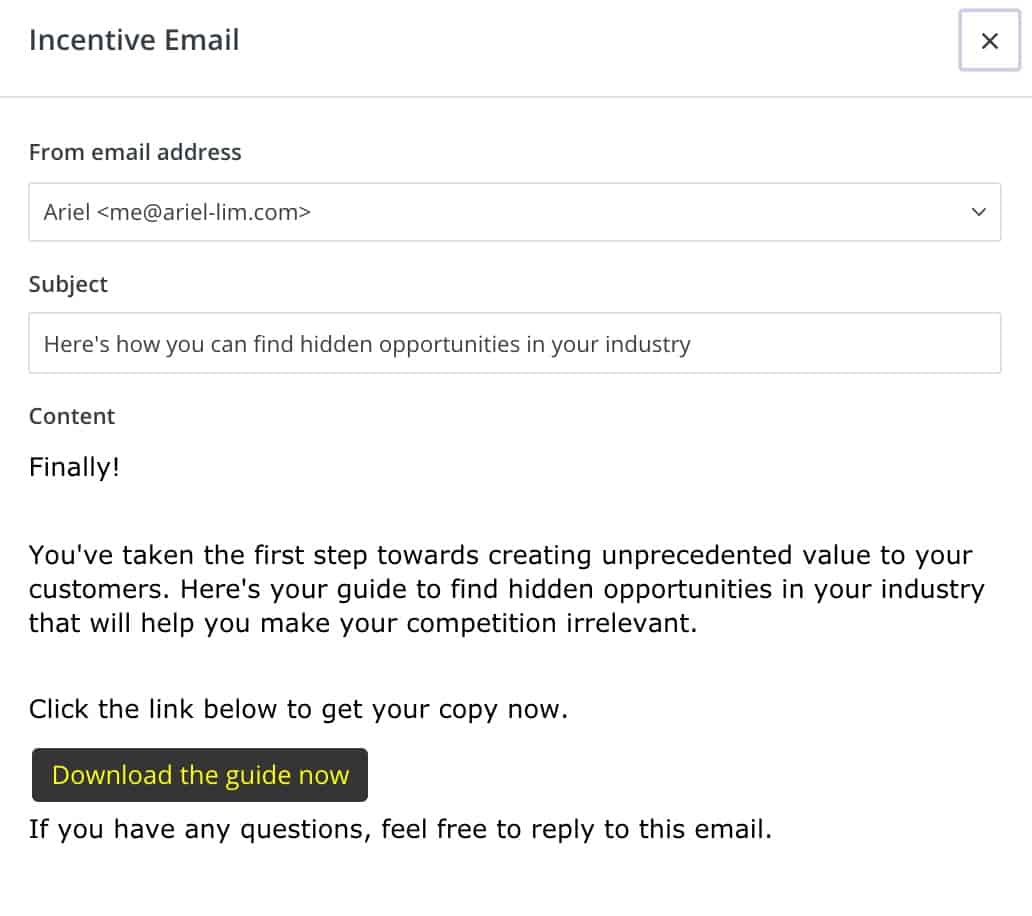
If you don’t, there will be a very confusing user experience for your readers. They’ll opt to download a PDF guide to something. Then, they’ll receive an email asking them to confirm their email subscription.
Don’t let yourself be in that position.
6. Add the form to your website
By now, you have your bonus upgrade on a GoViral page. You also have your backend setup to deliver the content upgrade. Now, it’s time to display this to the front end.
I chose modal (or popup) earlier. But if you choose inline or slides, the process will be similar.
Go back to the settings tab and I’ll show you two options you need to configure.
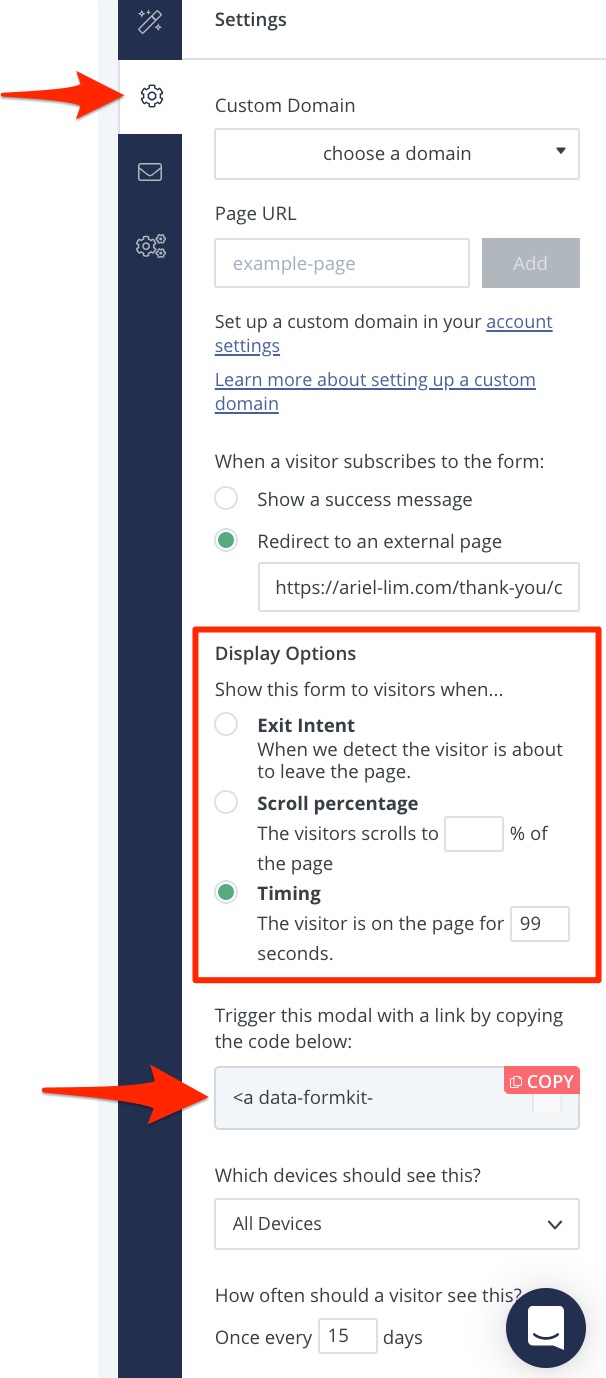
First, the display options. How do you want the form to be displayed? You are given three options:
- Exit intent
- Scroll percentage
- Timing
Depending on your goals and your “aggressiveness,” this will differ. In my case, I don’t want to appear pushy and mess up the user experience as what most sites do.
So, I chose timing then add a timer for 999. That means they’ll have to spend over 15 minutes on that page before the popup appears. Most websites make their popups appear as soon as the page loads. This is very annoying to me as a user so I don’t want my visitors to experience the same.
I might change it to exit intent in the future. But for now, I only want them to see the form when they want it. That’s why the next step is important. I want my visitors to see the form when they clicked on a button or a link on my website. That’s there the trigger comes in.
Before going into the details, I’ll show you what it looks like on my site first. For example, I added a call-to-action on the buyer utility map post.
If you click on that link, the modal form will show up.
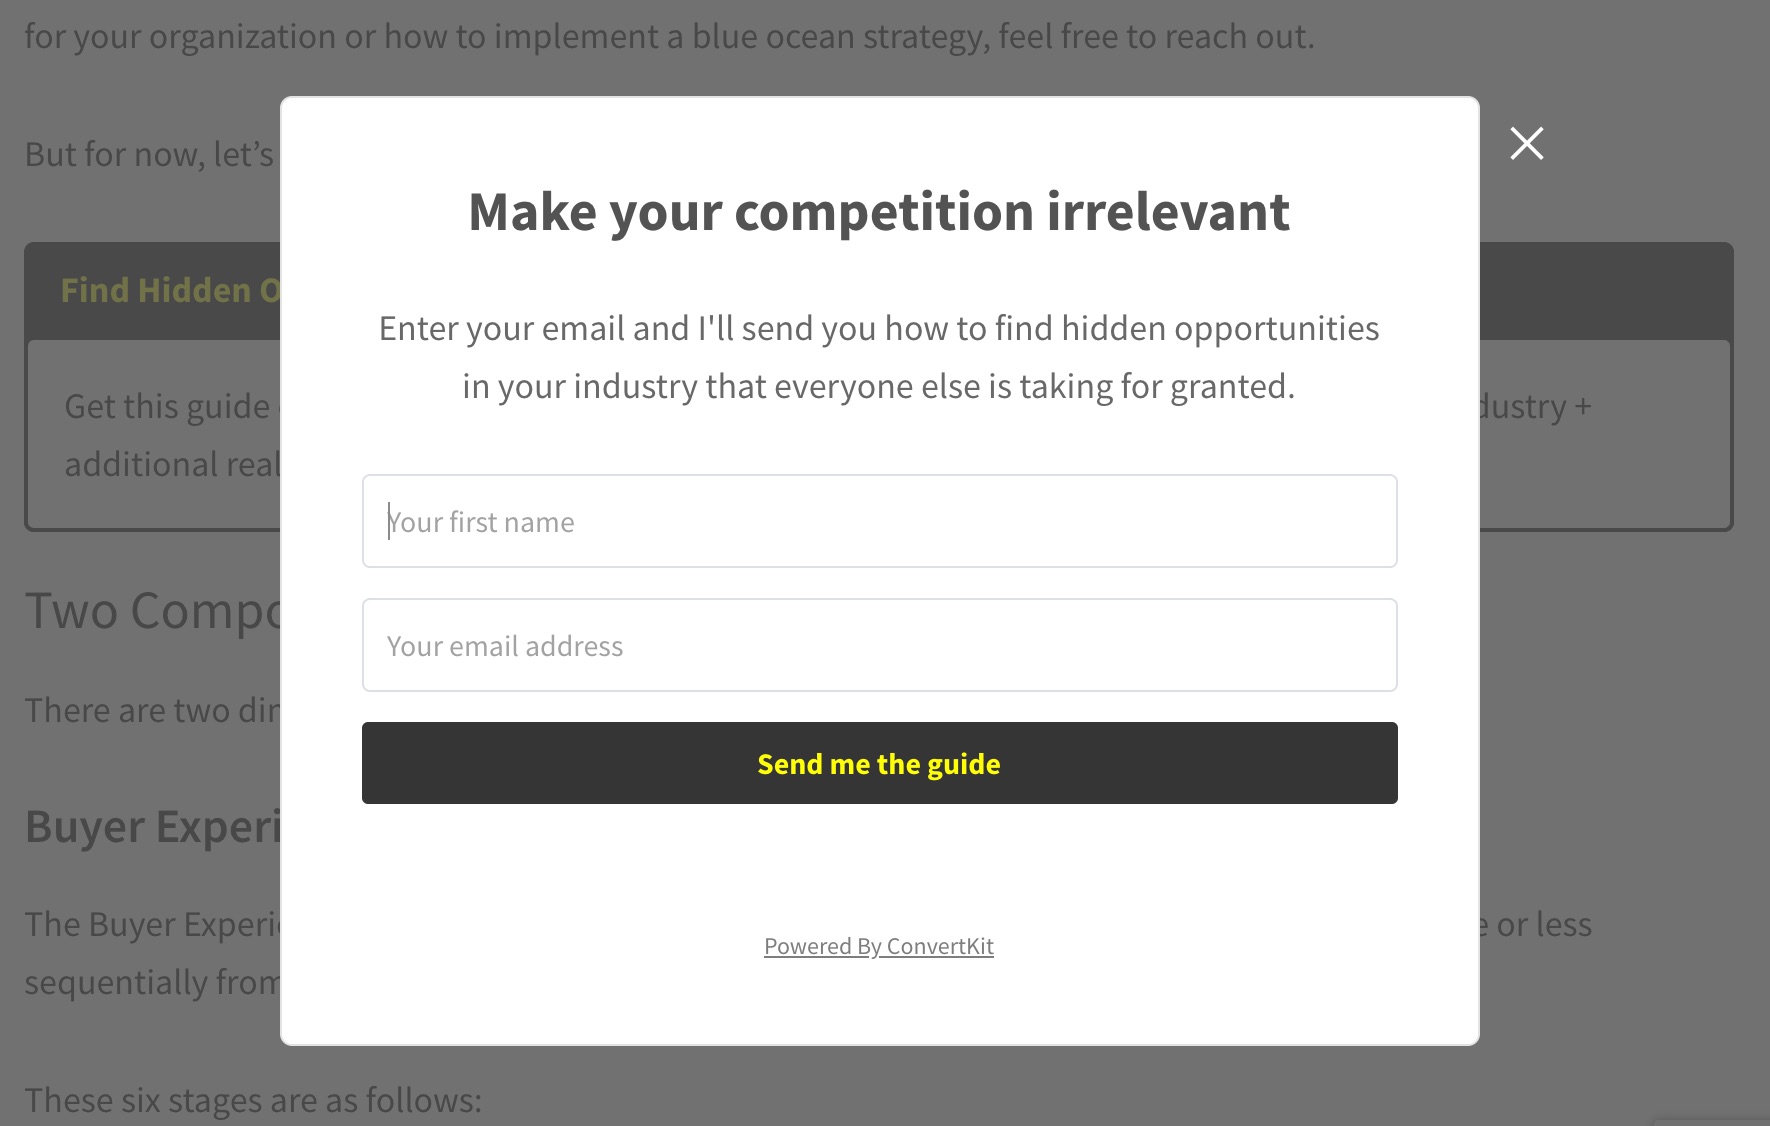
I added it in the middle and at the end of the article.
For some of my posts where I applied the same tactics, sometimes it’s at the beginning (3rd paragraph) and at the bottom. It’s really up to you to find out what’s best. In some post, I have an inline form instead. But, after filling out the form, redirects them to a GoViral page too.
To add the form, you need to add the the code on your website where you want it to display. The lazy way of doing this is add the code on all your pages, but it defeats the purpose.
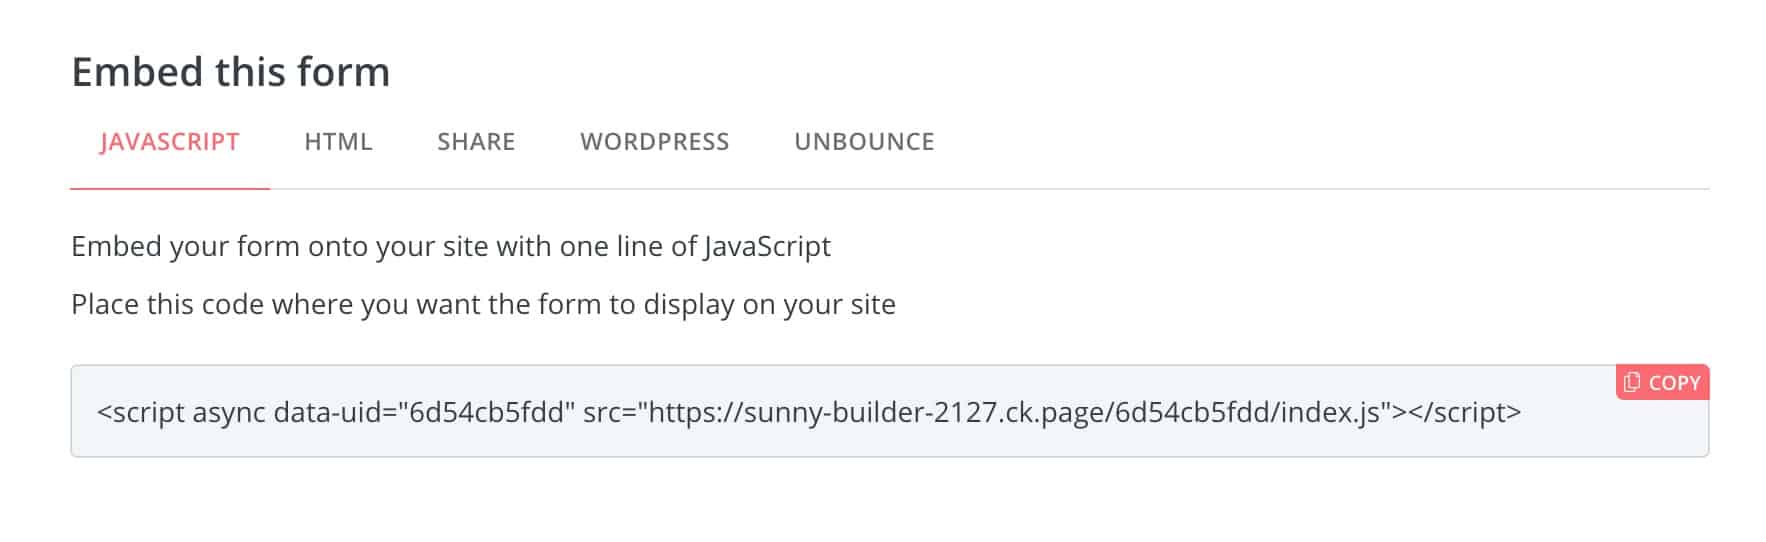
Head back to ConvertKit and click the embed button at the top of the form you want to add.

You’ll see several options. For the modal popup to work, you need to include the javascript code on the page itself. If you are using inline, then the WordPress or HTML code will work by itself. Copy the javascript code.
Next, edit the page or post on your website. Scroll to the bottom where you can add the header scripts, then paste it there (which is similar to adding the GoViral code above).
If you’re not using the Genesis Framework, you can still follow the same instructions in this next part but add it to the top of the HTML code.
Adding the javascript code will get your form to behave depending on the display options you chose (exit intent, scroll, or timing). But since I want it to also display when people click on a link, we’ll have to add that code in.
Go back to your form again and copy the code in the trigger this modal with a link by copying the code below. Then, go back to your page/post. From here, you have various options:
- You can paste it directly on your WordPress Editor
- Add an HTML block and edit it like that
- Add some styling around it
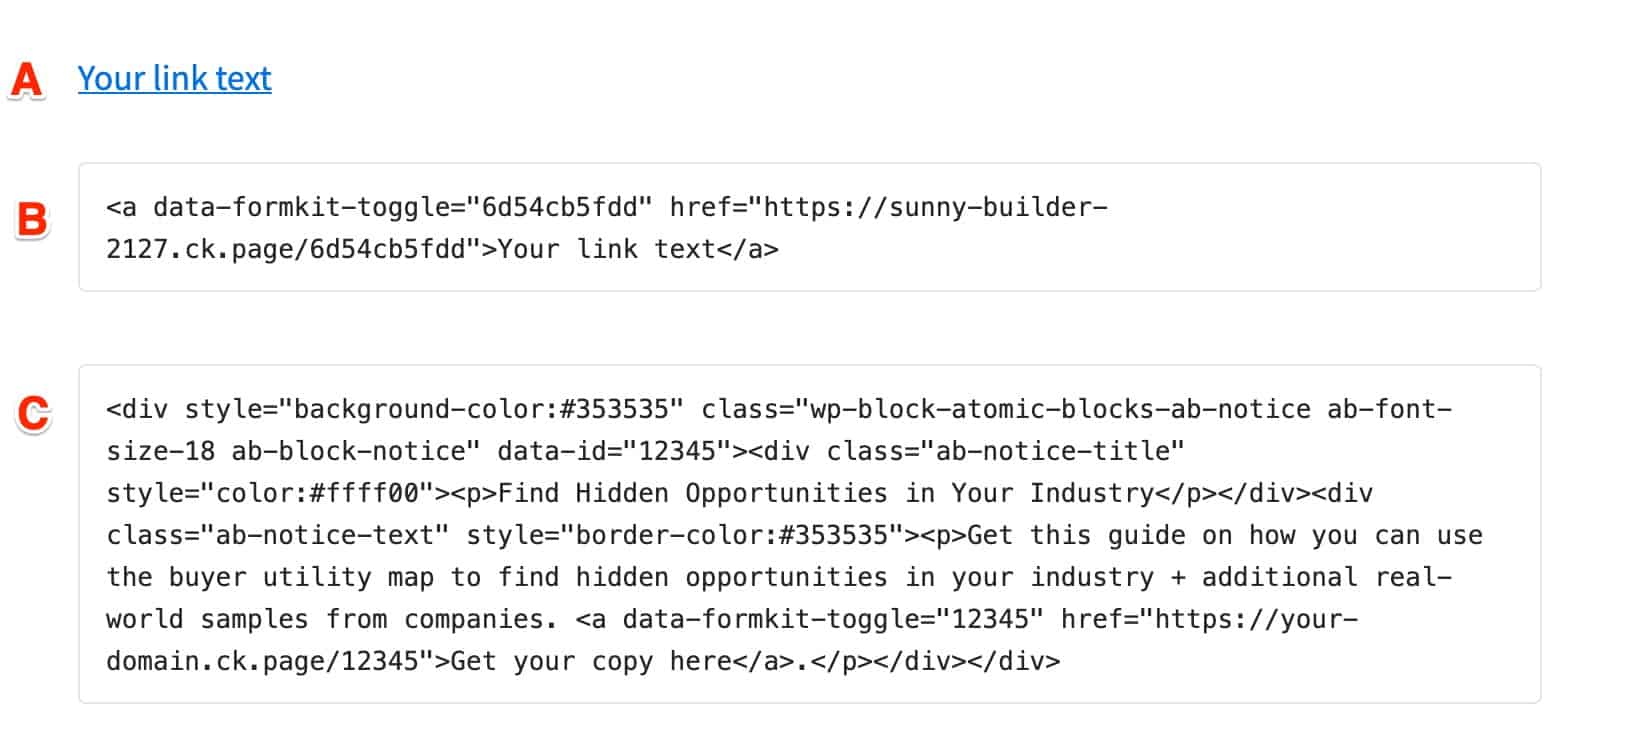
You can also use an image then add the link to it. It’s really up to you. But what’s important is you add the code here. Once people click on that link, the form will pop up. Try it out below.
7. Test the entire setup
Once you’re done, fill-out the form to see how the entire process looks like.
- Check of the form is triggering properly
- After entering your email, do you get the right incentive email
- Check the link in that email — is it the main content upgrade?
- After you submitted the form, did it redirect you to the GoViral page?
- Try the CTA
- Did it work?
- Try downloading the bonus content
If everything works, then congratulations. You’ve set everything up properly. Now, repeat the steps for your top 3-5 posts.
Over to You
I’m a huge fan of testing. That’s why I wrote this article to share what I’m working on. One of my best pieces that got featured in Search Engine Roundtable is also about testing—How to Use Google Optimize.
No matter what other experts tell you, they are not guaranteed. Nothing is. You have to test it yourself to find out. That’s why the title for this post is the promise of 10-20% lead conversion rate. I just finished implementing it and only time will tell if my conversion rates increase.
Is there a strategy that you want to implement? Or is there one that you just tried? How was it? I’d love to hear your thoughts.
