[Important Update] As of April 17, 2019, Buffer already discontinued the feature I used in this post. That means the contents of this post won’t work anymore. I’ll update this again once I find a workaround.
Are you using IFTTT and Buffer to schedule your social media posts but can’t seem to post to selected accounts?
The basic recipe for IFTTT goes like this: If (insert activity here), then add to Buffer. For example, mine looks like this: if I favorited an article in Pocket, add to Buffer.
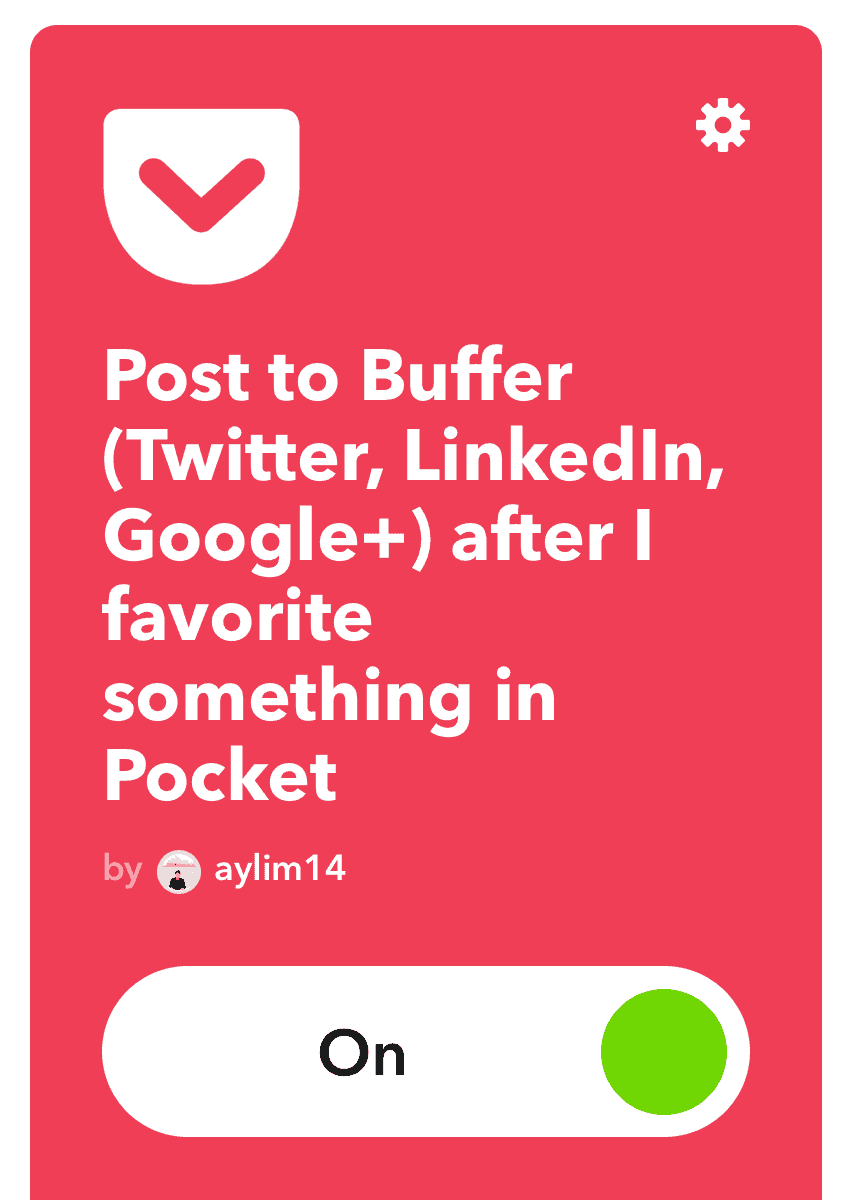
Problem 1: IFTTT Only Allows You to Post to a Single Account
As simple as it sounds, this setup is actually not that straightforward. If you tried this yourself, you’d realize that IFTTT only allows you to post to a single account in your Buffer profile.
You can customize this in the settings. On a browser, login to IFTTT. Click on your profile > Services > Click on Buffer > Settings (top-right) > Edit Connection. Mine is set to my Twitter profile.
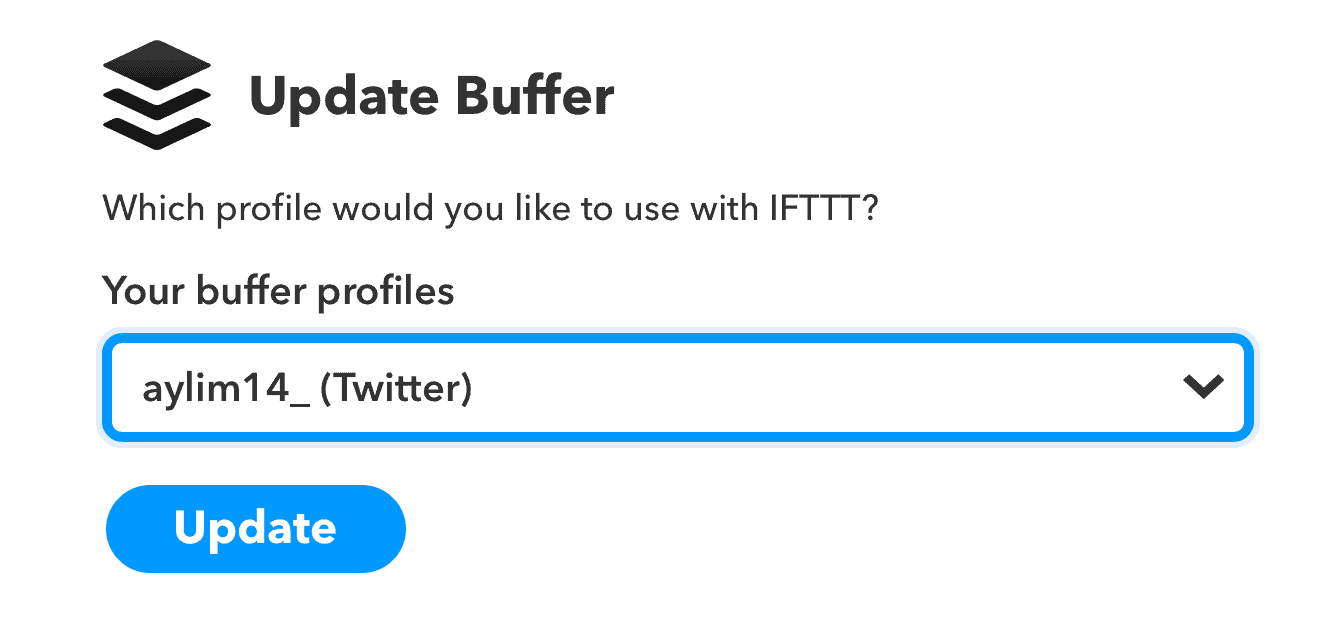
But, that’s now what you want, right? You want to be able to post to multiple accounts at once, or all of them.
The Solution: Email to Buffer
So, after spending time researching, you probably found your answer: Email to Buffer. While not originally designed for IFTTT, you can actually use this method to post to one or all your accounts.
All you need to do is connect your Gmail account with IFTTT and create a recipe with the that portion using Gmail.

Problem 2: Email to Buffer Posts to All Your Accounts
The email to Buffer works just fine when you want to post to all your accounts by default.
It’s simple to setup. You only need to remember these two things:
- Subject line —> contains the text/caption you want to post
- Body —> contains the link and image you want to be included
If you think about it, this gives us another problem. What if you don’t want to post to all your accounts, but only to selected ones?
For example, you have a Facebook page, Twitter, and Instagram connected to a free Buffer account. When you use the email to Buffer method, you’ll get an error if the post you tried to send doesn’t have a photo.
In my case, after I favorite an article in Pocket, the IFTTT recipe will run and send an email to Buffer.
But since I’m sharing an article, there’s no image.
This will give an error and won’t schedule anything to Buffer.
Solution: Advanced Commands
In your email settings in IFTTT, you can actually choose certain profiles or accounts to send to. Here’s an example where I only chose to post on my Twitter and Facebook accounts:
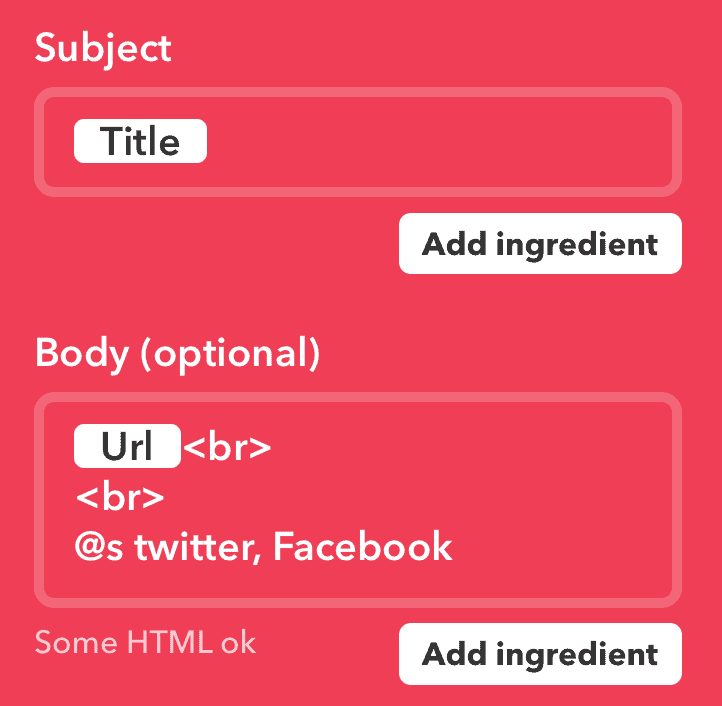
This solves our problem already, right?
We get to choose which profile to send by using the @s command and adding the social media accounts.
Not quite.
Problem 3: Multiple Accounts in One Social Media
If you’re like me (I’m have Pro account, btw), I have multiple accounts under the same social network. For example, I have 2 Facebook Pages, 1 Twitter account, 2 Instagram profiles, my personal Google+ and LinkedIn accounts. (Feel free to follow me and say hi! 👋)
If you use the settings above, Buffer will post to the two Facebook pages I have in my Buffer account. And that’s something I don’t want to happen.
Both pages are for different clients.
So, this method won’t work.
Potential Solution: Use @p to Identify Specific Profiles Instead
There’s the profile method: @p profile_name. This might work, but it depends on your setup again. For example, here’s how it might look:
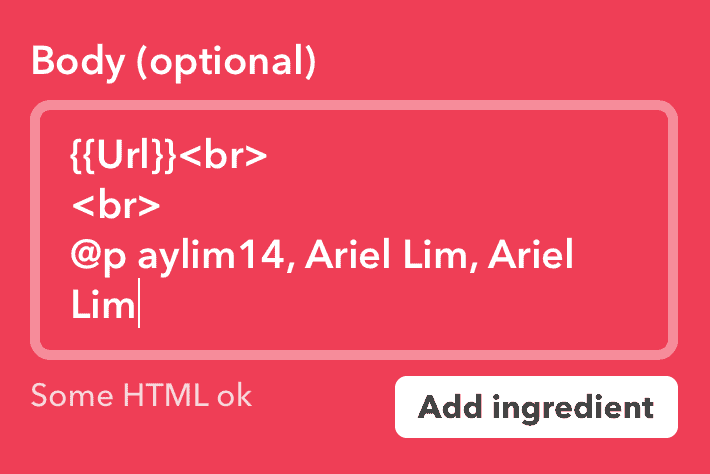
If you noticed, I have two “Ariel Lim” in the field. This represents my LinkedIn and Google+ accounts. As you can see, this already poses an issue.
I actually don’t know which of those two accounts my post show up. If I only use one Ariel Lim, will it post to my LinkedIn or Google+?
Here’s another scenario where this becomes an issue. My Twitter and Instagram profiles have the same name — @aylim14_.
So if I want to post a link, and since Instagram doesn’t support posts without images, this will give you an error.
Potential Solution: Combine @p and @s Depending on What You Need
In theory, yes.
But with all my experimentations, I can’t get this to work.
For example, I only want to post to my Twitter, LinkedIn, Google+ and one Facebook Page. I’d have to use something like this:
@s Twitter, LinkedIn, Google+
@p Facebook_PageName
But this seem to always give me an error.
Again, depending on the specific names in your account, this might work for you. You have to test it yourself.
Or…
The Real Solution: Use Unique Profile IDs for Your Social Media Accounts
After a lot of experimentation and help from the Buffer support team, this method allows you to post to selected profiles without worrying about errors or which one of them will it be posted on.
Here’s how this might look.
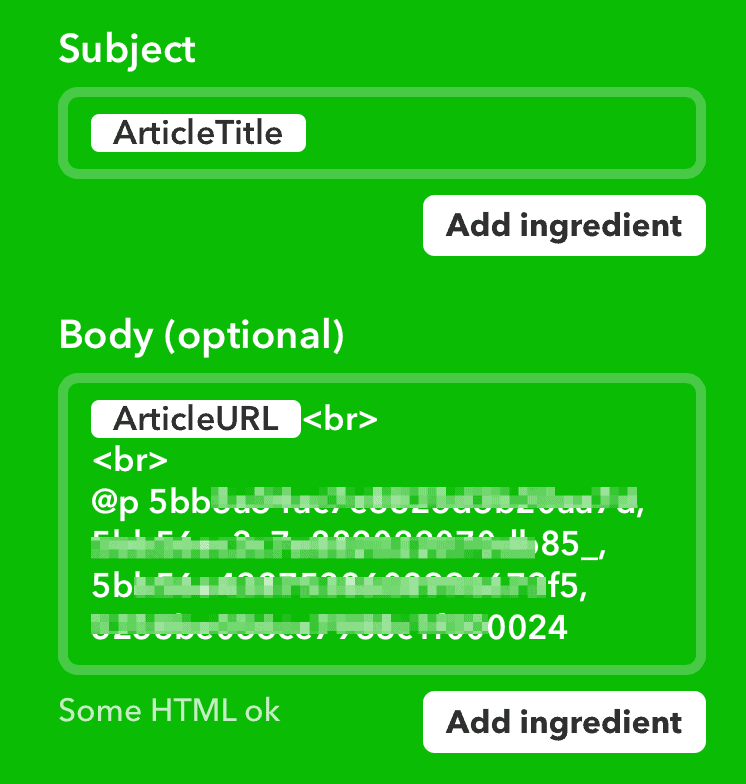
My Setup
If you noticed, the color turned to green because this is for a different recipe and app — Feedly.
The recipe goes like this: if I add an article to a board in Feedly, email to buffer.
I have several recipes for this because apart from my own reading, I use this to stay updated on my client’s industries. And if I also handle their social media accounts, this is how I curate some posts.
I read in Feedly. Then, when I read something I like and want to share, if it’s for Client A, I save it to a personal board (Board A). If it’s for Client B, it goes to Board B.
Each of this workflow has its own IFTTT recipe. The email to Buffer, therefore, has to be customized so that when it’s for Client A, I only post on Client A’s social media accounts, and not Client B’s.
Here’s how you do it.
Step 1: Locate your unique profile IDs
You can find your unique profile ID inside Buffer by logging in then clicking on each social account, check the URL and get the alphanumeric text there.
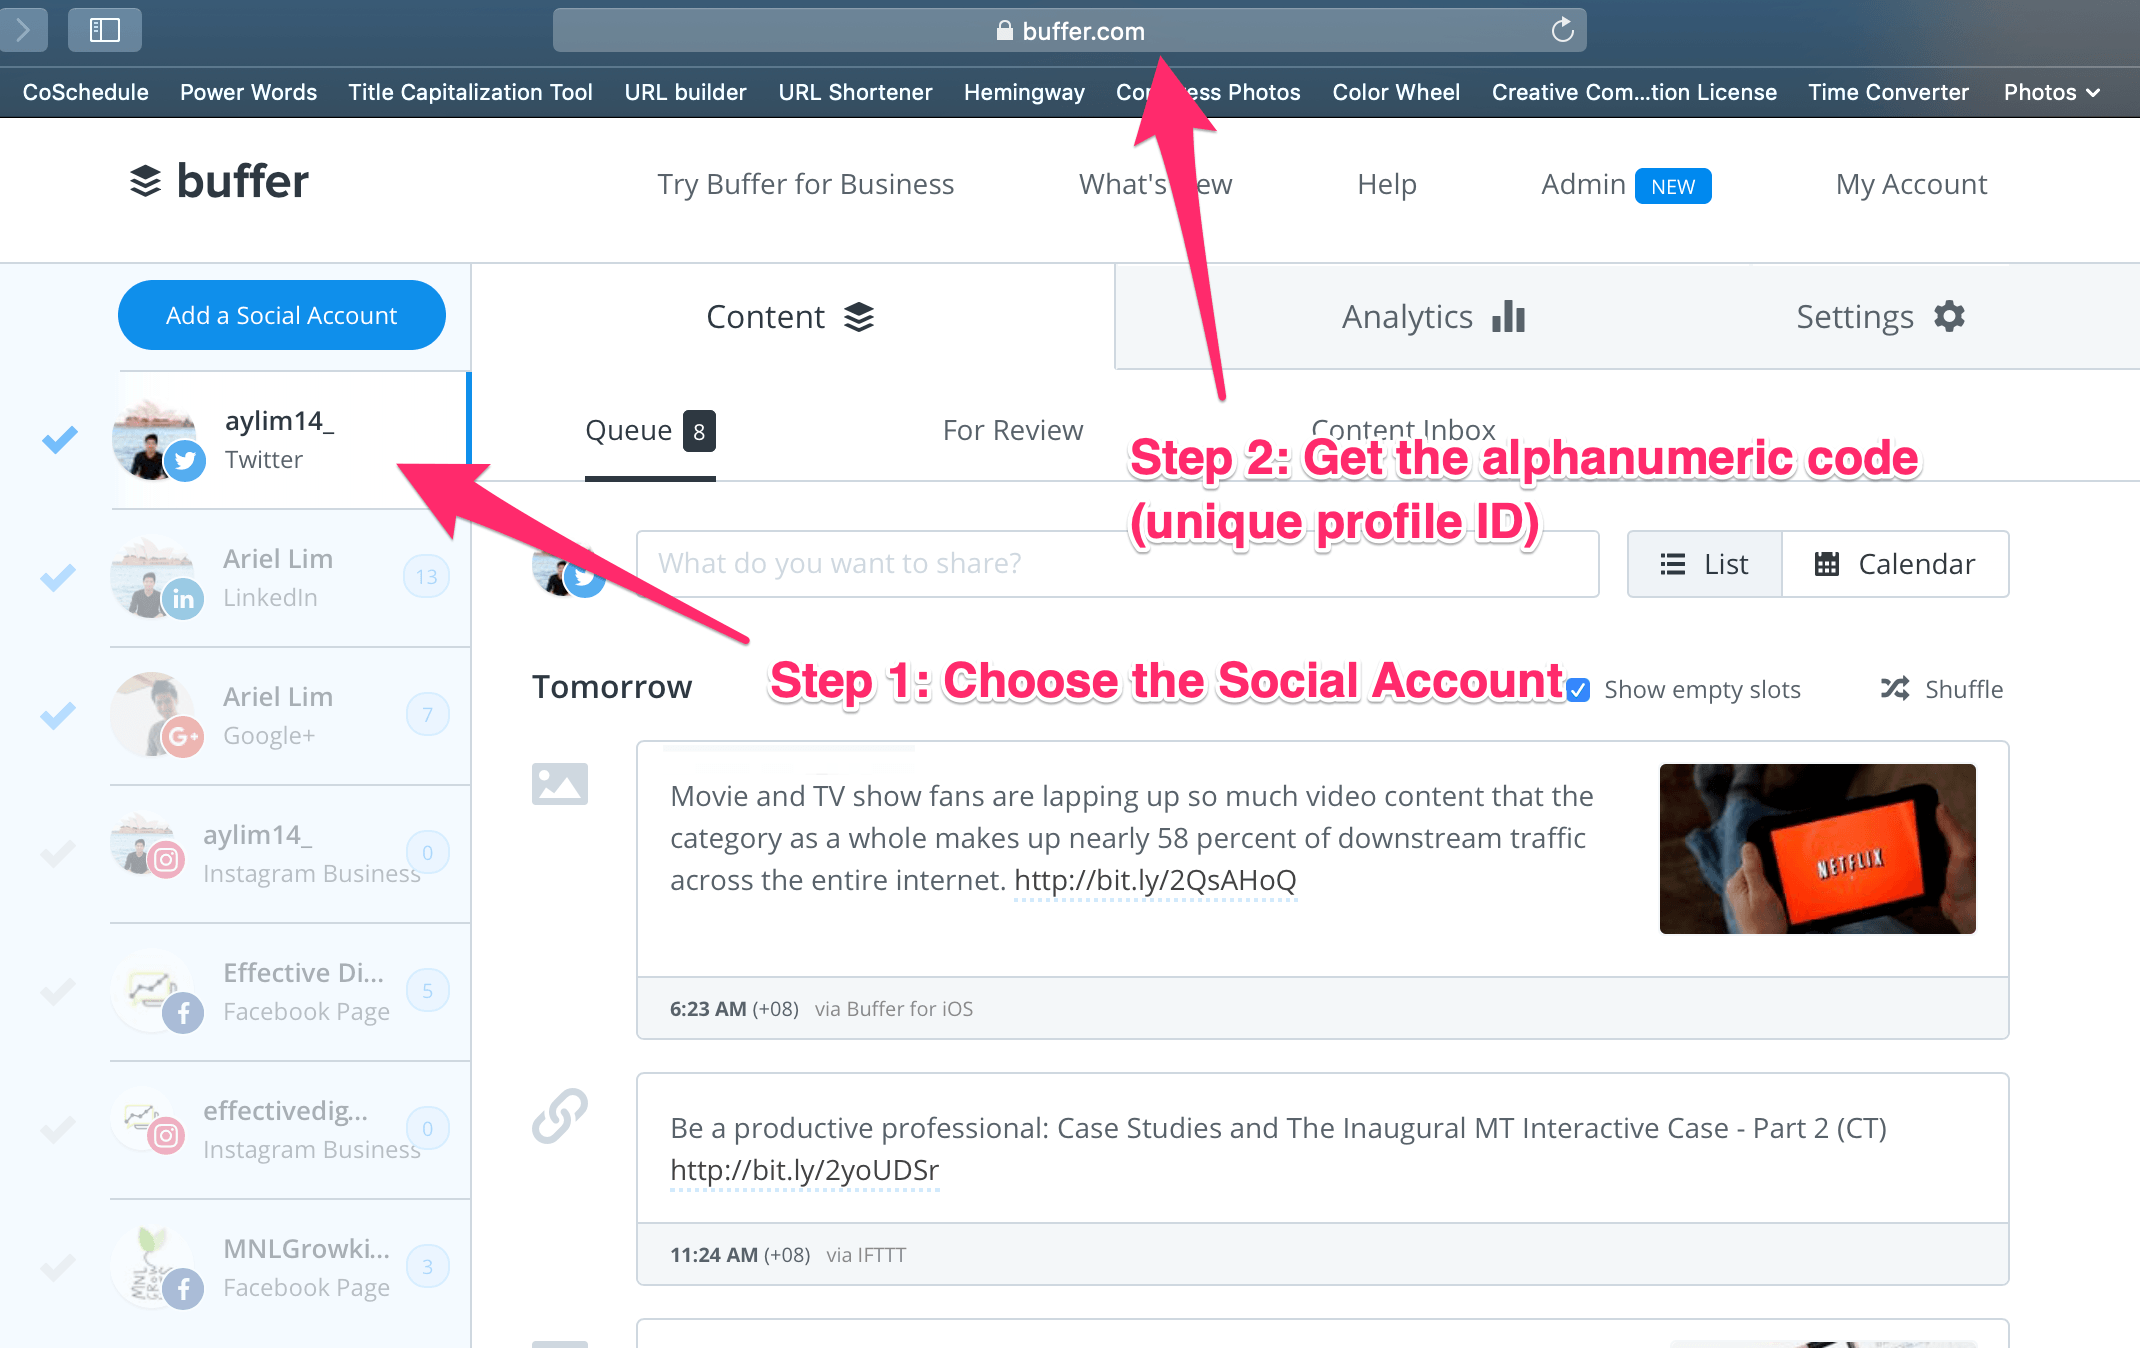
Go through each of your accounts using this process and save it to a place where you can easily reference it. This is what you’ll use in step 2 below.
Step 2: Use it with the @p method
Once you have each of those unique IDs, it’s time to create your recipes.
Again, this depends on your specific workflow. In my case, I have 2 separate recipes for my 2 clients. That way, when I add an article to Board A, it gets scheduled to Client A’s social media accounts and my personal Twitter account.
I also have another IFTTT recipe for Client B, where I share to their Facebook Page only.
As you can see, this method solves all your worries when it comes so posting to Buffer from an IFTTT recipe. You can customize this further depending on how you see fit.
For example, I created another recipe where after I publish a post on this website, it gets added to only my Twitter, LinkedIn, and Google+. It doesn’t get posted on my client’s accounts.
Your imagination is your limitation.
Did this solve your Buffer-IFTTT problem? Let me know in the comments below!
