Commandment 10: Never Stop Learning

img 0916

We are all busy. You are busy. I’m busy. Correct? 

Great. 

Now that we admitted that we’re just lying to each other, let’s get down to the real deal. But first, I have to tell you something. 

I have used busyness as an excuse numerous times. Sometimes, I really am busy. But often, I say it to get out of something like hanging out with (toxic) people; or telling myself that I’m doing something worthwhile; or simply have something to say. 

I recently came across this video on Twitter. I’m not really sure if it’s true or just a meme or something. But it made me think back to all the times I have used the words “I’m busy” to someone — my boss, my client, my family, and my friends. 

But the truth us, busyness shouldn’t stop us from doing what needs to be done. We all have commitments. And regardless of how much time it takes or activity we do, what matters is that we fulfill those obligations — at work, our family and friends, and even our community. 

Our World Is Constantly Changing

You already know this. Our world is constantly changing. Regardless of your industry, technology is changing every business sector

Everything changes.

Heraclitus

What that means is if you don’t keep up, you will eventually get left behind. And this has happened to me lots of times. 

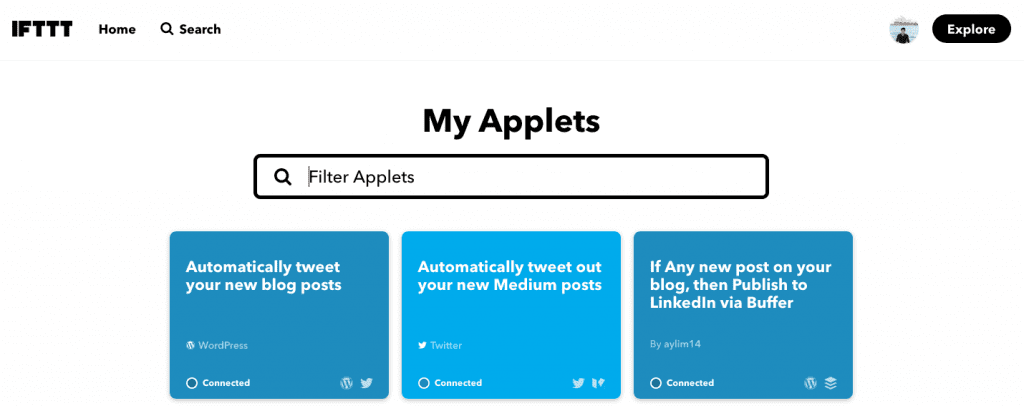
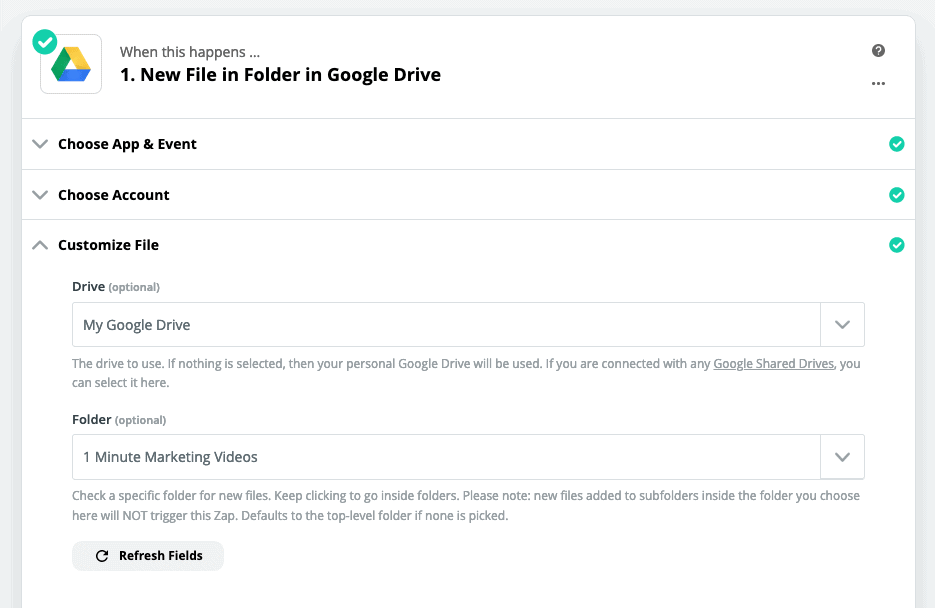
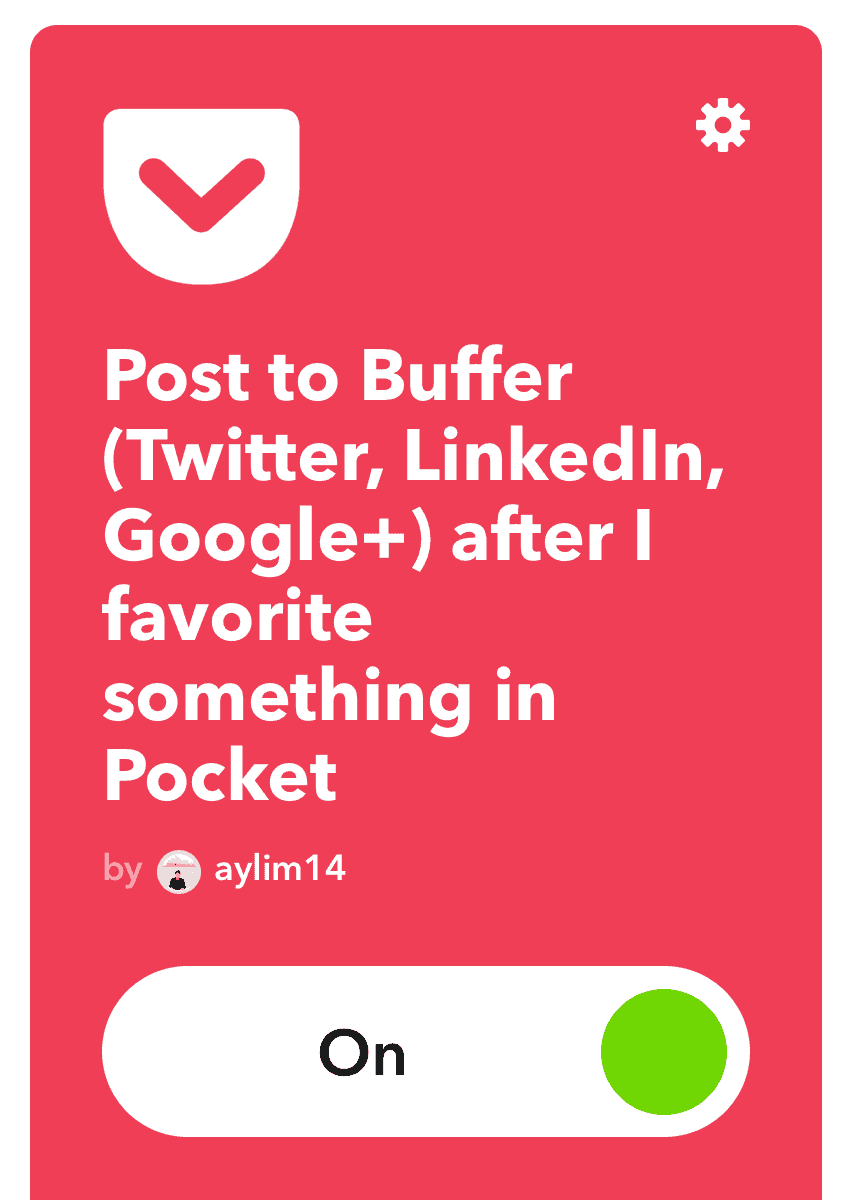
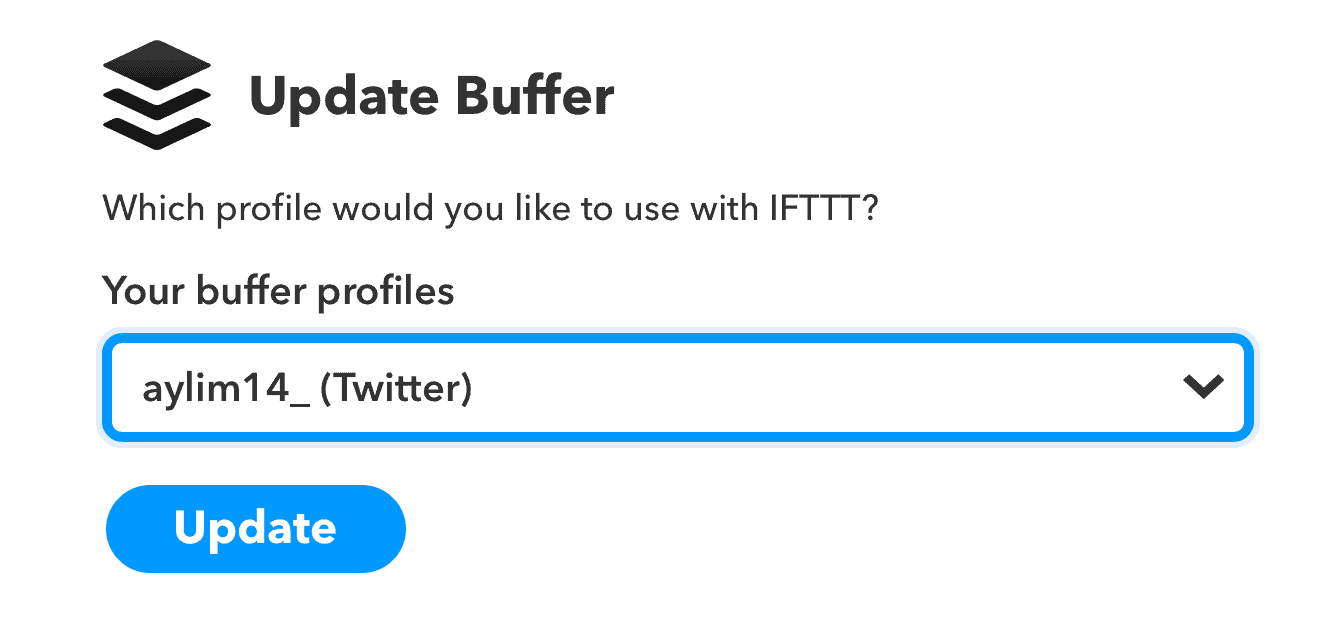
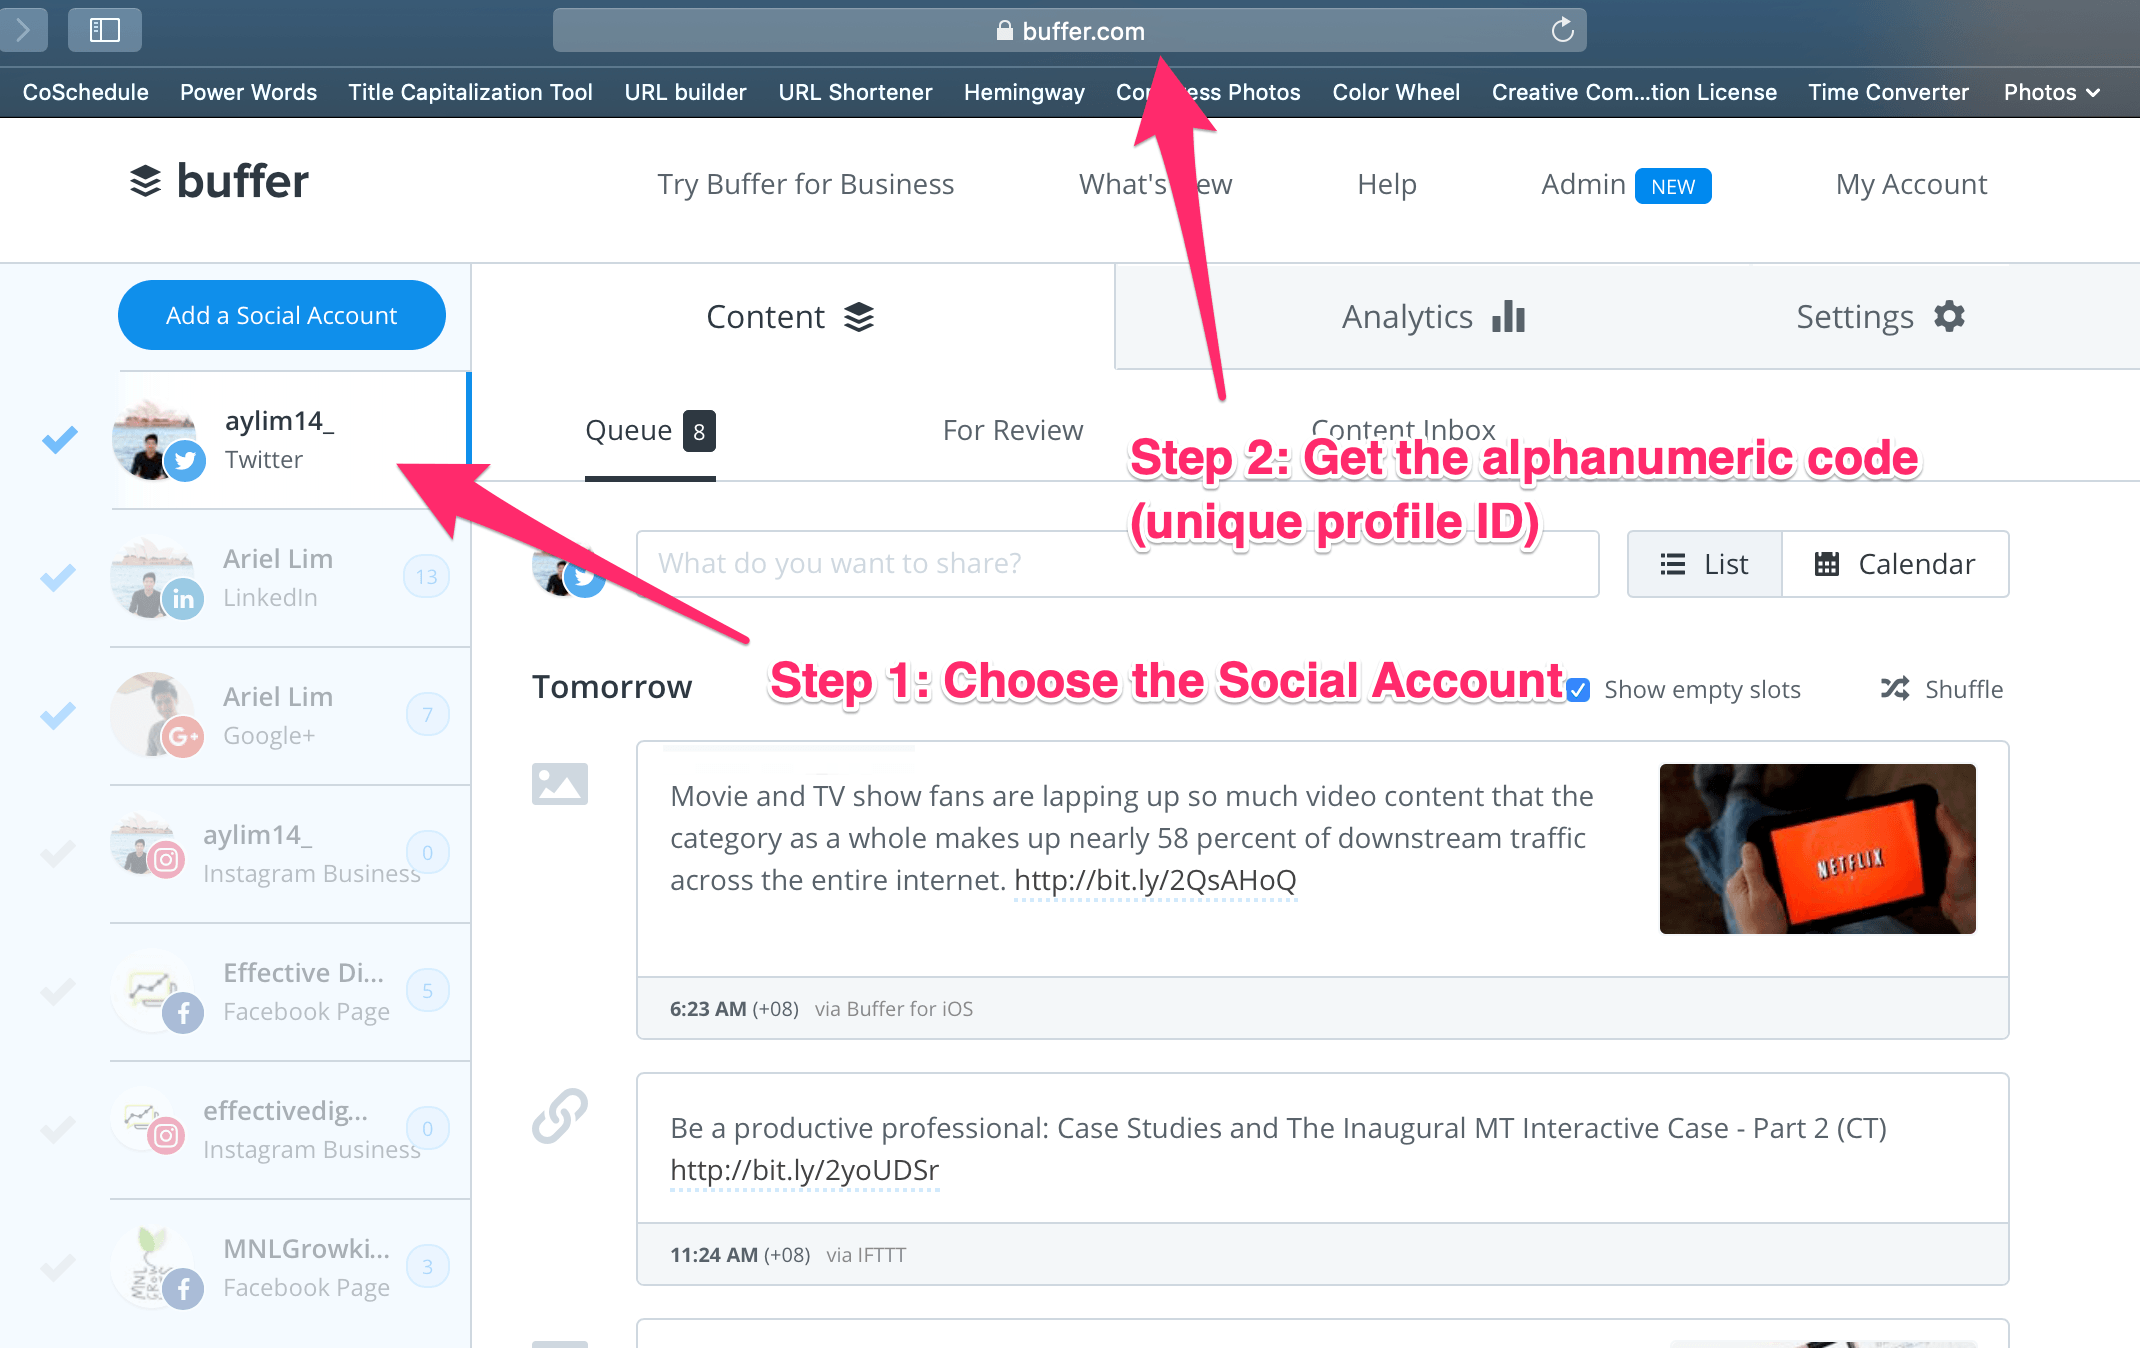
I wrote an article about how to use Buffer and IFTTT together to overcome a specific challenge for me — which I later found out that many people are having as well. After ~6 months, Buffer discontinued the feature that I used in that post. 

Because I didn’t keep up with the news that time, it took me 3-4 more month before I found out about it. In that time, a lot of people have seen that article. Unfortunately, it was not updated and no longer working. 

I kept saying I was busy. Frankly, that’s partly true. At that time, I recently started with a new client. So I’m spending my available time reading up on the industry and learning about the business. 

Looking back, I know if I kept up with my reading, it would only take me less than 5 minutes to fix the article. That’s not even a fifth of a show in Netflix — which I have been binge-watching with my wife every night.

Fortunately for me, it’s just an article. I’m not selling anything. So, it didn’t affect me directly. But what if it’s something that is relevant to your business? What if it’s something your customers use frequently with your app/product but because you didn’t update it, you received tons of complaints. 

How to Dedicate Time for Learning and Growth

First, let’s get one thing out of the way — you don’t know everything. That is why it is necessary to keep learning no matter what. 

You circumstances also aren’t an excuse:

  • You’re just a fresh graduate
  • Just had a baby
  • An entry-level person
  • have multiple businesses
  • Have debt

Learning is free. And while I’m advocating using technology to automate your learning, you can do this without spending anything. 

All you need is your time and commitment. 

I recommend at least an hour a day. That’s 60 minutes. Sometimes you spend more time, sometimes less. And that’s okay. The most important takeaway is that you allocate time to learn new things. 

Here are 5 tips to help you do that. 

Use technology to your advantage

Automation helps you do the mundane things so you can spend your limited energy to do the more important things. 

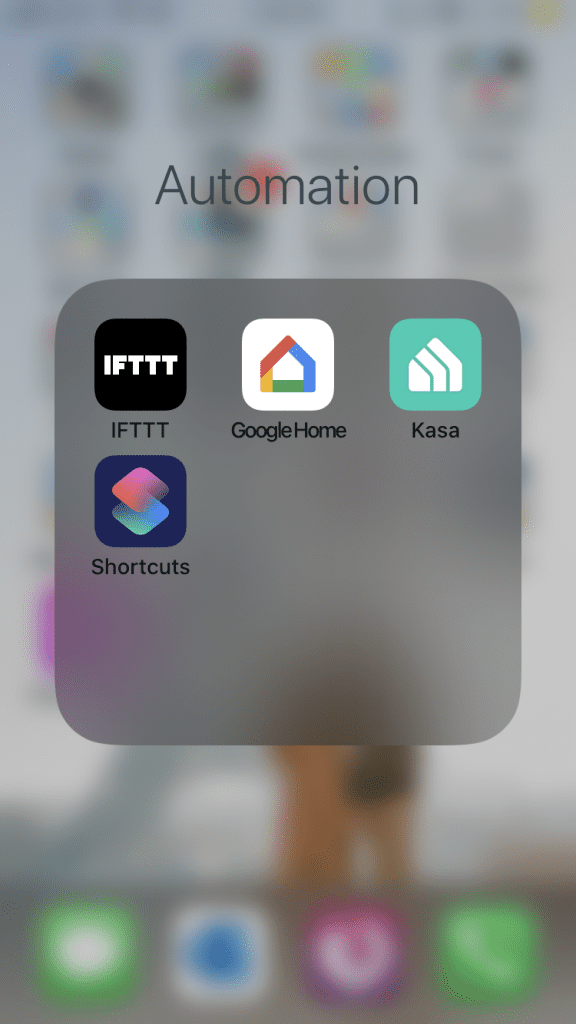
I use two apps for my learning and growth session:

While I can combine the two apps, I decided to keep them separate. Feedly allows me to glance stories (from the websites I added) very fast. By browsing through the headline titles, I get updated on what’s happening. Some topics I included are the following:

  • Local news
  • Digital marketing
  • Advertising
  • Design
  • Business
  • Economy
  • Technology 

If I find something that interests me, I click on the title then read it further. If it’s longer or needs a dedicated time to read and understand it, I save it to Pocket. 

Pocket is an app where you can store articles and videos for later. This is the app I use if I want to really dive in the articles and process it. 

As you can see, they serve two different needs. That’s why I kept them separate. 

Setting up Feedly is very simple. After you create an account, you can simply press the + button to add new content. You can browse the categories or add specific websites you want. 

Add websites to your Feedly account

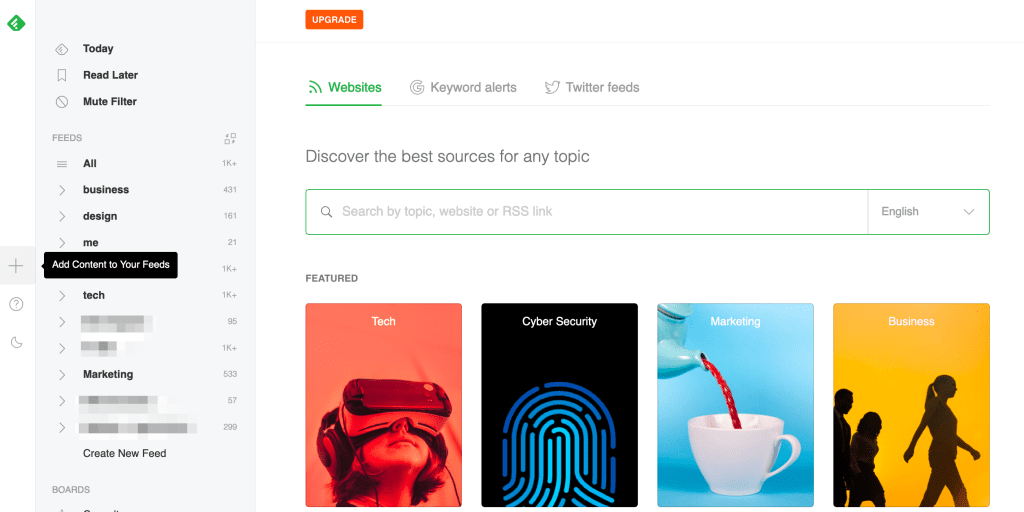
I recommend browsing through the different topics that interest you. Then, add in 2-3 websites of reputable local news. Then you’re all set. 

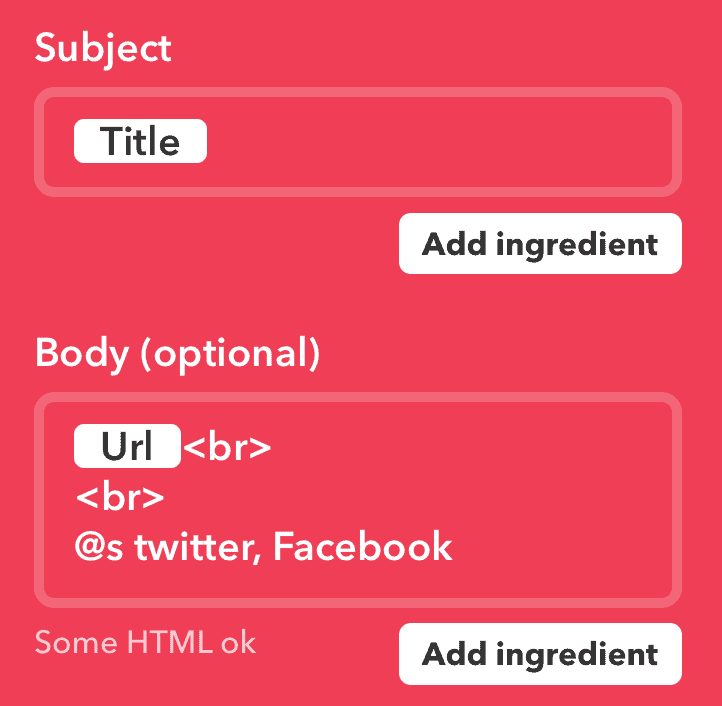
For Pocket, I use IFTTT to automatically add new articles from websites I trust. Feel free to check out that article so you can also automate this process — for free.

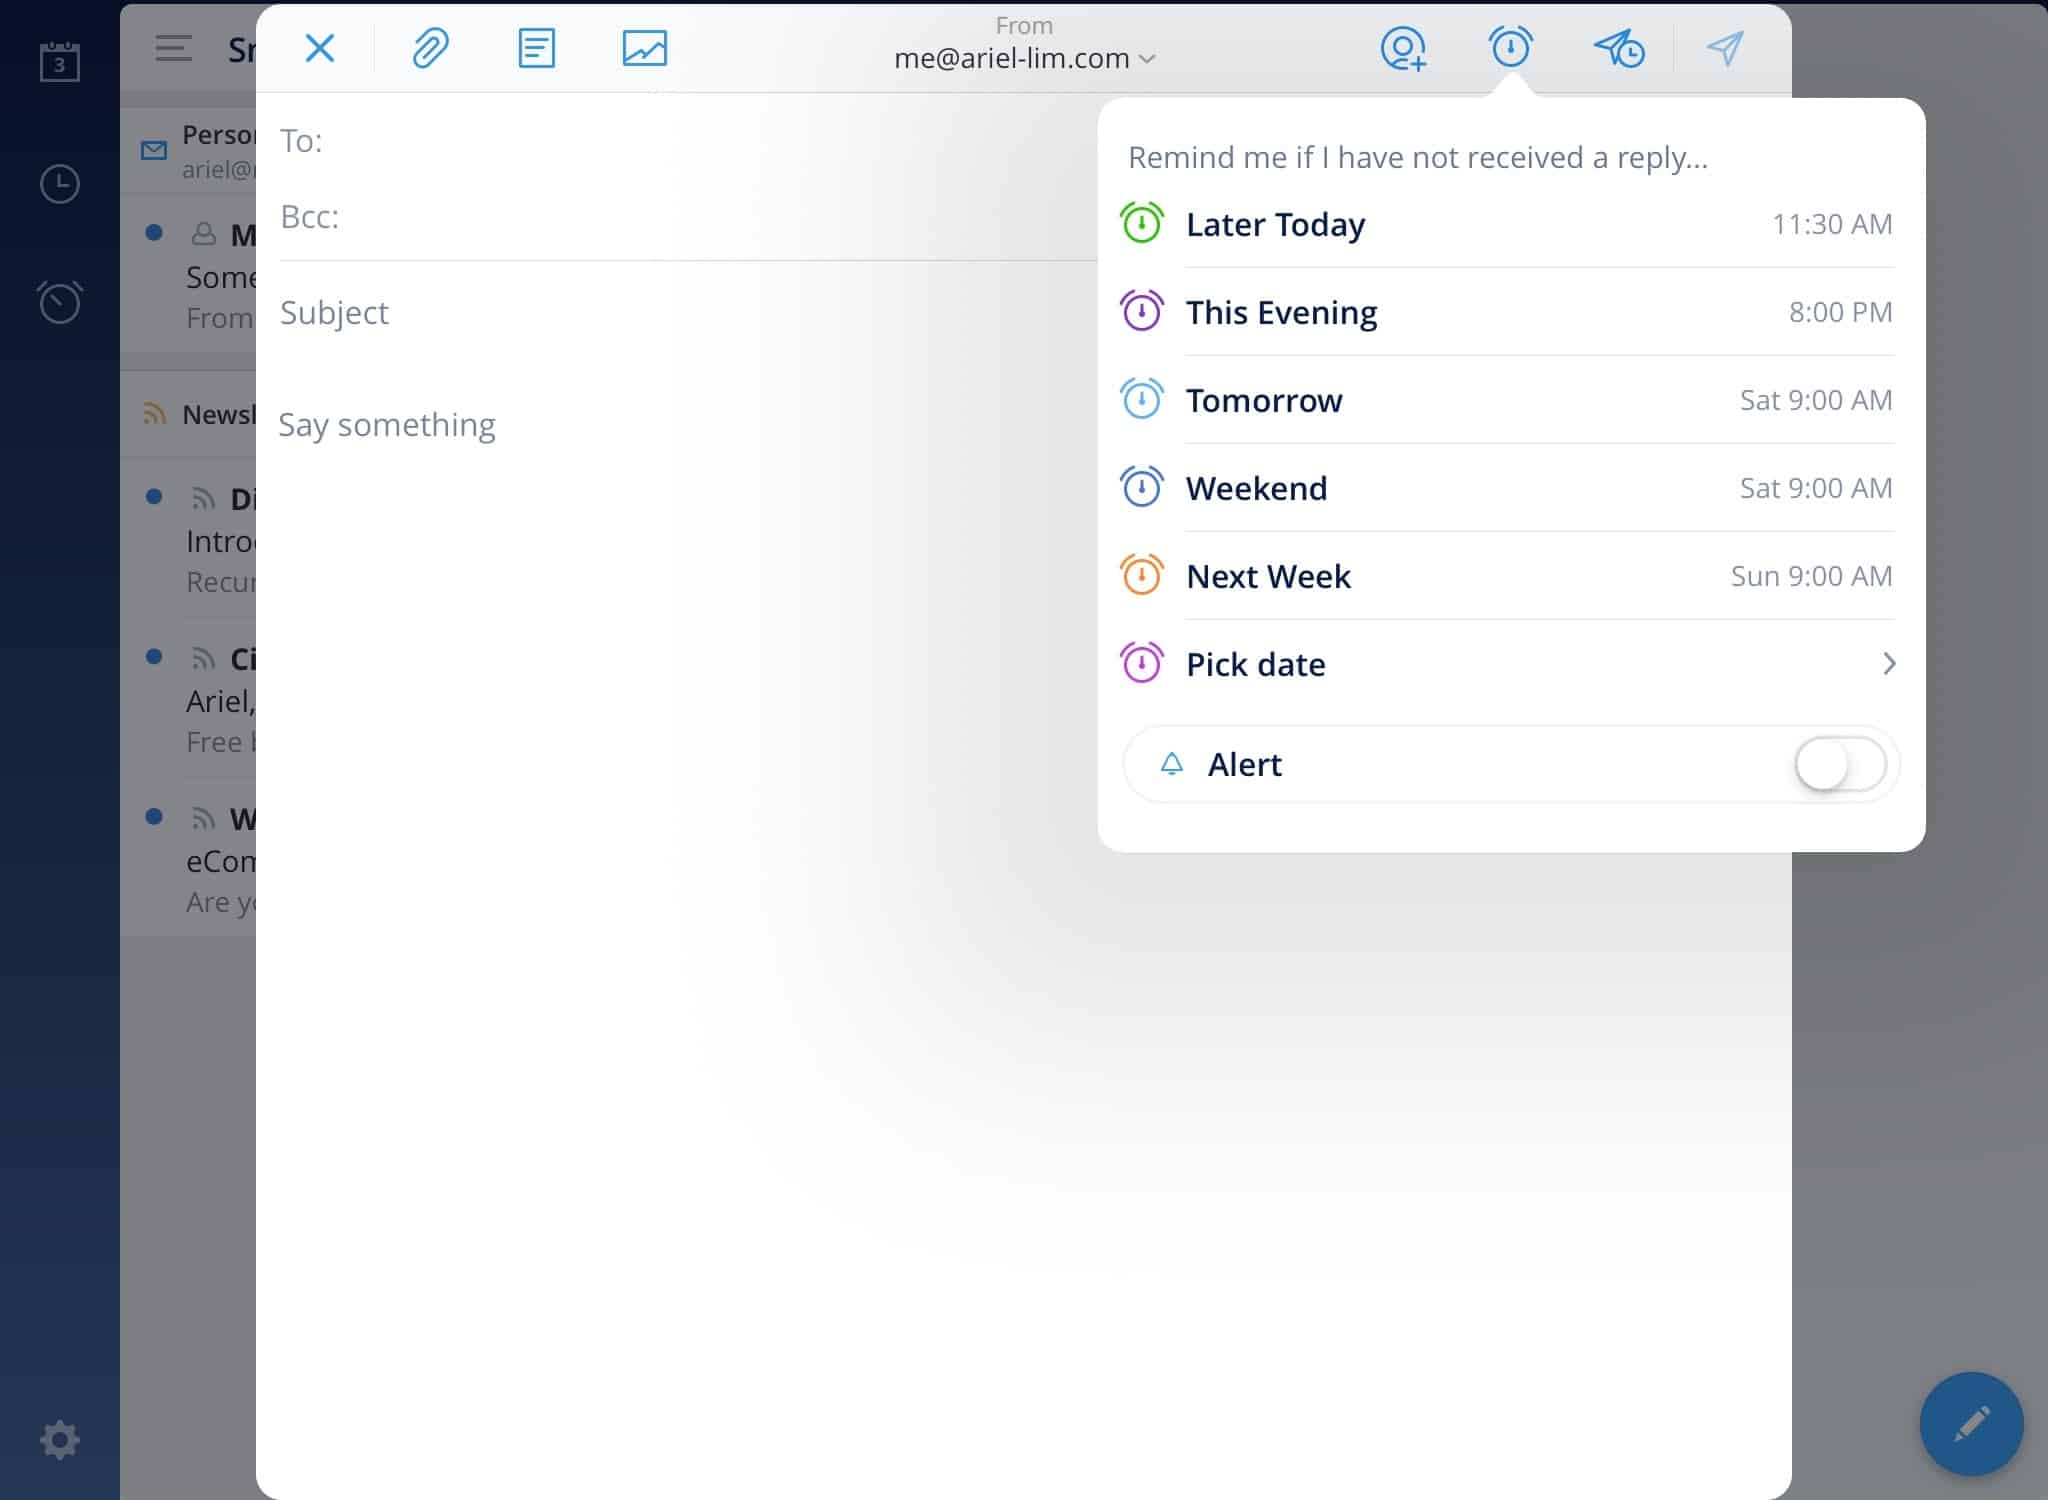
Add it to your calendar

Now that you’ve configured the tools to help you with learning, you have to actually do it. 

For most people, their calendars are only used for meetings. That’s an ineffective use of calendars, but that’s for another time. 

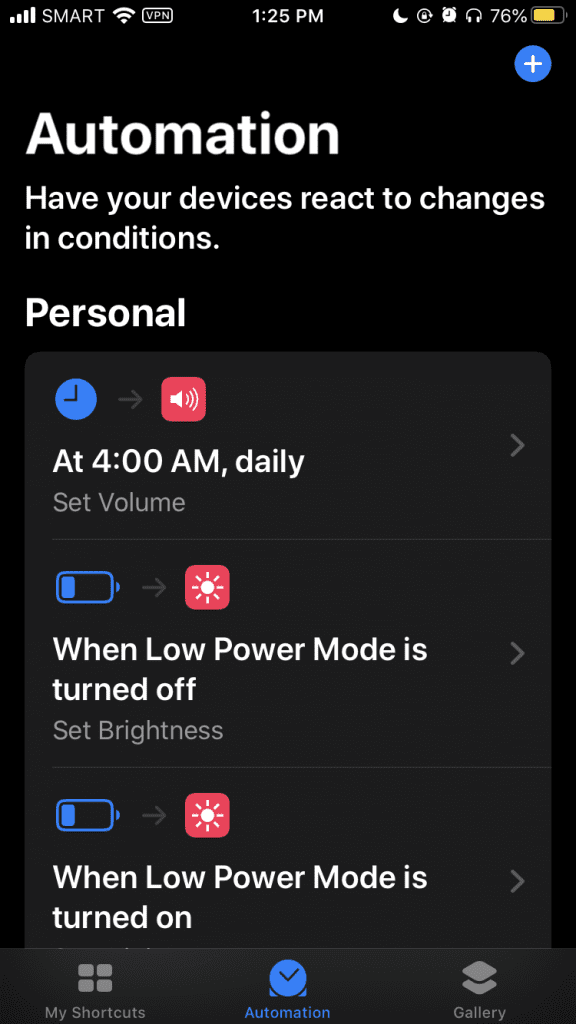
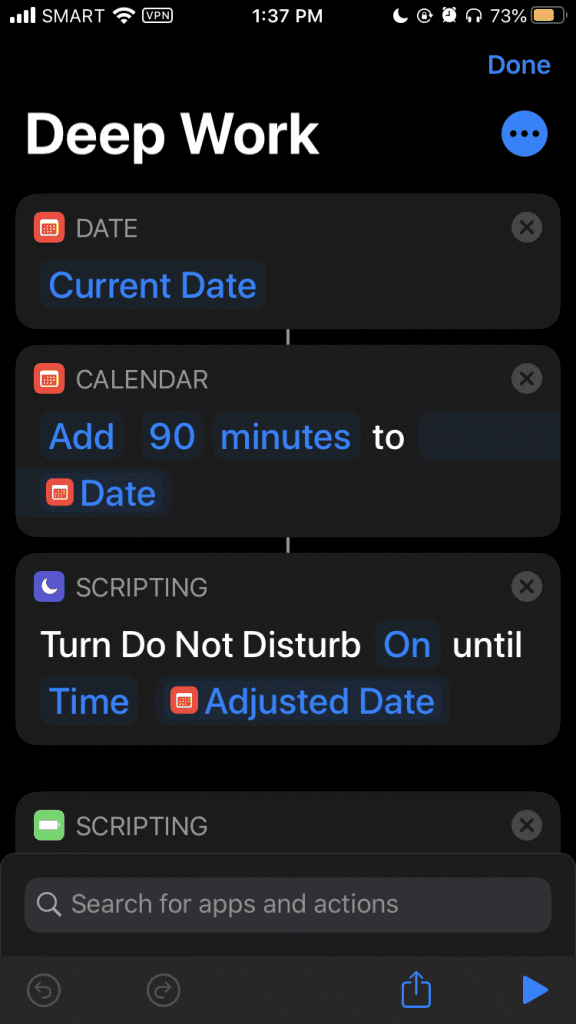
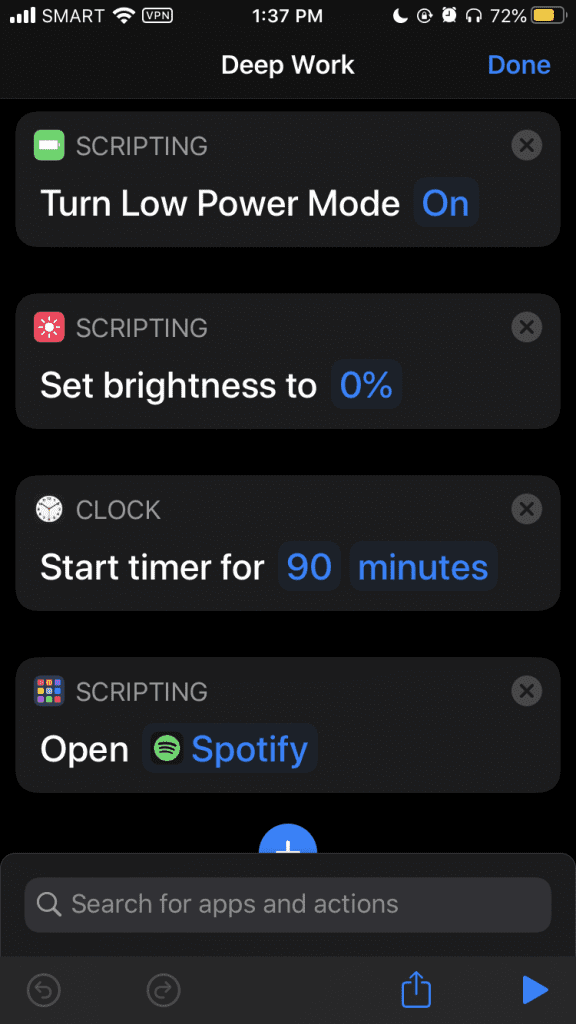
What I want you to do is set a recurring meeting for yourself to read and learn. Here’s how mine looks like: 

Add an hour of learning to your calendar every day

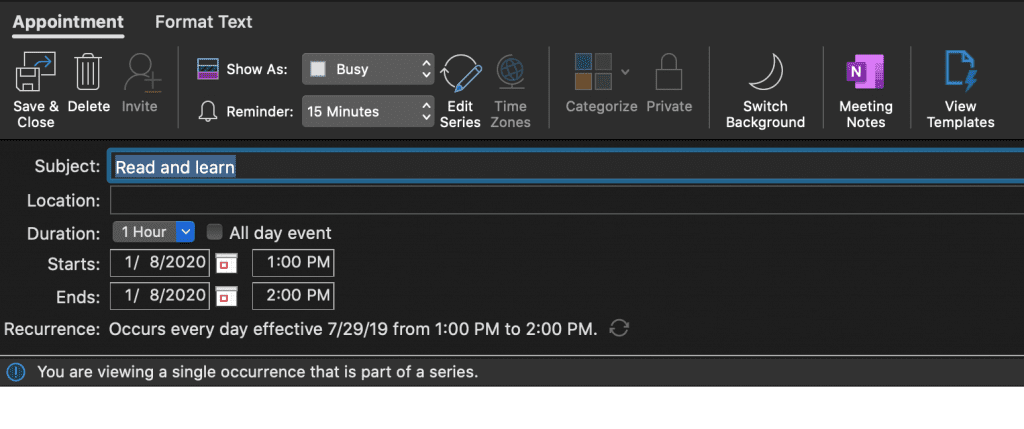
It’s an hour every single day. Occurs after lunch. Sometimes I don’t read. Sometimes I move it earlier or later. But because it’s on my calendar, I typically do it. 

Incorporate learning into another habit

If that’s difficult (which I highly doubt), or you really are busy, another recommendation is to add the task fo learning into another habit that you already do. 

For example, you have a daily routine of making coffee before you start your day (like I do). Once you start that process, start your learning time too. Open up the Pocket app on your phone and click on the headphones icon to have it speak/say out loud. That way you don’t have to read and can still do your morning coffee routine. 

You can add this to any activity you do: 

  • While eating or cooking breakfast
  • Doing the laundry
  • Stuck in traffic

Back when I was still working in corporate, I used to ride the train to and from the office. I use this time to listen to podcasts or the articles I have on Pocket. 

This way, I don’t “take away” from my day. Rather, I make full use of my commute time. 

Diversify

The next tip I highly recommend is to diversify your reading. Just like what I shared earlier, I read about stuff not related to my industry or work. 

If you watched the Decoding Bills Brain series on Netflix, you’d have noticed that Bill Gates also does this. He reads stuff outside Microsoft and technology. This helps him take the insights and learnings from others and apply it to his life. This process will also help you develop critical thinking. And the best part is it gives you a wider perspective. 

Allocate a budget

Lastly, I recommend allocating a budget to your learning and growth. Investing in yourself is one of the best investment you can make. 

Two years ago, I decided I’ll spend up to 10% of my income to my personal learning and growth. Looking back, I spent less than that. But that decision gave me the peace of mind to spend on those things. 

Usually, I hesitate to buy books because they are expensive. I always tell my self it’s not within my budget. I can learn those online from other articles. 

But oftentimes, books offer something more in-depth that articles, even the 2000+ words I often read, don’t cover. 

The mindset is if it’s within the budget, just go buy it. 

This includes books, subscription, tools, etc. 

Right now, I’m subscribed to Kindle Unlimited. I received an offer from Amazon for a $0.99 for 3 months (vs the 1-month trial). So, since the amount is so low and really within my budget, I immediately subscribed. 

I also bought two online courses last year: one about python basics (programming) and about photography. 

Over to You

As you can see, my learning isn’t limited to my industry nor what I do. Yes, the majority of it is. But that doesn’t stop me from learning something from others. 

Bottom line: you should dedicate time to learn new things every day. 

You can start with the free ones until you get the habit going.

Commit to learning something new every day.

How to Use Free Apps to Automate Your Boring Activities (No Coding Required)

Automation is like the gears working in the background

One of the sad truths of life is that we all have a limited amount of energy per day. Humans aren’t designed to be operating at 100% capacity for 24 hours. And because of that, we have learn to prioritize what must be done today and what can wait until tomorrow. 

We all face constant distractions every day. The biggest culprit we don’t notice is multitasking.

Studies have shown that multitasking can reduce productivity by as much as 40%. So, instead of trying to multitask, which only 2% of the population are actually capable of doing, stick to one task and finish it first. 

But what about the other stuff? 

The answer is to automate it. 

3 Automation Apps You Should Use in Your Daily Life

The three apps I’m going to mention are very popular and. You’ll find a lot of articles written about them already describing their history and their capabilities. I’m not going to do that. Instead, I’ll share with you the actual automations I use them for to save me a couple of seconds here and there. 

That means I have more time to spend on what needs my attention the most. I don’t lose productive time during switching

1. Shortcuts (for iOS)

Shortcuts is one of the tools I use every day. Or, put it in another way, it runs by itself without me doing anything. Once I set it up, it does the job for me. 

Of course, things would be different for your particular needs. But for me, the most used automations in Shortcuts are the following:

  1. Reduce screen brightness when low power mode is on (automation)
  2. Increase screen brightness when low power mode is off (automation)
  3. At 4 AM, set my phone’s volume to 100% (automation)
  4. Deep Work (shortcut)

The first 3 are self-explanatory; while the last one is more personal for me. Let me explain. 

First, download the app if you haven’t already. Then, once you open the app, you’ll notice three separate tabs at the bottom: 

  1. My Shortcuts
  2. Automation
  3. Gallery
Shortcuts app in iOS

Automations

This is the second/middle tab in the Shortcuts app. Automations make your device react to changes in conditions. 

Automation Tab inside Shortcuts App

For example, whenever I turn the low power mode on, my goal is to save up on battery. Naturally, to help with that, I’ll also lower my screen brightness. Instead of doing two tasks that take up an additional 2-3 seconds, I just do one and it automatically does it for me. 

Have you ever set an alarm only to wake up not hearing the alarm? That has definitely happened to me a lot of time. The culprit? It’s not because I hit snooze and can’t remember it. It’s because the alarm is tied to your phone’s volume. So, if during the night, you were watching Netflix or listening to some music, naturally, your volume would be set to around 20%. But then you fall asleep. Then your alarm goes off at 20% volume. If you are very tired the night before, you will most likely sleep through this. But if the volume was set to 100%, there’s a higher chance you’ll hear the alarm and wake up. 

My Shortcuts

I have multiple shortcuts here, but I’ll only share one of them and what I call Deep Work. At its core, what this shortcut does is whenever I want to do some deep work, I click on it and the magic begins:

  • A timer of 90 minutes starts
  • Do Not Disturb is turned on for that 90 minutes
  • Low Power Mode is turned on
  • My phone’s brightness goes dim
  • My music player (Spotify) opens
    • I then manually select my Deep Focus playlist
    • If you’re using Apple Music, you can do the same. That means you don’t have to manually select a playlist and just have it automatically played for you. 
Custom Shortcut for Deep Work
Custom Shortcut for Deep Work Settings

There are tons of ways you can use Shortcuts to automate things that you do frequently. For example, you can have it automatically send an SMS to your spouse when you get arrive at work, or automatically play a playlist when you connect to your home Wi-Fi network. 

Take a couple of minutes to think about what you do daily that you can pass on the work to your phone. 

For more inspiration, feel free to check the Gallery to find out how others are using the Shortcuts app. One of the automations I plan to create once I upgrade my phone is the use of NFC tags

2. IFTTT

IFTTT is one of the oldest automation tools on this list. It stands for “if this, then that.” And it’s pretty self-explanatory. Most automations are actually configured like that. It contains two parts: a trigger and an action. 

The Shortcuts app is limited to the iOS ecosystem, or more specifically, my device (iPhone or iPad). 

I use IFTTT for various things. But one of the most used automations I have in IFTTT is to automate social sharing of new articles I published on my website. 

IFTTT Example Applet Recipe: Automatically tweet new blog posts to Twitter

The interface has changed recently. Honestly, I don’t like it. It looks more complicated to me than before. 

But to set this up, you can download the app on your phone or create an account online. Once you get inside, you will see the “applets” you have. These are your automation recipes. 

IFTTT Home

If this is the first time your using IFTTT, head on over to the Explore section. You can find some inspiration there or start creating your own applet from scratch. 

Explore IFTTT

Depending on what you want to automate, you can simply “connect” an existing applet so you don’t have to configure anything else. Alternately, if you want to create one, you will go through something like this…

How the Magnet App for Mac Works

In the video, I already connected my WordPress website and my Twitter account. But if you haven’t done so, you will be asked to do it on that screen itself. Just like with the Shortcuts app, you can do a lot of automations here. 

For example, I setup various Applets that do something like this: if website ABC publishes a new article, add it to my Pocket account. That way, my Pocket always has something new I can read. 

3. Zapier

Zapier is one of the most popular and powerful automation tool out there. It allows for multiple conditions and logic branches, unlike Shortcuts and IFTTT. It also boasts of having the ability to integrate more than 1,500 apps. But, it comes with a price. You can create a free account but would be limited by its use to 5 running zaps (this is what you call the automation itself). 

Just like with IFTTT, you can do the same thing with Zapier. For example, if you publish a new blog post, have it automatically posted on Twitter, LinkedIn, or any other social media tool. But since the free version can only run 5 zaps and I can do the same tasks inside IFTTT, I limit what I do inside Zapier to more complex tasks. 

Zap Example: Automatically post hi-resolution video to YouTube

I started a project back in 2018 where I post quick 1-minute videos on marketing. I also documented the entire process of creating videos in 30 minutes or less

One part of this process is to distribute the finished video on YouTube. Since I use Google Drive to store all my files, I created a Zap to upload new video to my YouTube channel with some pre-defined data. The video on YouTube is set to draft first. I then go in and edit the description, then schedule or publish it. 

The main benefit of this setup is I eliminate the need to pre-fill the required data by YouTube and I don’t have to wait for it to upload as well. Once I move my final video to a specific folder in my Google Drive account, it does its magic. 

Here’s how that looks like inside Zapier. First, make a new Zap. You’ll see a screen like this…

Make a New Zap in Zapier

Next, populate it with the apps/services you want to do. The formula is similar to IFTTT: “when this happens…do this…” You will also get asked to connect the app if you haven’t done so in the past. 

The final output of the Zap will look like this:

Zap to Automatically Upload Videos to YouTube from Google Drive

Let me break it down step-by-step…

1. When there is a new file in Google Drive inside a particular folder

I created a specific folder inside my Google Drive account so that it only triggers when there is a new file in that folder. 

Zapier - New File in Google Drive
2. Add a filter so it only looks for videos

If you don’t add this, the zap will trigger every time a new file is added. For my purpose, I also add the cover photos (jpg) inside the same folder.

Zapier - Add Filter by Zapier

I don’t want to receive errors for my zap for them because I have to manually check them one-by-one to see if they are valid or not. That’s why I added this filter to only continue if the file extension is an mp4 or mov file. 

Zapier - Filter by File Extension
3. Populate default fields in YouTube

The final step is to add the default/required fields in YouTube. In my case, I have a specific naming convention. So that works great on the title field. I also have a default text/copy that I use in the YouTube description. 

Zapier - Upload to YouTube

Just go over the required fields and you’re on your way. 

The last step in the automation process is to test out if the zap is working. Add a new video (with file extension of .mov or .mp4) then it will automatically get posted on YouTube as a draft. 

I have to tell you, this saved me a ton of time back when I was working on this project. In a country with terrible internet connection, this zap was a life-saver. I don’t know if I continued with it if it took me 45 minutes to upload the video to YouTube. 

Over to You

Technology is only useful if it helps you become more productive and do more things in less time. If it drags out your day, then that’s definitely something worth cutting out from your life.

I hope you find these examples useful. I’ll be sharing more examples of automations in the future. Do you have any repetitive or administrative task that you have automated, or would like to automate? Let me know in the comments below.

3 Reasons Why I Switched from Mac Mail to Spark by Readdle

Spark by Readdle Mac OS

How many email accounts do you have?

I have at least 10 email addresses I use regularly. Two for my personal, one for work, three from clients, and a couple for other ventures.

I don’t know about you, but that many email addresses are difficult to manage. I’d like to say I’m on top of my email game, but receiving ~50 emails a day is still no joke. And that’s after all the filters/rules and unsubscriptions I already did.

I’m also in the Apple ecosystem. I don’t know why, but I’ve always used/preferred native apps like Mail and Calendar. But as I’ve learned, there are quite a few apps out there that work better.

Enter Spark Mail.

It’s been a year and a half since I’ve started using Spark mail as my email client. I’ve deleted the default Mac Mail and Calendar from my laptop and iOS devices.

And with iOS 14 coming this fall, which allows iOS users to set 3rd party email apps as their default mail client, I’m definitely going to enjoy using Spark more.

Let me tell you why…

3 Reasons Why I Switched from Mail to Spark Mail

I mentioned earlier that I stay on top of my emails. I practice two principles that any productivity guru tells you: inbox zero and touch-it-once. I also apply Getting Things Done (GTD) principles.

Inbox zero means you either delete/archive your emails so that your inbox has nothing in it. The touch-it-once method means when you open an email (touch), you have to take action on it. That means working on it if it’s a task for you, delegate it to other people and create a follow-up action, delete/archive it, or defer it in the future.

While I love Apple, it’s native apps don’t have the necessary functionalities that power users need.

That’s why I switched to Spark Mail.

Reason 1: Synchronization

As I mentioned, I have at least 10 email accounts. I work pretty much anywhere as long as there’s an internet connection. Whether I’m at home, a cafe, or traveling, I need to be able to access all my stuff. And that includes email.

One thing I noticed is that when I set up my iPad, after entering my Apple ID, I still have to manually configure all my mail accounts. If my memory serves me right, a couple of years ago, when you set up a new Apple device and enter your Apple ID, everything syncs, including email accounts. But that doesn’t seem to work anymore.

When I setup Spark, I originally created an account on my Mac. I then got a screen saying that I can use my email address to sync all my accounts across my devices.

Spark Email

So, when I installed the app on my iPhone and iPad, all I have to do is login my the first email account, then everything just works.

For example, I added in my second and third email on my iPad. After a few seconds, it showed up on my Mac.

One thing I didn’t like during the account setup process on the iPhone was whenever I switch apps, the login options reset to the beginning. It’s a bummer since I use multi-factor authentication (MFA) in all my accounts. So, once I entered my password, I get asked for a passcode. Once I switch apps, memorize the code, and go back to Spark, I have to go through the login process from the start. That’s why I had to add all my other accounts on my laptop since I need to access the Authenticator app on my phone.

That aside, when I opened my iPad later that night, after a couple of seconds, all my other accounts are there. Like magic.

Reason 2: Customizations

There are a ton of cool stuff in Spark Mail but I won’t go over each one of them. I’ll only talk about the stuff that I really love.

1. Swipe gestures

I stay on top of my emails by making decisions quickly. Depending on what they are, who sent it, the time of the day/week, and many more, I decide on what to do next.

Those options are usually to open/read it, delete/archive, tackle it later (defer), or create a task for me to work on it.

And that’s where the swipe gestures come in.

Spark by Readdle - Personalization Using Swipes

Depending on how you handle your email, these are customizable. In my case, it’s almost always one of these options:

  1. Move (to a folder, or tags inside Gmail)
  2. Snooze — this is the defer option. I snooze the email until, let’s say tomorrow 9 am, so the email is ‘removed’ from my inbox and won’t appear again until tomorrow at 9 am.
  3. To Omnifocus — this is my task management app. You can add other 3rd party integrations here (which I’ll talk about below).
  4. Delete

Other apps allow you to swipe left/right and do only one thing. Spark gives you four options by varying the length of your swipe. Take a look at these two images.

Spark - Short Swipe on iPad
Spark - Long Swipe on iPad

I have changed how I use these swipe options over time, but I still use them regularly. Once I see the subject line, I immediately know what to do. That saves me a lot of time. Instead of going in, tapping several buttons just to get to the archive or share to other apps, I can do it in my inbox.

2. Reminders

If you’re a fan of David Allen’s GTD, there’s a part there where you create a task to follow-up with someone you assigned/delegated the task to. And if you’re a manager, this is something you should be doing as well (and not leave it up to chance that your direct report will update you).

Another use case for this is you want to make sure you follow-up with your boss or your client if after an X amount of time he/she hasn’t replied.

That’s where reminders come in.

How to use reminders in Spark email

Let’s say it’s Tuesday. You send an email today to a client asking for a meeting on Friday. You can add a reminder to your email so that you are reminded about this email if you haven’t received a reply by tomorrow 9 am (Wednesday).

If you received a confirmation (or any reply) from your client anytime before your stated reminder, you won’t receive a notification.

This is great as it eliminates one more step in your workflow. It frees up your mind so you can focus on more important things. You send an email and you’re reminded about it automatically on your stated schedule. You also don’t have to remember about the meeting. It helps you save some mental energy that you can spend on other tasks.

The great part about this is you can also customize the options that display here. Whether you want tomorrow to be 8 am, or later today to always be +6 hours from now, etc.

You can do that in settings > Scheduling. Then choose which one you’d like to edit. This applies to Snoozes, Reminders, and my favorite feature, Send Later.

3. Snooze

The Snooze option allows you to remove an email from your inbox (thus achieving inbox zero) even if you haven’t decided on what to do with that particular email yet.

You can keep snoozing an email to hide it today and show up next week. Then the week comes and you snooze it again for another week. Just be mindful when you use this option. You’re not getting anything done by continuously snoozing them.

Remember the touch-it-once method I mentioned earlier? If you combine that with the concept of inbox zero, you’ll be more productive.

Why?

Because if you really stick to it, you’ll be very mindful of when to check your email. You won’t live in your inbox anymore. You’ll actually have time to get things done.

For example, you see two emails. A newsletter from a blog you follow and an email from a colleague. It’s 4:45 pm.

Applying the two principles, you snooze the newsletter to tomorrow morning because you won’t be able to read it in time because you want to get home on time. You open, read, and take action on the email from your colleague.

Or in my case, I received a coupon for some free food (yay!). The only way to avail it is to show the email upon ordering. Right now I’m travelling in another country. So, I snoozed it until a few days after I get back. To when I can actually use it.

It’s out of my inbox. I don’t have to worry about it again. When it shows up on my inbox again, I can decide what to do with it then. Should I go to that restaurant and claim it? Or snooze it again for the weekend?

4. Send Later

This is one of my most favorite features in Spark.

I have clients in different time zones. That makes it hard to communicate at times. But it doesn’t mean there’s no chance to find a workaround.

Spark email schedule later

The send later feature is great because if I have a very important email, let’s say a report, or I need a decision to be made, I schedule it to be sent on the morning of my client’s time zone. Why?

Because even if we read emails all the time, it’s one way to show respect to my client. If they are like me, they are also receiving tons of emails every day from customers, other vendors, their team. If I know it’s nighttime for them, I stay away from sending emails I don’t want to take away from their time to rest or from their family.

Another reason is most people take action during the day. So, even if they read the email, they can sleep on it and not do anything.

Just ask yourself, did you ever read an email then tell yourself you’re going to reply tomorrow? Most probably yes.

Then what happens the next day?

There’s an emergency meeting. Or a problem with the shipping. Or another fire that needs to be put out.

Dozens of emails came in and buried that email you intended to reply to.

So, the best course of action? Schedule the send time to arrive in their inbox in the morning.

And as I mentioned earlier, you can customize the schedule here according to your preference.

Reason 3: Integrations

I consider myself a power user. That’s why I use apps and advanced features to help me be more productive. That’s where Spark has an advantage over other email apps. It has integrations with 3rd party software you’re probably already using.

Spark integrations with 3rd party services

In my case, the apps I use daily are OmniFocus, Asana, and Pocket.

If you noticed earlier, one of my swipe options goes to OmniFocus. It’s my task management software of choice. When it’s a task for me that doesn’t have to be done now, I add it there.

But if it’s client-related, I add it to Asana instead since that’s what the client is also using.

Let’s say this is an email from a client and there are stuff for me to do. After reading the email, I can add it to Asana, choose a workspace, project, and assignee. This shows up on my Asana account. If I assigned it to myself, it’ll be in my inbox there, waiting for me to take action on it.

Add task to Asana from Spark Mail by Readdle
How to add tasks to Asana using Spark

Or if it’s something I want to read later, I simply choose to add it to Pocket.

Special Note on the Spark Email Privacy Concern

If you’re like most people, you’re probably doing some research on using Spark mail. One of the most controversial issues that I came across while researching about Spark is its privacy policy.

I read this post while I was doing my research.

But, just like with anything, you don’t have to believe everything you find on the internet.

So, I did more research and found another thread that explained and elaborated on Spark’s privacy policy.

Tl;dr: not worth your time.

There may or may not be an issue with privacy or the information collected. But that’s on Spark and it’s no different from any other email clients (like Outlook) or apps you grant your accounts access to. So, as I said, you don’t have to worry about Spark’s privacy policy because there’s nothing shady about it.

Privacy Policies of Spark and Outlook Compared

[Update 2020 June] Since this is still a very popular topic, I decided to dig in myself.

The main issue most people have with Spark Mail is they store your passwords on their servers. Just look at the comments section in this post.

Yes, they do that. Here is a snippet from Spark’s privacy policy. To highlight, they use these credentials to access your email and for synchronization across multiple devices.

Spark Mail's Privacy Policy

Clear? Great. Now, let’s look at Microsoft’s Privacy Policy.

Microsoft Privacy Policy Statement

Pretty much the same thing.

The only difference is the Spark puts theirs way up on the page and in plain, easy-to-read English.

Conclusion

So, should you keep using the standard Mac Mail or switch to Spark Mail by Readdle?

Spark may or may not be for you. It depends on how you use email and your own workflow. If you are using apps like Dropbox and Google Drive, or Asana and OmniFocus, regularly and you end up having to download and upload the files to these services, then it’s worth considering Spark. But if you’re really just sending and receiving emails, then the stock Mail app might be enough for your needs.

There are a lot of cool features I didn’t discuss here since most of them are ‘expected’ already like a fast app and a simple user interface. And there are stuff I haven’t used yet like delegating an email to your team and templates (!!).

Feel free to download the app and explore it yourself. It’s free. And this is not a paid post 😉

And as their tag line says, love your email again.

Spark - Love Your Email Again

Automatically Clean Up Your Mac Desktop

img 5123

Is your Mac’s desktop full of files and folders that you said you’ll clean later, but just couldn’t get to it? Wouldn’t it be nice if there was a free, yet automated solution to clean up your Mac desktop?

I’m telling you right now, there is. And it’s already built-in your Mac…

For most people, their desktop is the temporary holding space of files and documents. But because we’re all busy (lazy), we suddenly realize one day our desktop is so messy it’s impossible to find what you’re looking for. Then we make a vow to clean this again next time.

What if I tell you that you can keep your desktop clean — free from any files and folders forever — in just 5 minutes? Keep reading…

Most articles I found online about this topic either fall into these three buckets:

  1. Tips and tricks to organize your files into folders
  2. Use the new feature called Stacks in macOS Mojave
  3. Copy all documents/files and dump them into a new folder

I’m not going to cover any one of those.

No, this article is about how you can automatically clean up your Mac’s desktop and transfer them into a separate folder of your choosing.

Yes, all automated. You set this up once, and you’ll always have a clean desktop on your Mac.

Added Bonus: Bring Your Files with You

Do you have an existing Dropbox account? A Google Drive storage? Or a OneDrive account?

With this method, you can automatically move all your files from your desktop to a designated folder in these services. This way, you don’t have to subscribe for extra iCloud storage, yet be able to access all your files with you.

Follow these step-by-step instructions and you’ll always have a clean desktop. And have you heard of the productivity benefits of having a clear desktop?

6 Steps to Automatically Clean Up Your Desktop Mac

1. Open the Automator app

As the name implies, the Automator app can automate stuff for you after you set it up. In our case, we want to clean up our desktop by simply moving them to another folder.

Press ‘command + space’ at the same time to bring up the Spotlight Search. Then type in Automator. Hit enter.

Open the Automator app

Now, don’t worry. Even if you haven’t used this before, I’ll walk you through this step-by-step.

You should see a screen that looks like this…

Automator App

2. Choose Folder Actions

That popup screen will now close and you’ll be inside the app itself.

Create a new Folder Action in the Automator App

3. Choose the desktop folder at the top

Click on the ‘Choose folder’ selection, then click on ‘Other…’

(This will be the “source” folder)

A separate finder window will open. Scroll down the left sidebar and choose the desktop.

Choose desktop in the Folder Action

4. Add the ‘Move Finder Items’ action

Click on the search bar in the actions column (second column) and start type ‘move.’

This will filter the actions. You will then see the ‘Move Finder Items.’

Now, go ahead and drag that into the main screen.

Add 'move finder items'

5. Select the folder you want the files to be transferred to

Let’s say you want to move it to your Dropbox folder.

(This will be the “destination” folder)

Click on the ‘Desktop’ icon under the Move Finder Items. A list of folders will show up…

Choose your destination folder

Most likely, your Dropbox folder isn’t listed here. So, just click on ‘Other…’ and a finder window will open up again, just like before.

Select your Dropbox folder (or create a subfolder, which I recommend).

Finally, click on ‘Choose’ to save. You should have something that looks like this…

Automator app: final folder action

Again, you can use any folder in your Mac here.

6. Save your work

Now, it’s time to save your work.

Press ‘command + s’ at the same time to bring up the save dialogue.

Type in a name, then hit ‘Save.’

Save the workflow

And you’re all done.

Conclusion

What will happen now is that every time you save a file on your desktop — take screenshot, downloaded a file from your email, or copying a folder from a USB drive — they will not be stored in your desktop anymore. They will automatically be moved to the folder you selected.

Note: Existing files on your desktop will not be affected. Only the new ones. So, if you want to clean up your current desktop, just move them manually to the folder you chose.

To summarize…

  • Start by creating the automation (steps 1 & 2)
  • All files you add to a certain folder, e.g. desktop (step 3)…
  • Gets added to a folder of your choosing (steps 4 & 5)
  • Save the automation to have it run automatically (step 6)

With this, you will always have a clean desktop.

The best part is you can do this for any folder you want.

In my case, I created two Folder Action automations to move my files from my desktop and downloads folder into their own respective folders inside Google Drive. I am subscribed to a Google for Business account so it makes sense for me to add it there.

Plus, I get the benefit of having all my files accessible anywhere I go. Once these files are inside my Google Drive folder, it automatically syncs to my account. So, even if I’m on my mobile, or using a separate computer, I can get access to these files.

Again, you can do this with Dropbox, OneDrive, or maybe even just inside a folder that is not your desktop.

How does it feel to have a clean desktop? I’d love to know. Let me know in the comments below…

Buffer and IFTTT Integration: How to Post to Multiple Accounts (A Workaround on the Single Account Limitation in IFTTT)

IFTTT and Buffer Integration

[Important Update] As of April 17, 2019, Buffer already discontinued the feature I used in this post. That means the contents of this post won’t work anymore. I’ll update this again once I find a workaround.

Are you using IFTTT and Buffer to schedule your social media posts but can’t seem to post to selected accounts?

The basic recipe for IFTTT goes like this: If (insert activity here), then add to Buffer. For example, mine looks like this: if I favorited an article in Pocket, add to Buffer.

pocket buffer recipe

Problem 1: IFTTT Only Allows You to Post to a Single Account

As simple as it sounds, this setup is actually not that straightforward. If you tried this yourself, you’d realize that IFTTT only allows you to post to a single account in your Buffer profile.

You can customize this in the settings. On a browser, login to IFTTT. Click on your profile > Services > Click on Buffer > Settings (top-right) > Edit Connection. Mine is set to my Twitter profile.

update buffer settings in ifttt

But, that’s now what you want, right? You want to be able to post to multiple accounts at once, or all of them.

The Solution: Email to Buffer

So, after spending time researching, you probably found your answer: Email to Buffer. While not originally designed for IFTTT, you can actually use this method to post to one or all your accounts.

All you need to do is connect your Gmail account with IFTTT and create a recipe with the that portion using Gmail.

ifttt pocket to blank

Problem 2: Email to Buffer Posts to All Your Accounts

The email to Buffer works just fine when you want to post to all your accounts by default.

It’s simple to setup. You only need to remember these two things:

  1. Subject line —> contains the text/caption you want to post
  2. Body —> contains the link and image you want to be included

If you think about it, this gives us another problem. What if you don’t want to post to all your accounts, but only to selected ones?

For example, you have a Facebook page, Twitter, and Instagram connected to a free Buffer account. When you use the email to Buffer method, you’ll get an error if the post you tried to send doesn’t have a photo.

In my case, after I favorite an article in Pocket, the IFTTT recipe will run and send an email to Buffer.

But since I’m sharing an article, there’s no image.

This will give an error and won’t schedule anything to Buffer.

Solution: Advanced Commands

In your email settings in IFTTT, you can actually choose certain profiles or accounts to send to. Here’s an example where I only chose to post on my Twitter and Facebook accounts:

email to buffer advanced controls

This solves our problem already, right?

We get to choose which profile to send by using the @s command and adding the social media accounts.

Not quite.

Problem 3: Multiple Accounts in One Social Media

If you’re like me (I’m have Pro account, btw), I have multiple accounts under the same social network. For example, I have 2 Facebook Pages, 1 Twitter account, 2 Instagram profiles, my personal Google+ and LinkedIn accounts. (Feel free to follow me and say hi! 👋)

If you use the settings above, Buffer will post to the two Facebook pages I have in my Buffer account. And that’s something I don’t want to happen.

Both pages are for different clients.

So, this method won’t work.

Potential Solution: Use @p to Identify Specific Profiles Instead

There’s the profile method: @p profile_name. This might work, but it depends on your setup again. For example, here’s how it might look:

email to buffer advanced controls 2

If you noticed, I have two “Ariel Lim” in the field. This represents my LinkedIn and Google+ accounts. As you can see, this already poses an issue.

I actually don’t know which of those two accounts my post show up. If I only use one Ariel Lim, will it post to my LinkedIn or Google+?

Here’s another scenario where this becomes an issue. My Twitter and Instagram profiles have the same name — @aylim14_.

So if I want to post a link, and since Instagram doesn’t support posts without images, this will give you an error.

Potential Solution: Combine @p and @s Depending on What You Need

In theory, yes.

But with all my experimentations, I can’t get this to work.

For example, I only want to post to my Twitter, LinkedIn, Google+ and one Facebook Page. I’d have to use something like this:

@s Twitter, LinkedIn, Google+
@p Facebook_PageName


But this seem to always give me an error.

Again, depending on the specific names in your account, this might work for you. You have to test it yourself.

Or…


The Real Solution: Use Unique Profile IDs for Your Social Media Accounts

After a lot of experimentation and help from the Buffer support team, this method allows you to post to selected profiles without worrying about errors or which one of them will it be posted on.

Here’s how this might look.

email to buffer advanced controls profile id

My Setup

If you noticed, the color turned to green because this is for a different recipe and app — Feedly.

The recipe goes like this: if I add an article to a board in Feedly, email to buffer.

I have several recipes for this because apart from my own reading, I use this to stay updated on my client’s industries. And if I also handle their social media accounts, this is how I curate some posts.

I read in Feedly. Then, when I read something I like and want to share, if it’s for Client A, I save it to a personal board (Board A). If it’s for Client B, it goes to Board B.

Each of this workflow has its own IFTTT recipe. The email to Buffer, therefore, has to be customized so that when it’s for Client A, I only post on Client A’s social media accounts, and not Client B’s.

Here’s how you do it.

Step 1: Locate your unique profile IDs

You can find your unique profile ID inside Buffer by logging in then clicking on each social account, check the URL and get the alphanumeric text there.

buffer locate unique profile id

Go through each of your accounts using this process and save it to a place where you can easily reference it. This is what you’ll use in step 2 below.

Step 2: Use it with the @p method

Once you have each of those unique IDs, it’s time to create your recipes.

Again, this depends on your specific workflow. In my case, I have 2 separate recipes for my 2 clients. That way, when I add an article to Board A, it gets scheduled to Client A’s social media accounts and my personal Twitter account.

I also have another IFTTT recipe for Client B, where I share to their Facebook Page only.

As you can see, this method solves all your worries when it comes so posting to Buffer from an IFTTT recipe. You can customize this further depending on how you see fit.

For example, I created another recipe where after I publish a post on this website, it gets added to only my Twitter, LinkedIn, and Google+. It doesn’t get posted on my client’s accounts.

Your imagination is your limitation.

Did this solve your Buffer-IFTTT problem? Let me know in the comments below!