If you’re like most people, the first time you’ve heard the name Cloudflare is when you’re trying to speed up your website using a content delivery network (CDN). That’s the same thing for me. And that’s what I’m going to talk about in this article—how can you use Cloudflare to make your website faster through its CDN.
As a side note, Cloudflare do offer a lot more than just providing CDNs. In fact, once you setup your website with Clourdlare, you’ll automatically be protected from malicious activities like DDoS attacks, bots, and other intrusions. They have different plans that you can choose from. But for the purposes of using their CDN to make your website faster, their free plan is all you need.
But before diving right in, let’s answer some of the most common questions:
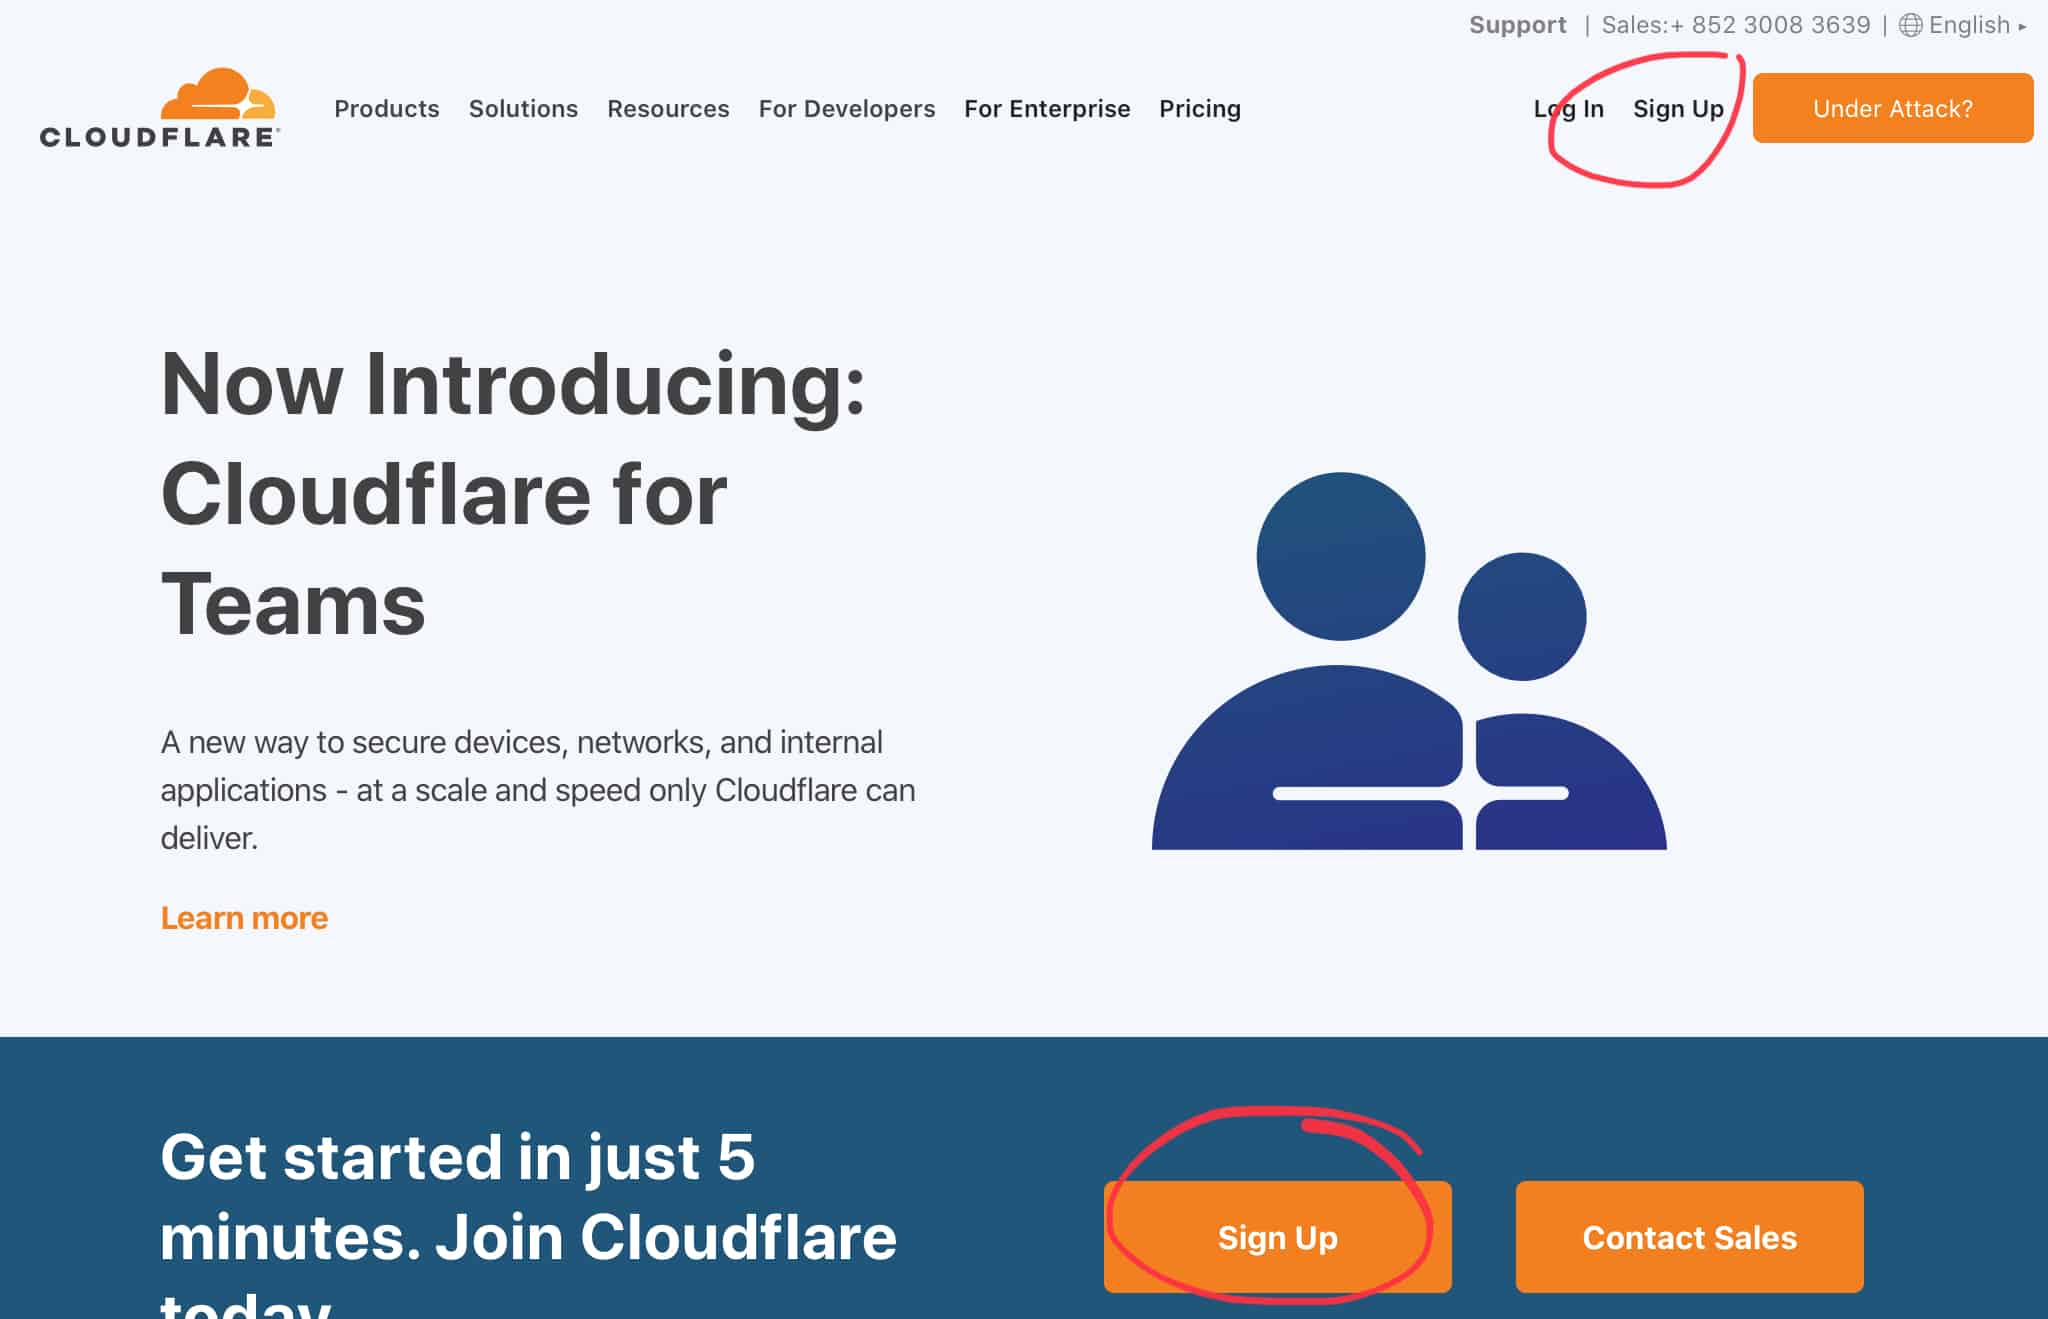
Use Cloudflare as Your CDN in 5 Simple Steps
One of the biggest names in CDN is Cloudflare. Another name that usually comes up is StackPath (formerly MaxCDN). And because I’ve never used StackPath, I’ll be focusing on Cloudflare.
If you want to use Cloudflare as your CDN and speed up your website, follow these 5 steps.
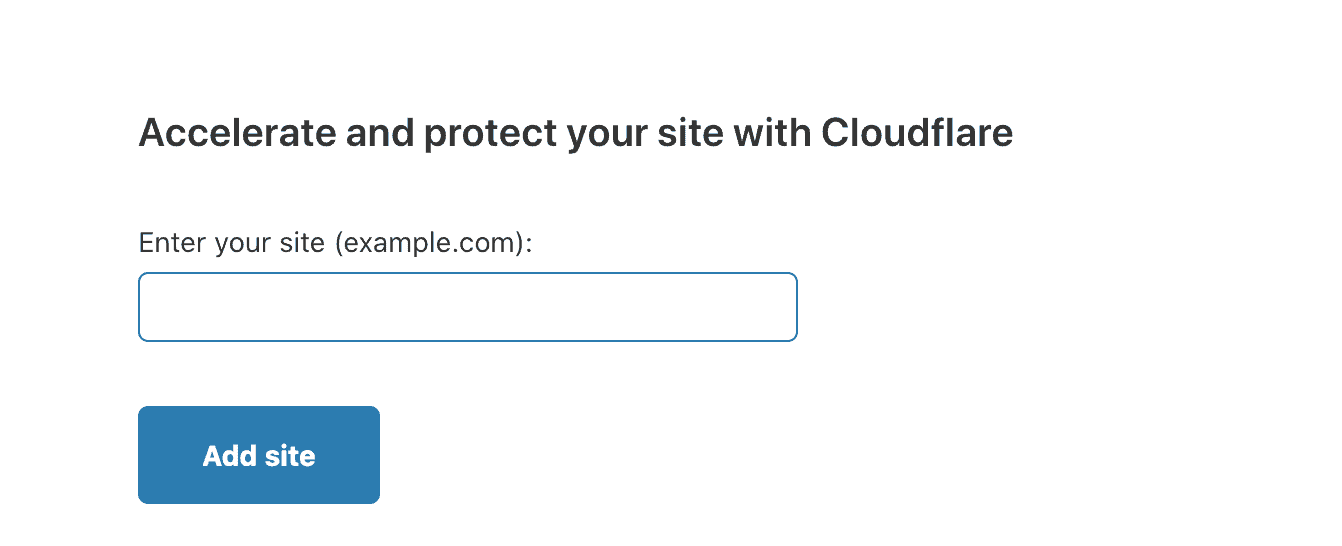
Once you logged in successfully, the first thing you need to do is add your website.
Just enter your domain here.
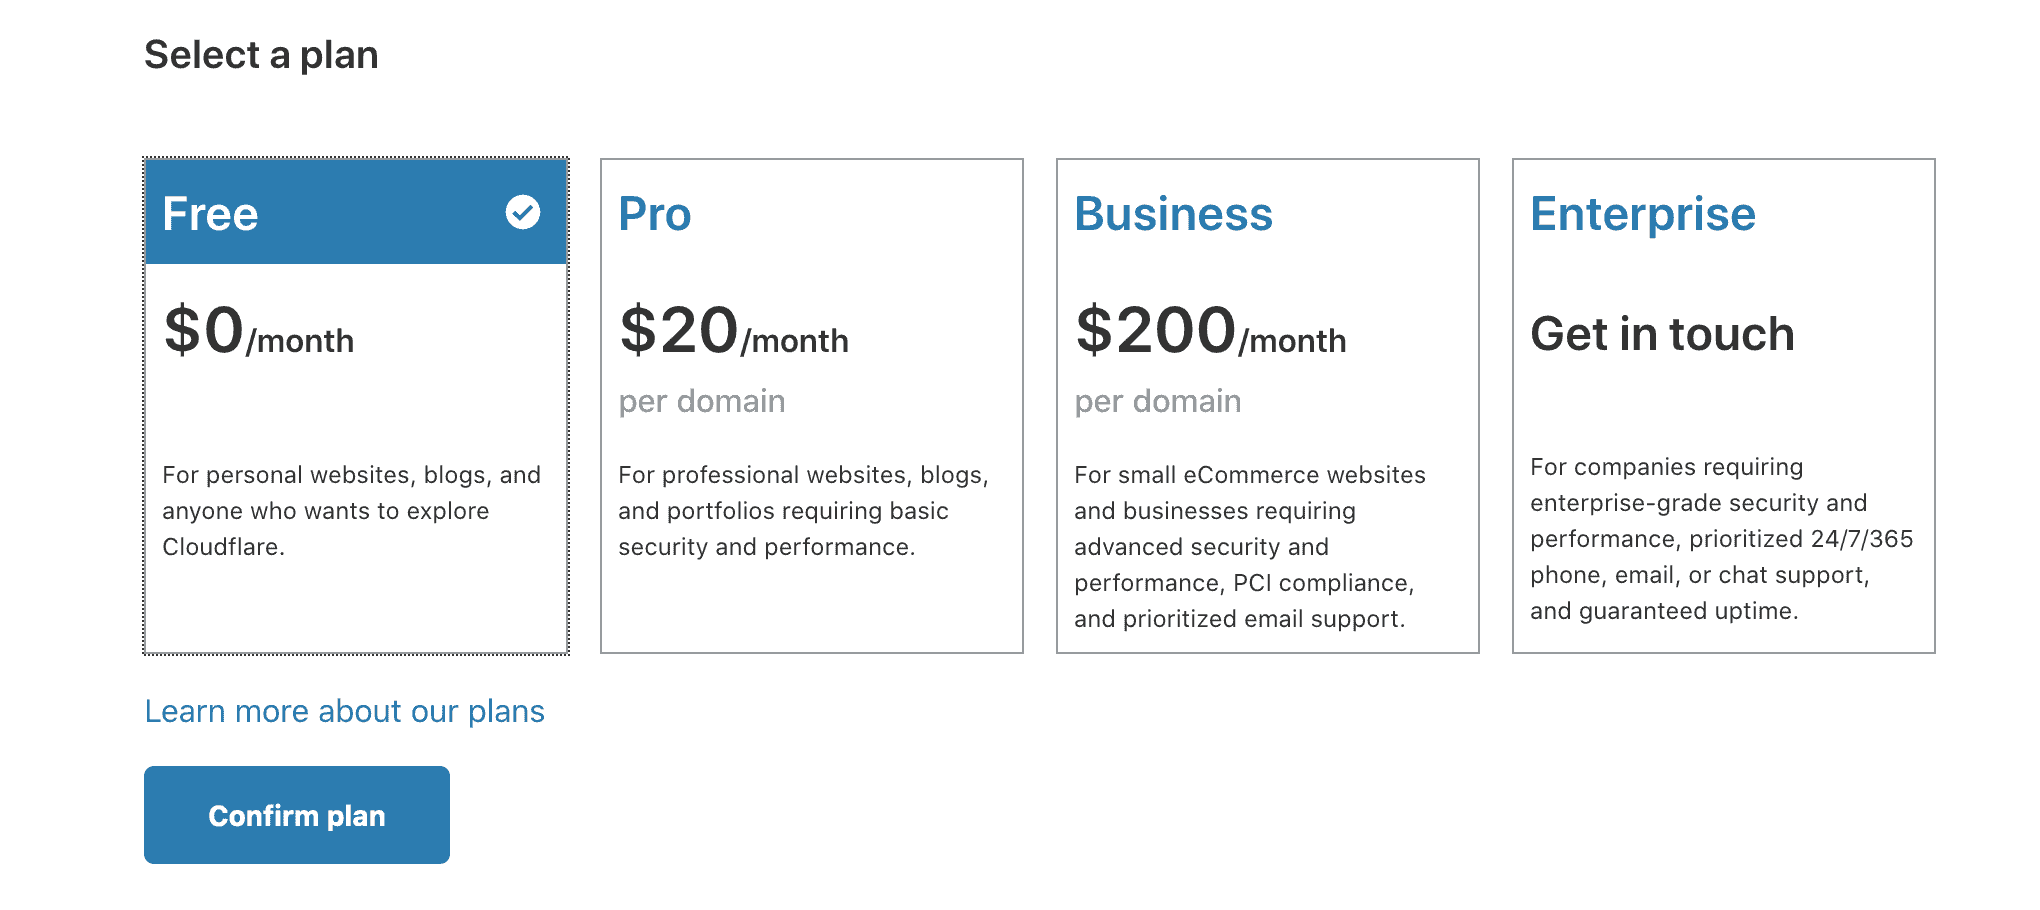
3. Choose the free plan
In the next screen, you’ll be ask to choose one of their plans. Like I said earlier, Cloudflare offers a lot of things. You can explore this for yourself later on.
For now, choose the free plan.
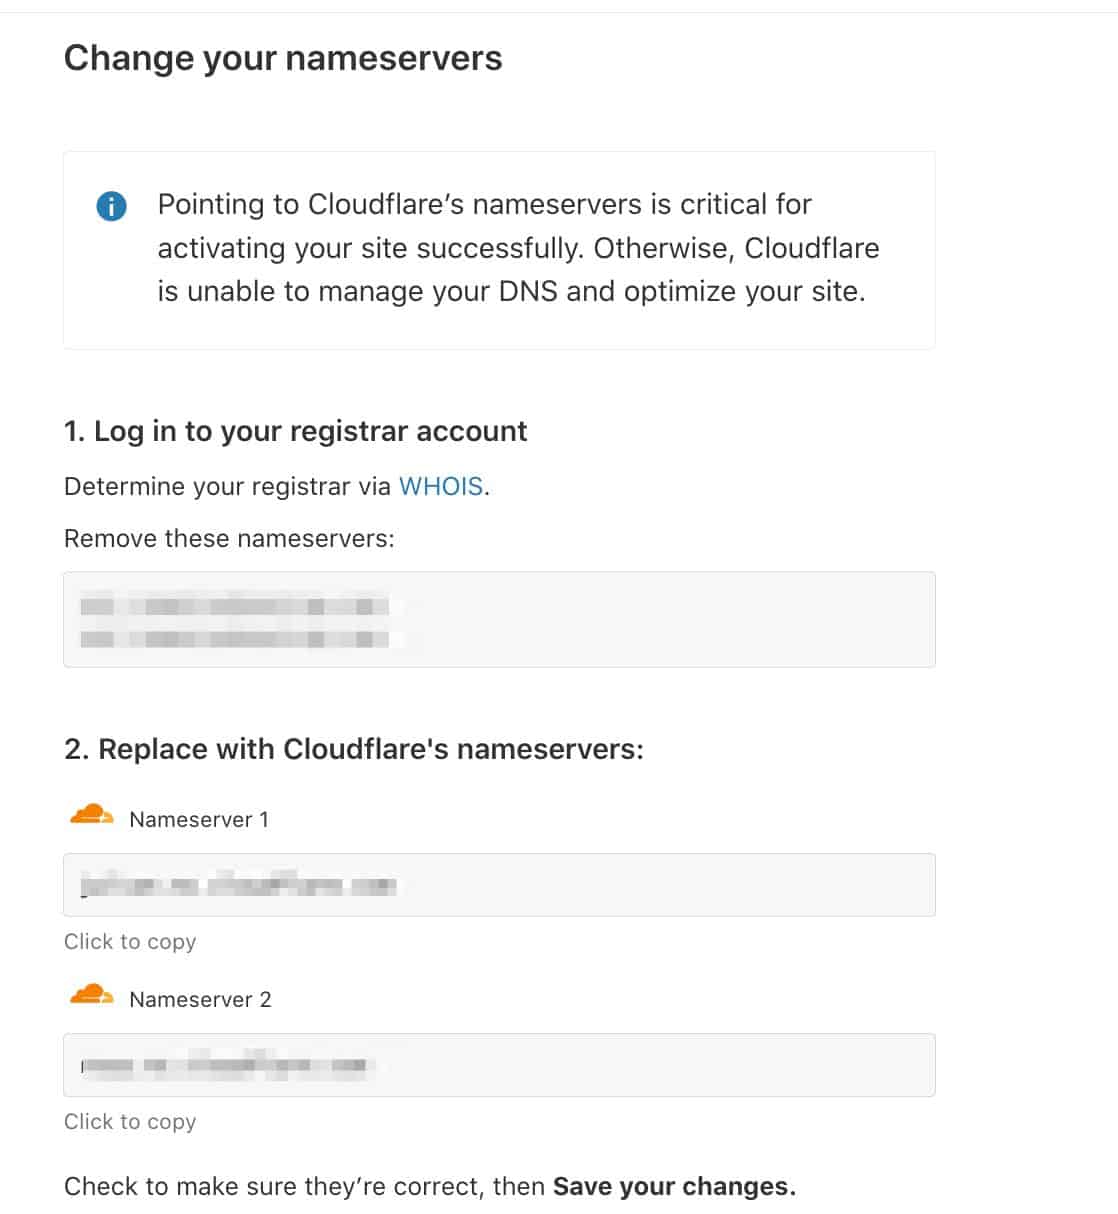
4. Change your nameservers
The next step can be a little scary if you’re not familiar with the process. But don’t worry. I’ll walk you through this.
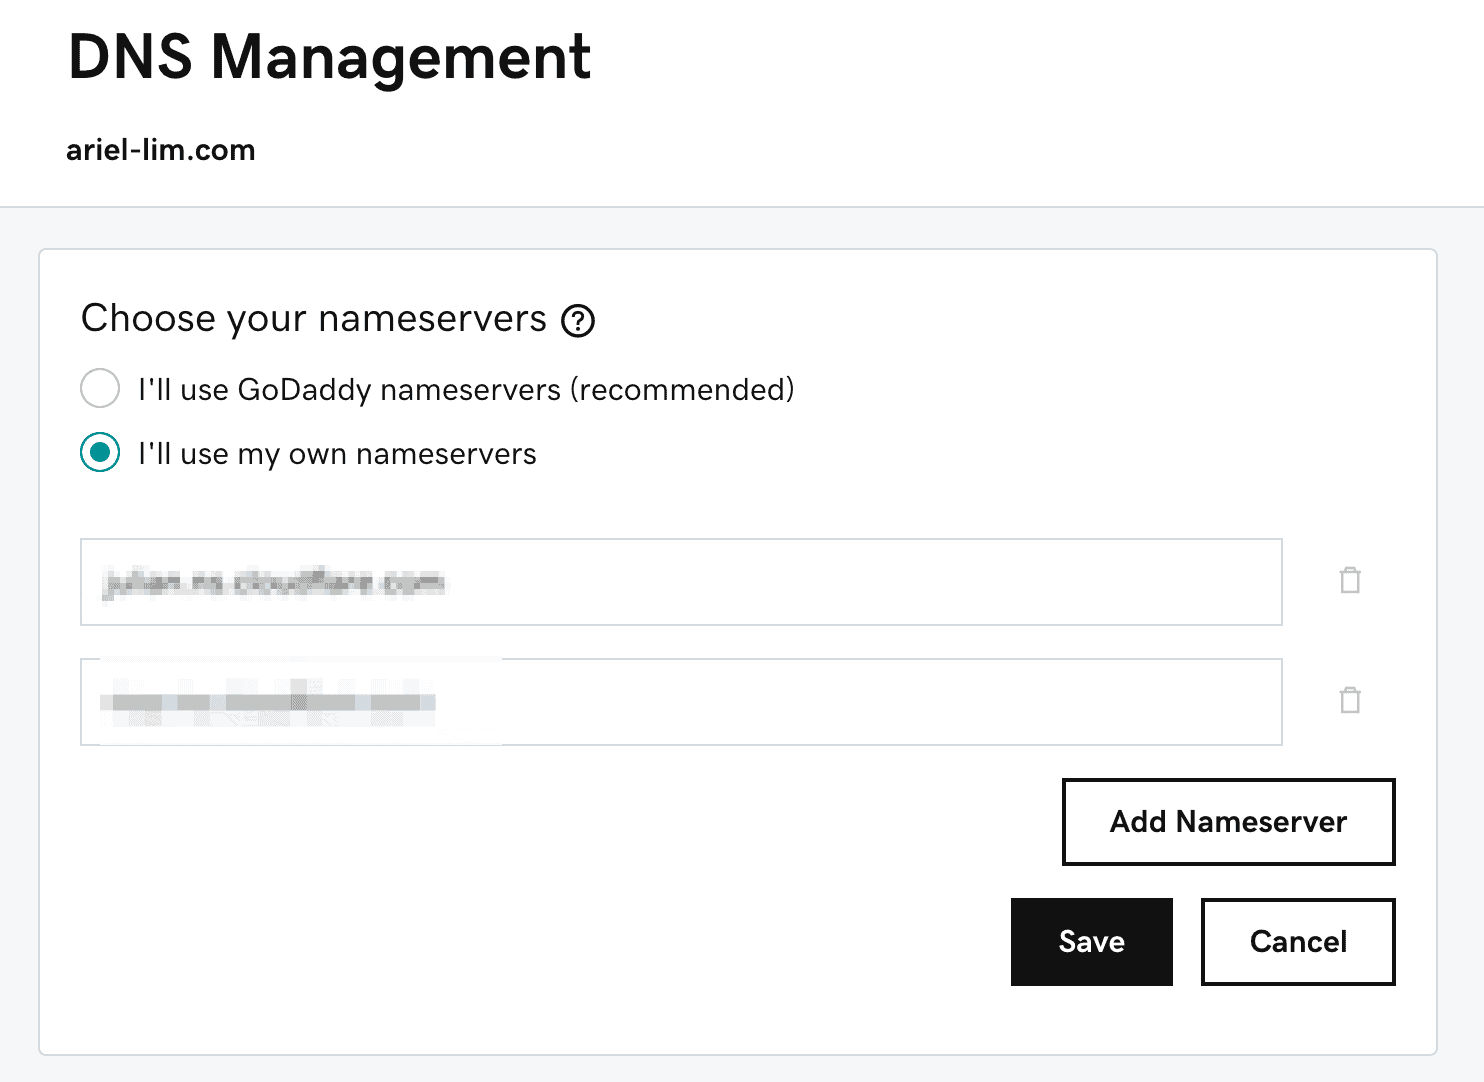
Basically, what you need to do is follow the instructions in this screen to change your nameservers.
You can find your nameservers from your domain provider—where did you buy your domain?
I bought mine from GoDaddy. You might have a different provider, but the process should be similar.
Here’s it looks like inside GoDaddy.
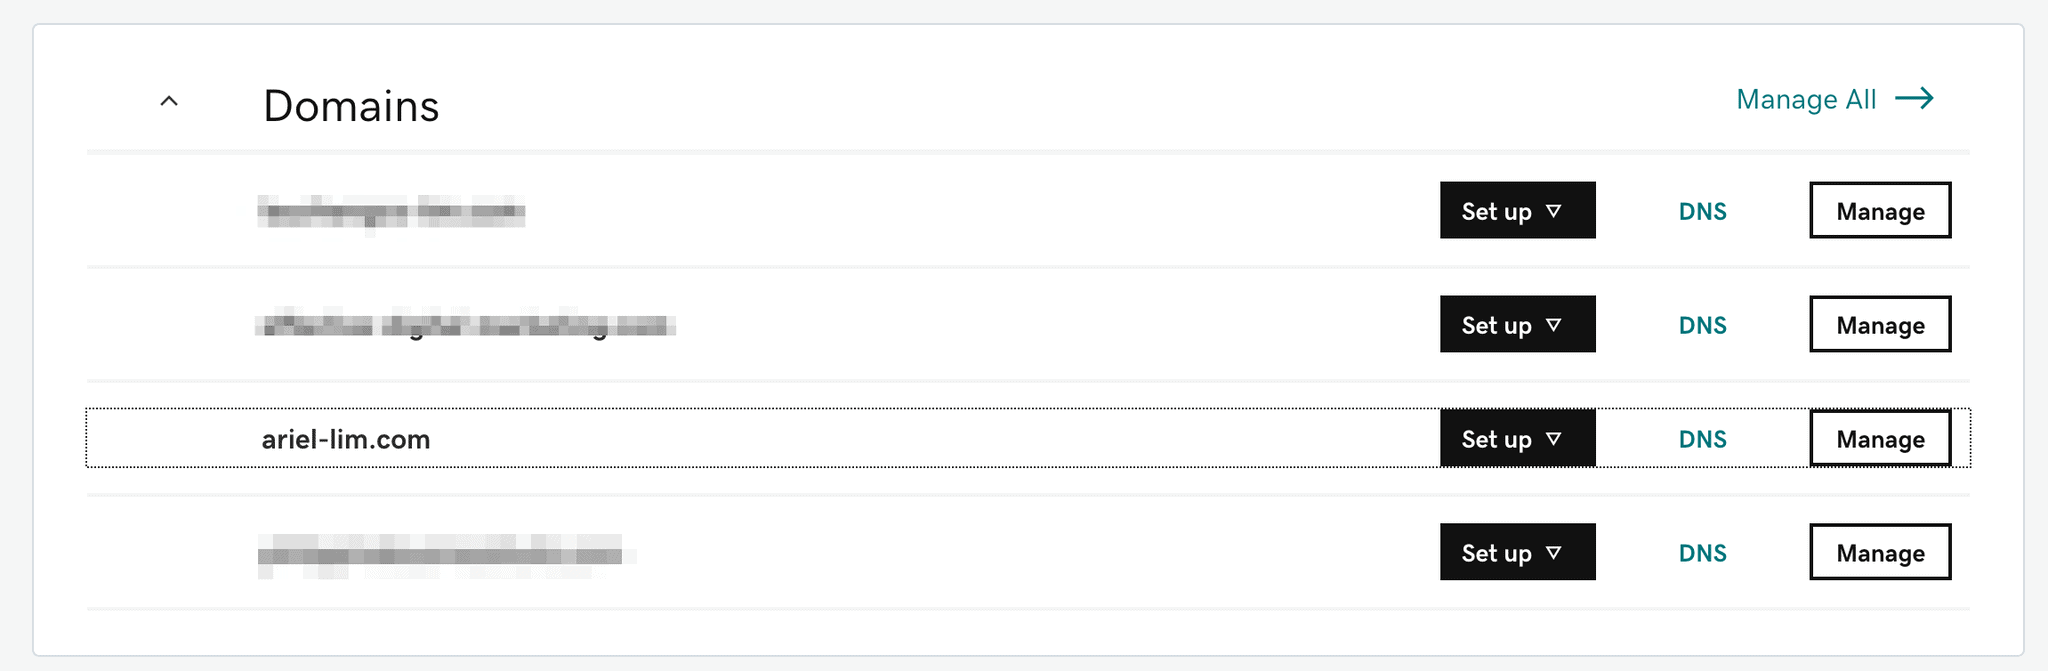
After logging in, I see the domains I have on my account. Click on the DNS button to enter the DNS settings of that particular domain.
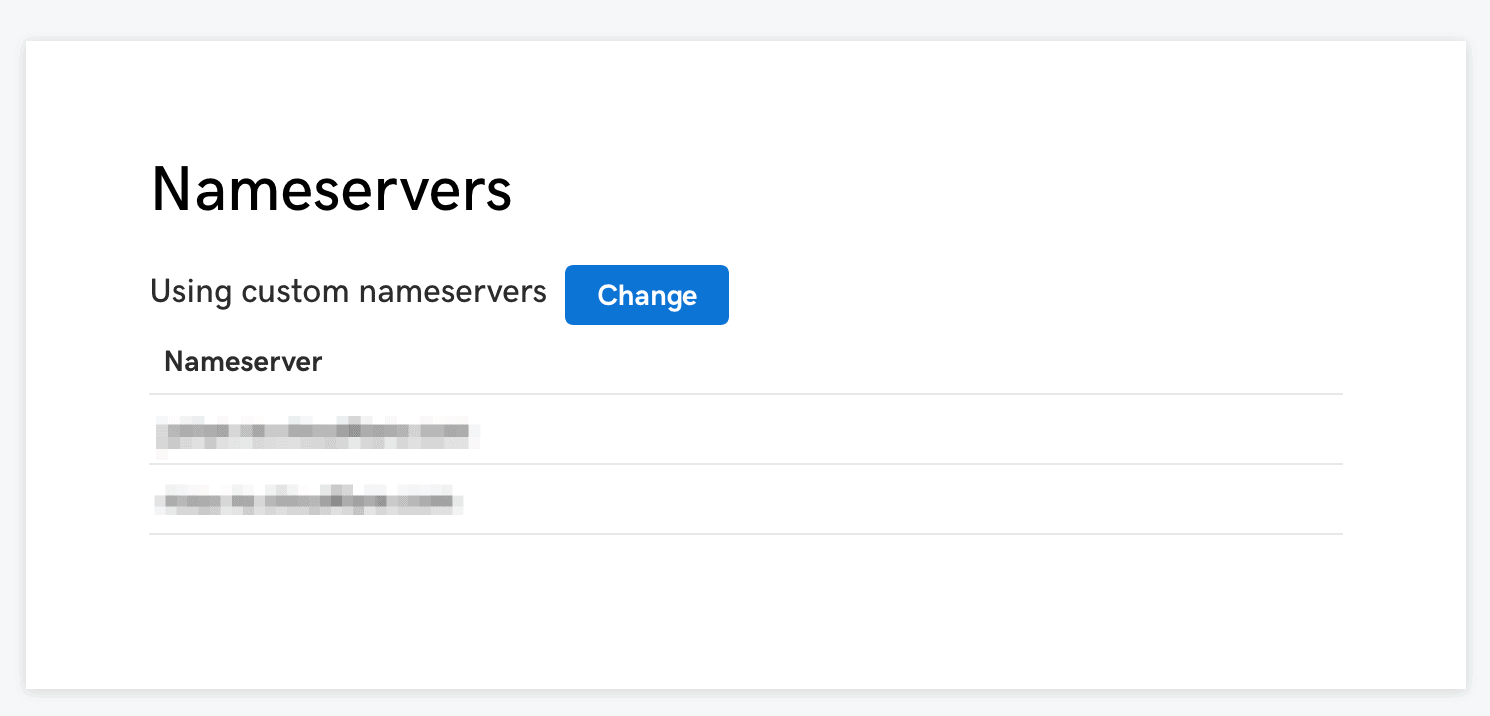
Once you’re in, find the section on Nameservers. You’ll want to click on change to edit it.
Lastly, copy and paste the nameservers from Cloudflare to this section.
Hit save and you’re done.
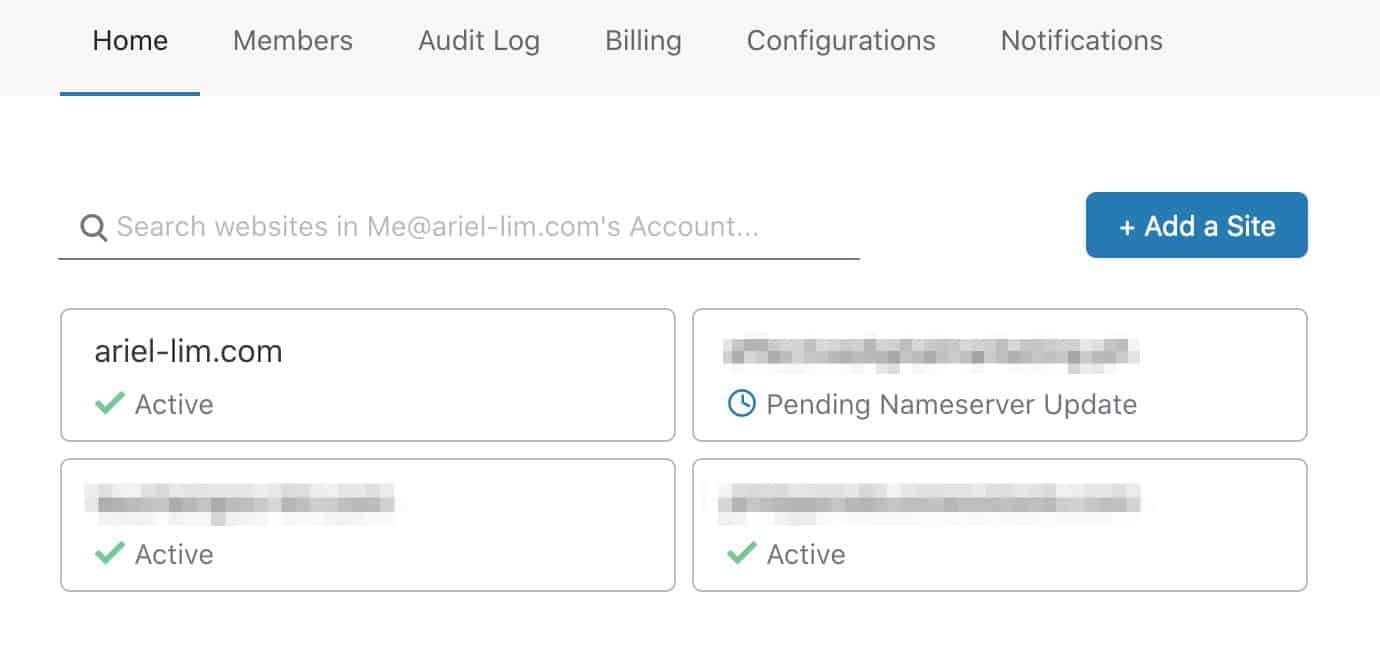
5. Go back to Cloudflare and check the records
If you did everything correctly, you should see your domain saying that it’s active, just like the one shown in this image.
If it’s not, you should see the status there as well.
And that’s it. You have now configured Cloudflare as your website’s CDN.
Conclusion
Depending on your plan, traffic volume, and other factors, you should see your images (and other content) being served from Cloudflare. Once you’re done, feel free to explore the different sections of your account in Cloudflare.
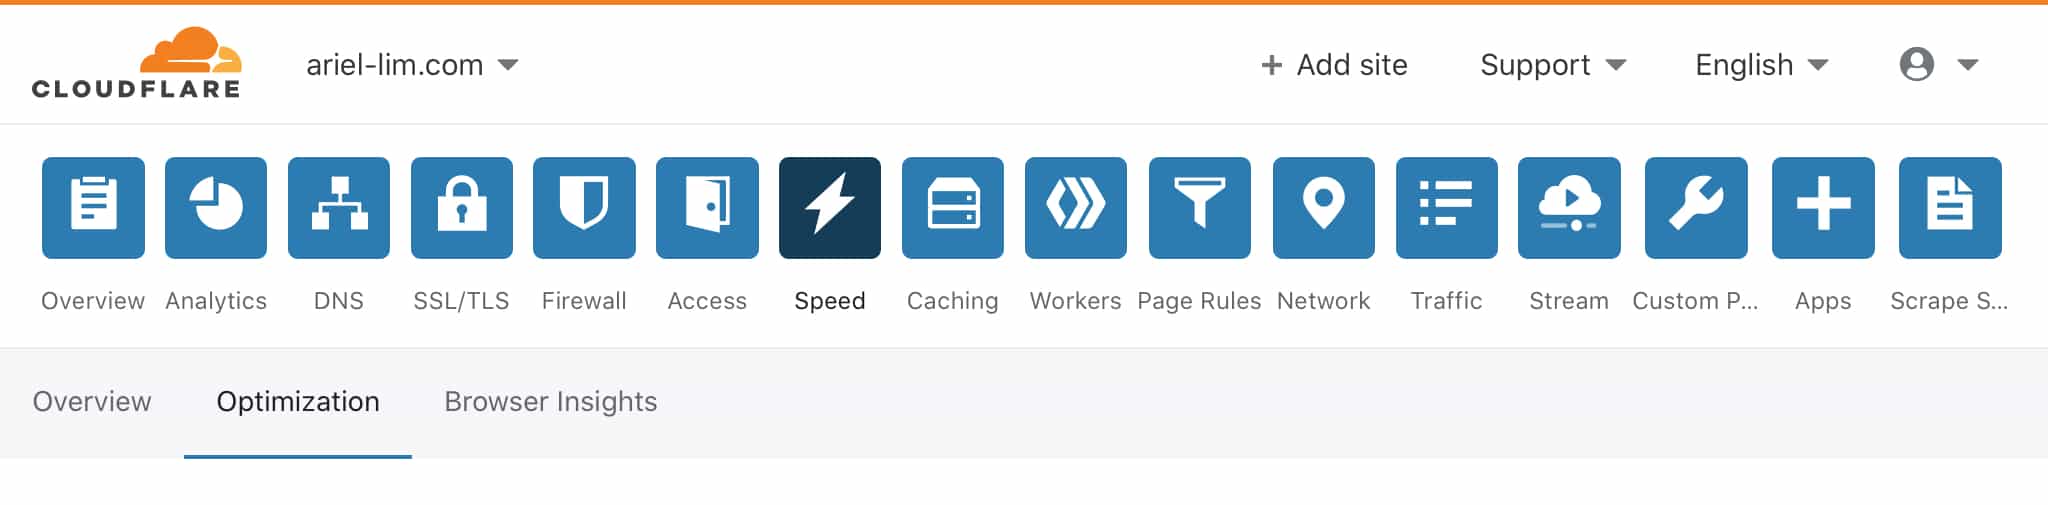
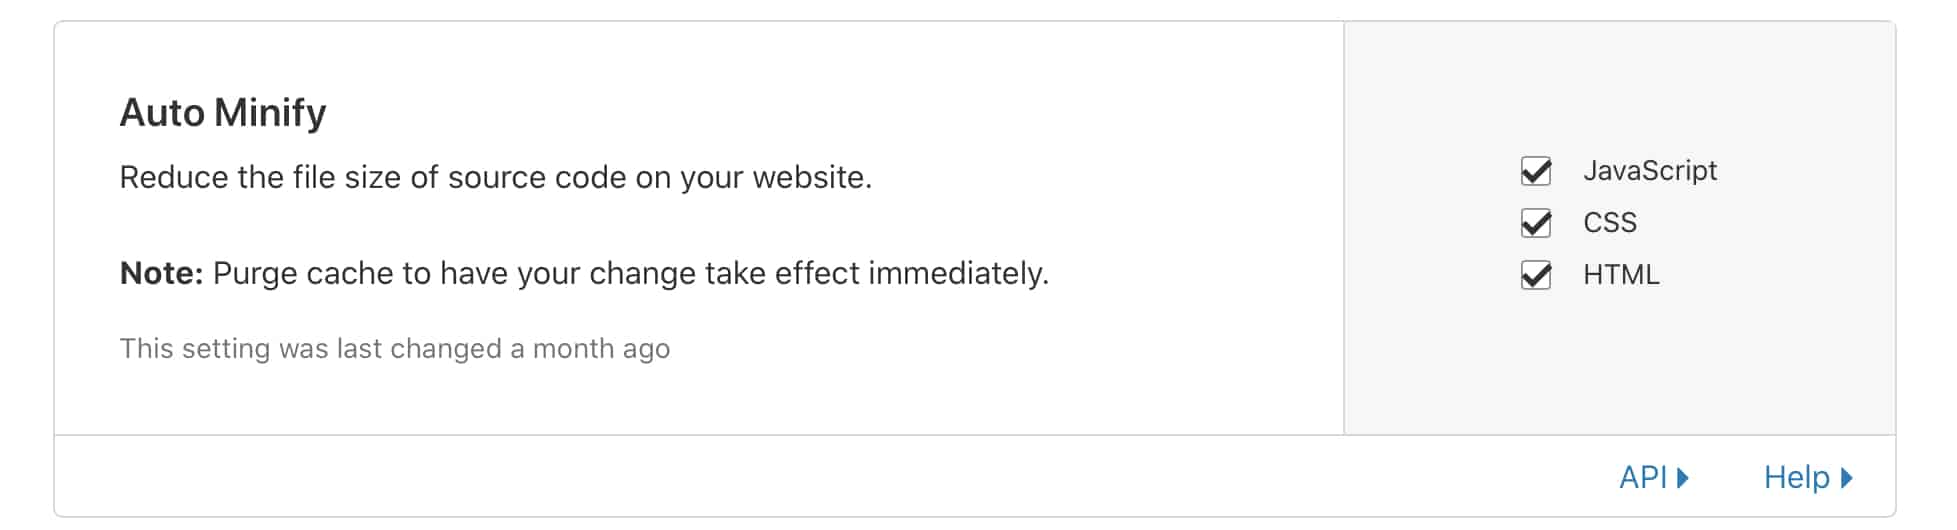
One thing I do recommend doing right now is to make sure your pages are minified. Go to the Speed tab, then select Optimization.
Once you’re there, make sure you check all the boxes in that section.
What it does is it automatically reduce the file size of your code—particularly the three ones you checked: JavaScript, CSS, and HTML.
After a couple of days, feel free to check the Analytics tab so you can see how Cloudflare has helped your site in terms of traffic, security, and performance.
Writing is something I have incorporated into my daily habit this 2020. I committed myself to a 30-day challenge where I’ll write anything about the four core topics I’m passionate about.
But long before this challenge, I was already writing a lot. I did this for an events company I put up before, then into my first marketing role, and the next, and the next.
It’s actually one of the reasons why I also created this website a couple of years ago. I wanted an outlet to share what’s on my mind, my experiences, and the lessons I’ve learned.
It wasn’t until recently where I’ve taken writing seriously.
And by writing, I’m not talking about articles. I’m talking about content in general. For me, everything starts out in written form — outlines, articles, copy for social media, scripts for videos. Then, once the writing process is done, it undergoes a transformation. That piece of content is then used and repurposed into various types of content and distributed to multiple channels. But I’m getting ahead of myself.
Table of Contents Click on any of these to jump straight to that topic
In late 2018, I was searching for an app that can help me with my writing.
How can I store all the ideas in my head?
What’s the one app or software where I can add all the stuff I am planning to write and have written?
Can it support a custom workflow?
Will it be able to accommodate my particular situation — I have my own projects, write for my own website, and brainstorm other ventures; I also have various clients that I do the same thing.
All these questions start popping into my head.
After some initial research and reading a couple of reviews, I decided on Ulysses. To be honest, the main reason it’s the one I used is It’s one of the apps that had a free trial that offers the full version.
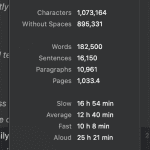
Fast-forward to today, here’s how much I’ve written:
182,500 words
16,160 sentences
10,961 paragraphs
1,033 pages
Over 180,000 words — that’s two whole books!
Using Ulysses to Publish to My WordPress Website
The main reason I was looking for an app to help me with writing is so I can have a place to organize my thoughts, edit-on-the-go, and most importantly, do all these offline.
Before, when I want to write an article, I have to do it on the WordPress editor. That limits me in my ability to take my work anywhere. I have to be online.
But Ulysses was able to solve this problem for me. I can write whenever and wherever I am. And everything syncs seamlessly. For example, I start an outline on my iPhone while waiting in line. Then, when I sit down and open up my laptop, I can continue where I left off.
And finally, when I’m done with the article, I can publish it directly from Ulysses.
I don’t have to go to WordPress and upload all my photos and format everything again. I just set the connection once, and everything just works.
For every post, it gives me the ability to do the following:
Set my title
Set the date — to be published now or scheduled for later
Set the status — public or private
Add the appropriate categories and tags
Add a featured image
Change the URL slug
And many more
For a short while, following the setup process from Ulysses was easy. But after a while, that’s when issues start to creep up.
Your Website Evolves, So Must Your Tools
In a span of a year, I had revamped my entire tech stack. I updated my theme, upgraded WordPress, installed/uninstalled/deleted several plugins.
This is normal. As time goes by, you have to ensure that you’re using the tools that you need, and removing those that you don’t.
But that’s when hell broke loose.
My seamless publishing from Ulysses to WordPress broke. I kept getting various errors. I tried reaching out to Ulysses, WordPress, and my web host directly. But none of them was able to get things back to normal.
The error, according to Ulysses, is about the XMLRPC endpoint being blocked. It’s actually a known issue and Ulysses has a somehow useful knowledge base article about it.
So, I reached out to WordPress. They checked on their end and everything is working. They know so because Jetpack is working properly.
The last place I can look at is my web host, InMotion Hosting. They confirmed limiting the connections to the XMLRPC endpoint because I am on a shared server. If I want to modify it, I have to purchase/upgrade to a dedicated server. In other words, I have to pay more to get this to work.
But it doesn’t make sense.
I was able to use it before without any issues. So, I don’t think that’s the case here. Surely, some workaround is out there.
While all of them have been nice and tried helping me, none of them could make it work. I had to take matters to my own hands.
Enter, Google.
After reading a few dozen articles, going through several forum/community pages, I found the answer.
Resolving the Connection Refused Error in Ulysses Preventing You from Publishing to WordPress
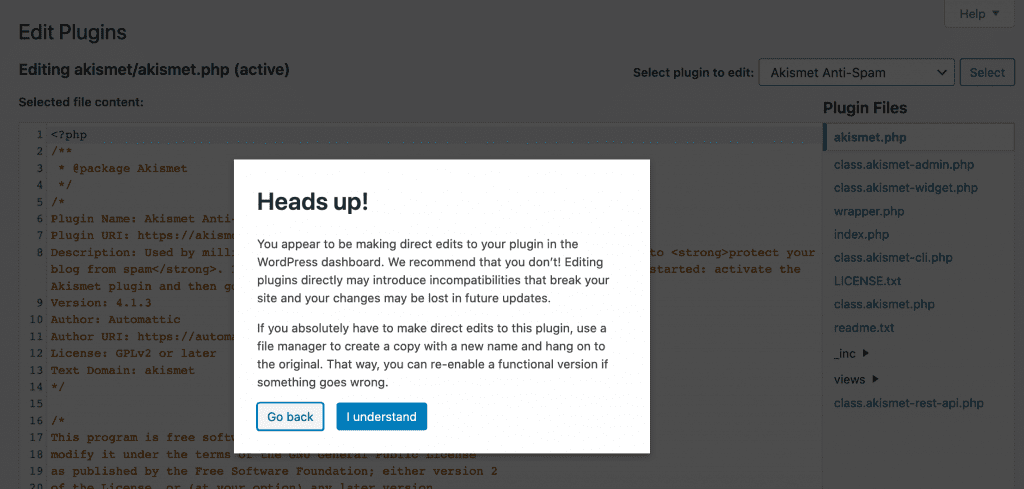
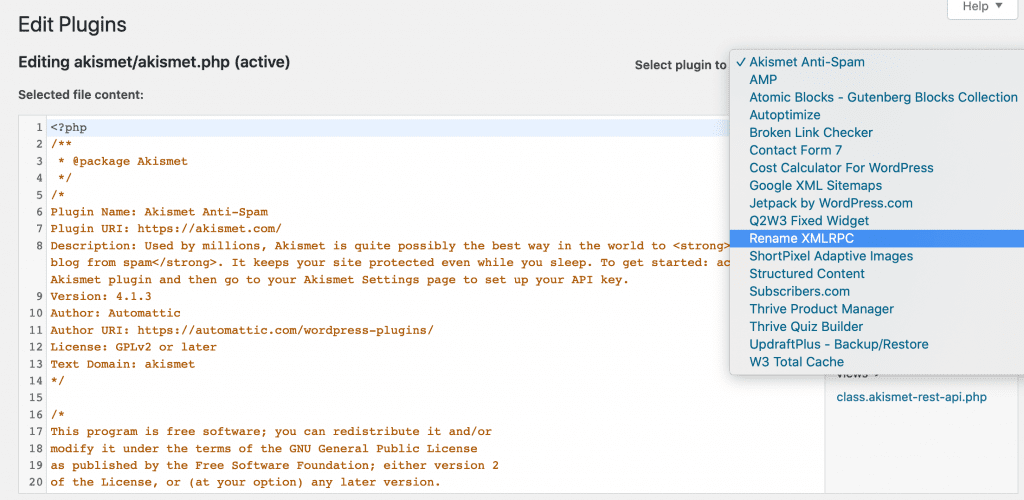
The main error is about the XMLRPC connection being blocked by WordPress. To overcome that, you need to install a plugin that would act as a proxy to the requests. Sounds too complicated? Don’t worry.
Here’s a step-by-step instructions to get Ulysses to publish directly on your WordPress site. It involves two phases and a little bit of courage. You will install one plugin and modify some code.
Let’s get started.
Phase 1: Backup and Preparation
The first thing you need to do is make a backup of your website. Whatever you do, no matter how big or small the changes you are planning to make, it’s a great idea to backup your website.
Done?
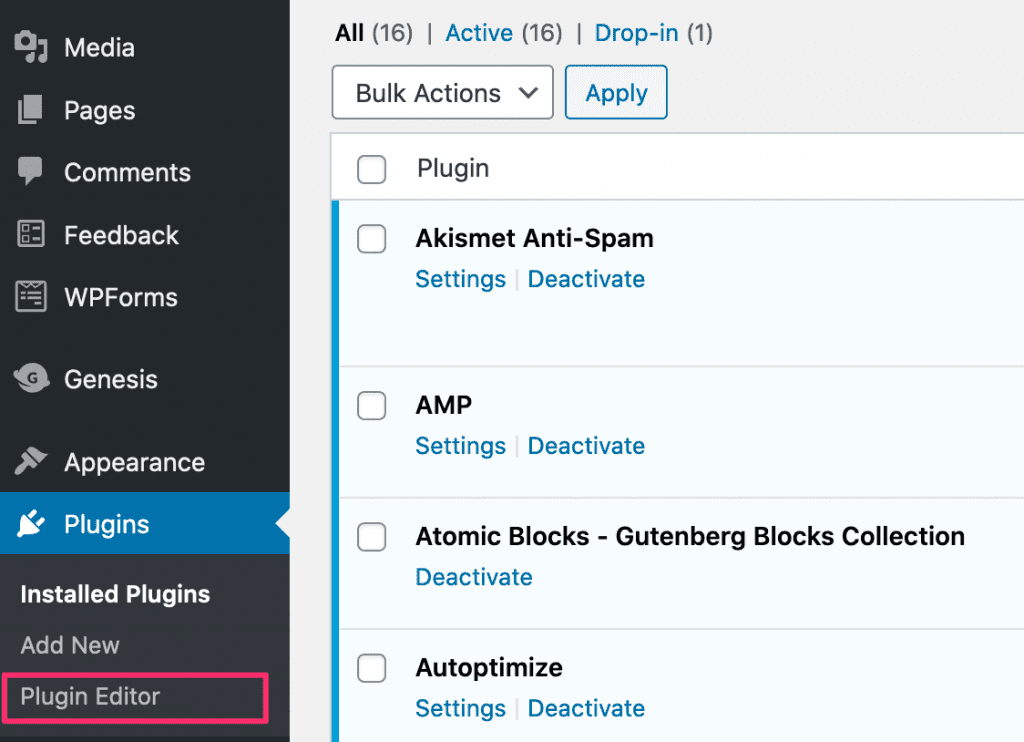
Step 1: Login to your FTP or Cpanel
Next, you need to do is login to your cpanel account or FTP. If this is all unfamiliar to you, I suggest taking time to research more about it.
Usually, you can login to your cpanel by entering your domain.com/cpanel. Just replace it with your domain.
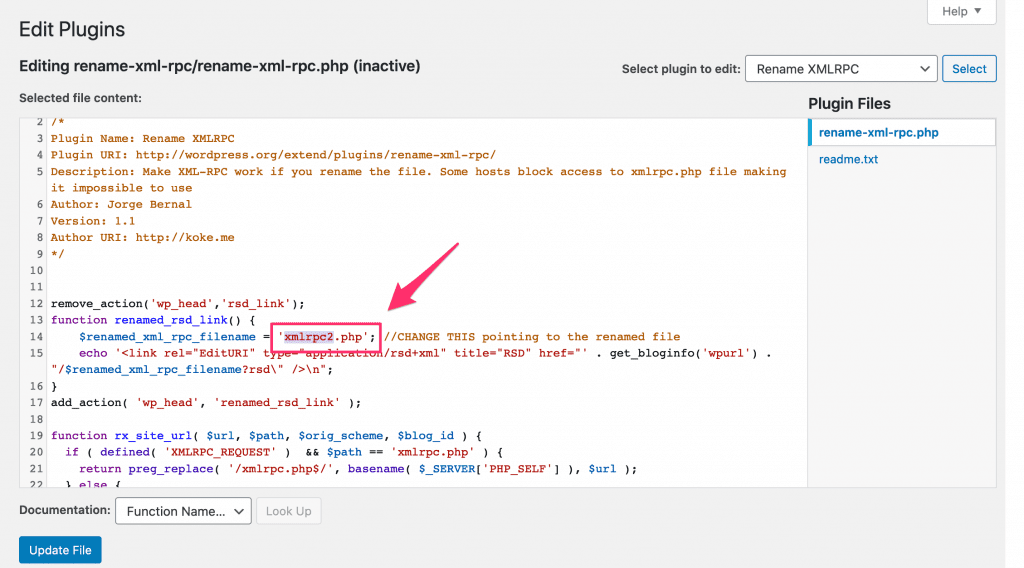
Step 2: Locate your XMLRPC.PHP file
Once you’re in, find your xmlrpc.php file. If you’re using an FTP, you should be able to see it immediately. But if you’re using the file manager in your cpanel, it should be located at the “public_html” folder of your account.
Now, download a copy of the file just in case something goes wrong.
Step 3: Rename it to whatever you like
After downloading a copy of your xmlrpc.php file, rename the original file on your site to whatever you want.
For example, you can change the xmlrpc.php to something like this:
supercalifragilisticexpialidocious.php
im_awesome_and_i_know_it.php
Then, take note of this name. You will need it in the next phase.
Phase 2: Installation and Activation
There are various ways you can proceed here. But the easiest is to login to your WordPress account.
Now, it’s time to test if Ulysses is working properly.
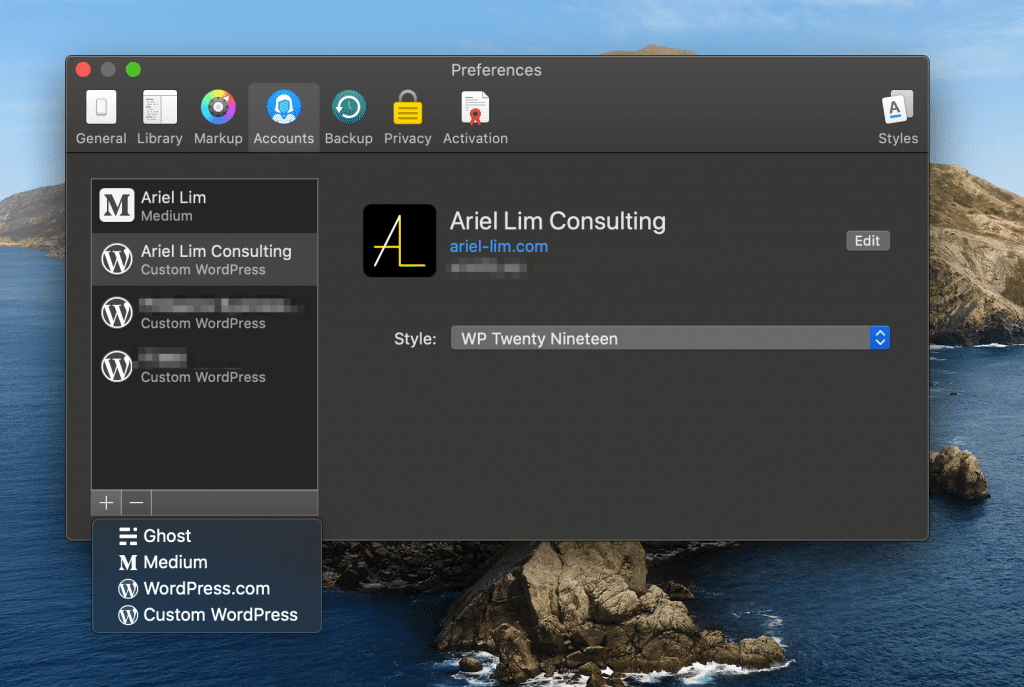
Head on over to your Ulysses account and delete the existing connection, if there’s one. Then, add a new custom WordPress site.
Now, here’s the important part.
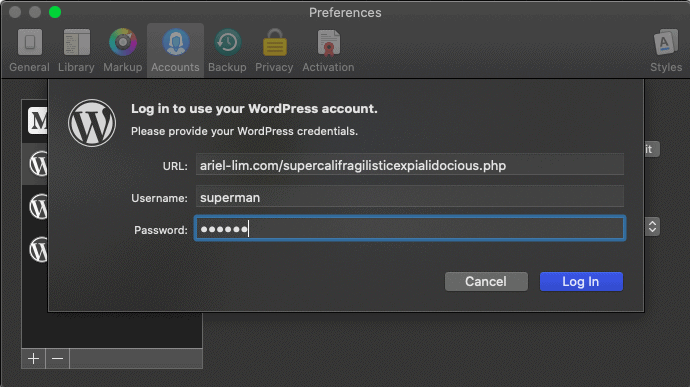
When setting the URL, append the renamed file at the end so it looks something like this…
You should now have a working Ulysses-WordPress connection.
And as proof of that, this article was posted using Ulysses straight to this website.
Were you also facing this issue with Ulysses and WordPress? I hope this helped you with that issue.
Side note: After implementing this, my WordPress iOS apps have partially stopped working. I’m coordinating with WordPress about this but haven’t reached a resolution yet. What’s happening is that half of my site stats are updating (weird), and my posts and pages aren’t syncing.
[Update 16 Jan 2020] WordPress support says my site has to use the default xmlrpc in order to get JetPack stats to work.
[Update 20 Jan 2020] My WordPress app is working after logging out of JetPack. I then added my custom WordPress URL using the same convention as in Ulysses (ariel-lim.com/supercali…php) then used my username and password. No errors. Syncing properly. Just no JetPack stats. JetPack still works on the browser though. I guess this is the tradeoff.
One of the primary functions of search engines like Google is to provide answers to users’ questions and problems. That’s why it’s important to create content that is helpful and valuable to them, rather than promote your products and services. And frankly, that’s the best way to future proof your business — by focusing on creating value for other people.
This is also the reason why Google loves fresh content. Fresh content doesn’t necessarily have to be new content. Rather, it can be and “old” content, but updated to reflect certain changes; therefore, making it relevant and useful.
And that’s what we’re going to be talking about in this article.
Let me ask you a question.
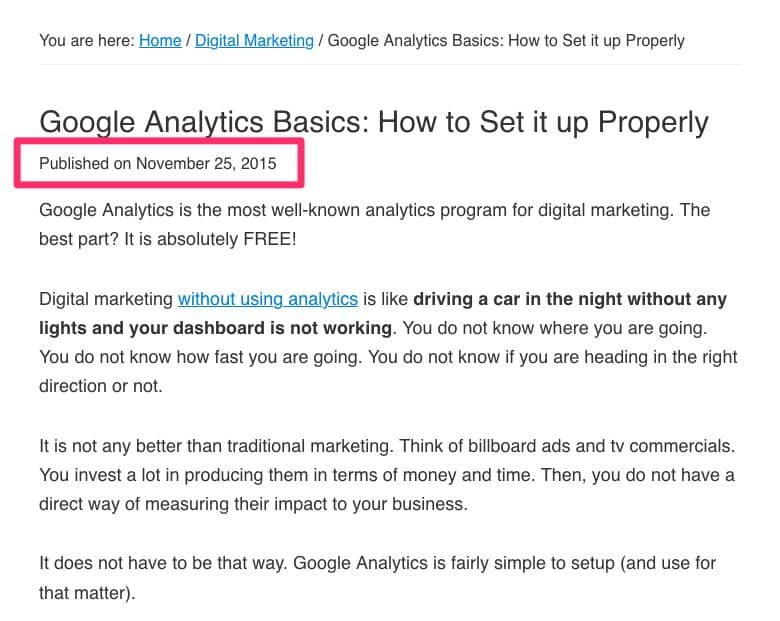
If you were looking for some resources about how you can install Google Analytics to your website and you came across this one I wrote. What comes to mind?
If I saw that, I’d probably take a look, but I’ll search for a more updated one. Because the contents of that page might not be relevant anymore. Depending on the topic, my leeway would probably be between six months to a year. If it’s older than that, unless it’s the only resource out there, I will probably not take it seriously.
And I believe it goes the same for you. You want something relevant and updated. You don’t want to spend your time reading and following some instructions only to find out later that it’s no longer applicable.
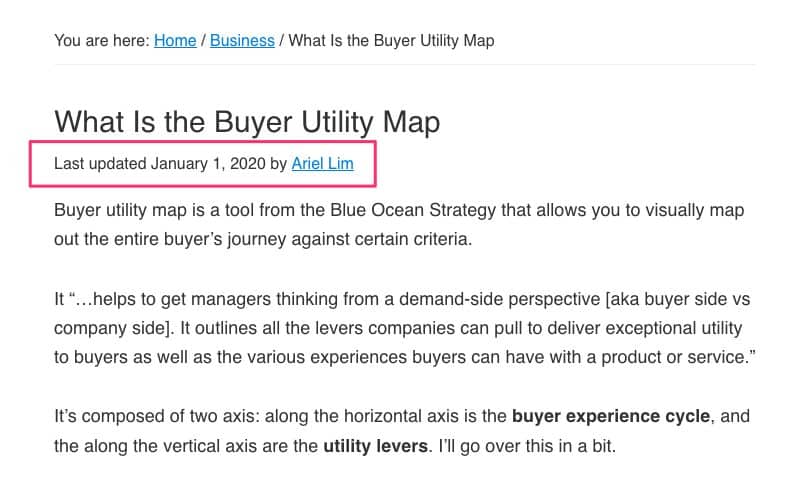
Now, what if you saw the same article and it looks like this…
Now, we’re talking.
Despite it being published a couple of years ago, you see that the date was recently updated.
If you’re using a WordPress website, whether you’re running on the Genesis Framework or another theme, then you can easily make this change yourself. You can do this using a plugin, but I’m biased towards not relying on them, especially if you want to speed up your website and get high 90s score on Google PageSpeed Insights for both mobile and desktop.
Preparatory Points
But before getting into it, I’d like to go through a couple of things.
First, you can simply remove the published date and only show the modified date. In fact, that’s what’s most of the resources out there. They simply tell you how to replace the published date with the modified date. If that’s what you want, there’s absolutely nothing wrong with that approach.
But that’s not what I’m going to here.
As you noticed in the examples above, the dates will be displayed depending on whether or not you actually updated the article. I also included a time element to it.
For example, I published an article on January 1, 2020. The article will display “Published on January 1, 2020.”
A year goes by and I haven’t updated the same article. It will still show the same thing. But if I edited it 6 months after, it will display both dates (or only the modified date which I’ll share below).
But there’s another problem here. Let’s say I noticed a typographical error the day after. I went in and edited the article. The modified date has changed. So, if I don’t include the time element, it will display it both. Again, there’s nothing wrong with that. It’s just weird.
Published on January 1, 2020 • Last Updated January 2, 20120.
Personally, I’d only want to display the modified date only if 30 days or so have passed.
Finally, make sure you make a backup of your site first. While this is relatively simple, a single mistake can make your site inaccessible.
Now that that’s out of the way, let’s dive right in.
How to Show Modified Date Instead of Published Date
There are two variations of this that I will show you.
First, as you saw in the example above, the published date and the modified/last updated date is displayed together.
The other option is to only show the modified/last updated date. Just like this one.
This is actually how it looks like on my website right now. This is option two below.
I’ll show you the code you need to add to your functions.php file for each, then I’ll explain parts of the code in case you want to modify it yourself.
First, login to your WordPress website. Go to Appearance then Theme Editor. Click on the functions.php file then scroll all the way down.
Where to Find the functions.php File on Your WordPress Website
Option 1: Display BOTH Original Published Date and Modified Date
Add this code at the bottom of your functions.php file if you want both the published date and modified date to appear on your posts.
You can edit the text you want by changing the “published on” and “last updated” to whichever you want. Hit save. Then check a post you recently updated but have been originally published a month ago.
Option 2: Display ONLY Modified Date
Add this code at the bottom of your functions.php file if you want only the modified date to appear on your posts.
Same as above, you can edit the text you want by changing the “published on” and “last updated” to whichever you want. Hit save. Then check a post you recently updated but have been originally published a month ago.
How the Code Works
The code is pretty simple to understand.
For option 1 — display both dates — here’s how to read the code:
Show original published date
If the updated date is greater than the original published date + 30, show last updated date.
For option 2 — display only modified date:
If the updated date is greater than the original published date + 30, show last updated date.
Else, show original published date
It’s that simple.
Over to You
By displaying the last modified date instead or together with the original published date, you show to your visitors (and Google) that you value them.
You avoid giving them a poor experience by showing them outdated content.
Did you find this helpful? Let me know in the comments below!